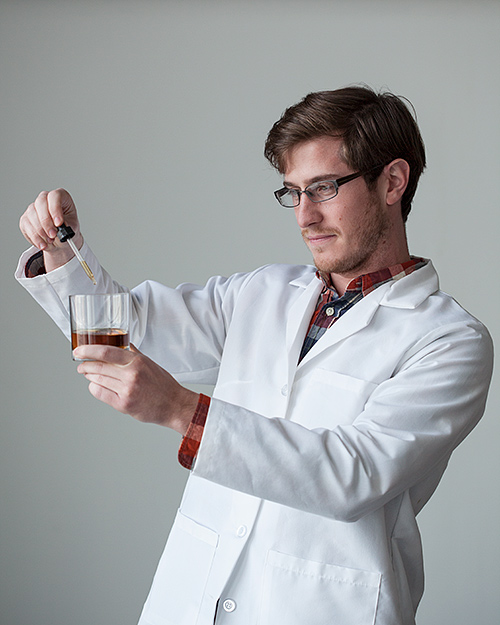
Research
I’m a devoted whisky (and occasionally whiskey) drinker and usually enjoy my Scotch like I enjoy the top shelf of my dresser: neat. But I was intrigued to see if bitters might prove an opportunity to salvage a liquor I’ve all but quit–rum. The recipe calls for a high-proof rum, so I picked up one of my favorite antiseptics, Bacardi 151. I also bought an aged rum (to test my bitters in later) that I was hoping might change my opinions of the drink. That rum, Plantation Grande Reserve (note the fancy pants name), was a vast improvement over any rum I could remember tasting (in either direction), in my younger days, so I was looking forward to a different experience, perhaps.
Hypothesis
I don’t think I’ve ever tried bitters before, but I’m coming in with a semi-open mind. I like bitter things. There’s something smart-sounding about the word “bitters.” As I have a general preference for straight alcohol, I’m not sure how much this will “add” to the experience, but perhaps since I’m less predisposed towards rum, it may make that drink more enjoyable. (Spoiler alert: I cheated and came up with this last line after the experiment.)
Experiment
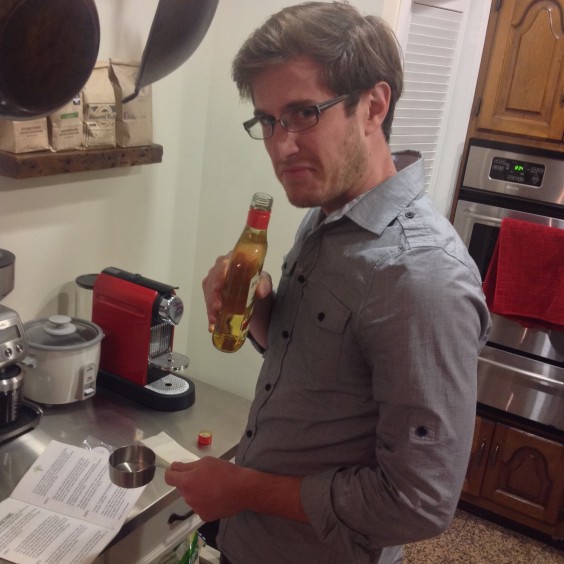
Preparing the mixture is actually a good bit of fun, adding the composite spices and ingredients as if your high school science teacher were a part-time bartender. (I didn’t see you and you didn’t see me, Mr. Chard.)
The preparation requires a morning and evening shake of the mixture in its jar, which is a fun way to interact with your little blooming bundle of joy, and to appreciate the visual richness and beauty of the concoction as it does its thing. Eventually you’ll forget to shake it one morning and you’ll feel guilty for the rest of the day. Just let it go–it’ll be fine.
DAY 1 TEST
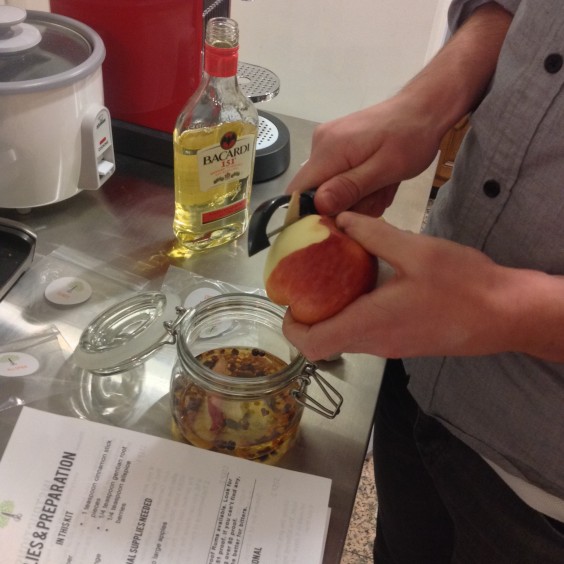
Finally, after a long and eager wait, 2 weeks are up and it’s time to open my present! Hold on there just a minute, bud–a few more steps before we’re ready for cheers. First we have to strain through cheesecloth (which doubles as gauze if you cut yourself peeling that apple earlier–try to use the clean portion).
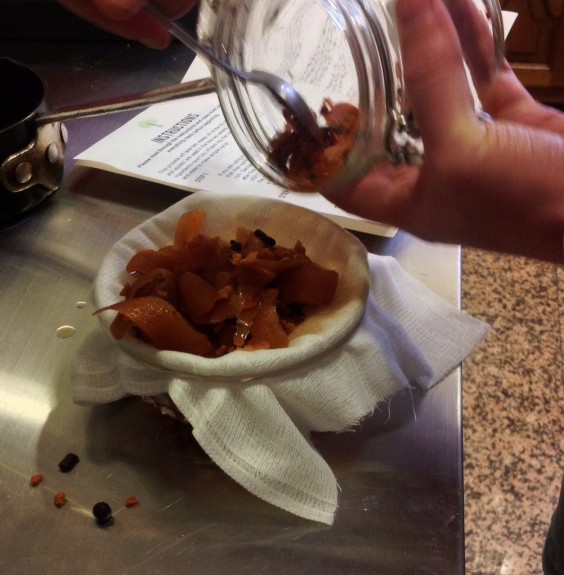
The liquid is separated from the solid ingredients, which are placed on the stove to simmer with water then cool. This is a good opportunity to be extremely impatient, blow on the mixture, and just dump it in hot anyway. (Again, you’re probably fine.)
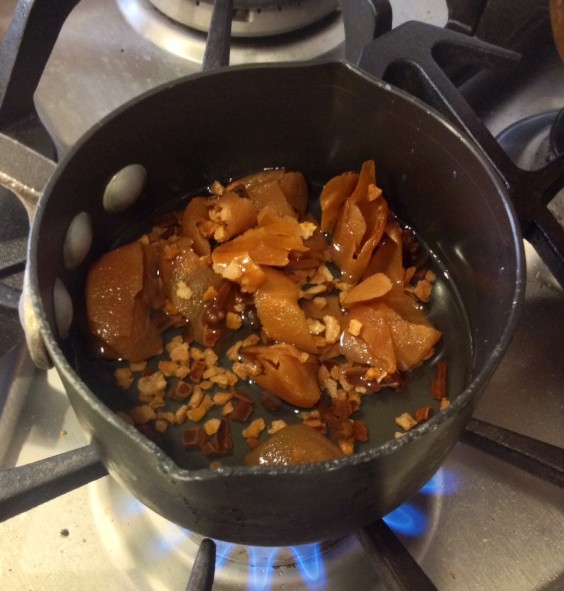
After cooling, we strain the mixture once again. OK, this is your exit solids! In the trash you go! We then get started on simple syrup (a sugar and water mixture that is heated and added in equal parts to the rum mixture). Add to dropper bottle then the big payoff.
I decided on bourbon because, well, I like bourbon and it seems to feature in a good number of bitters cocktails. I could make a cocktail, but I’d rather really taste the bitters here just to see how they work with the alcohol. A bit of bitters drip drop into some Buffalo Trace bourbon.
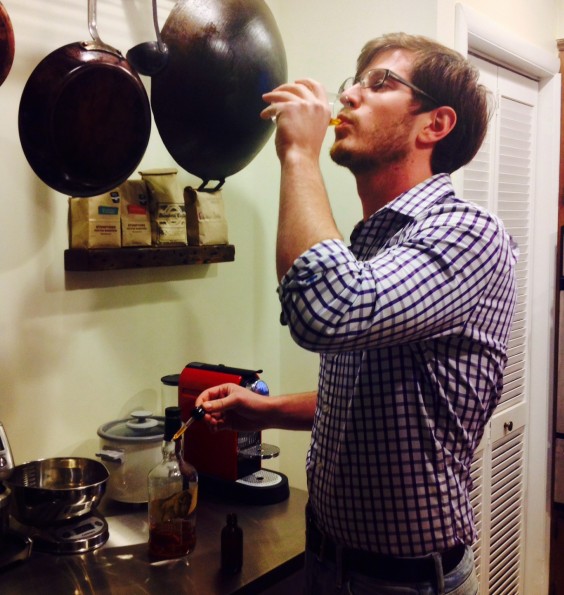
Unfortunately, it wasn’t doing it for me. Nope. Had I done something wrong? I don’t think so. Was it last Friday when I neglected to shake the bitters? Were they exacting their revenge? Nah – I don’t think bitters hold grudges (although they are called bitters…). I think it was just the combination. The iconic Buffalo Trace flavor now muddled into something indecipherable and a bit all over the place. I added a bit more but that just added to the confusion. My eyes saw the Buffalo Trace and my mouth was failing to compute.
Give up? No way. We’ll try again tomorrow.
DAY 2 TEST
New shirt, new day, new opportunity to drink.
Back on the saddle and off the wagon with something a bit more compatible, perhaps – rum. Yes, my aged rum would make a late-game, surprise guest appearance in a highly unscientific evaluation.
In one glass – straight aged rum
In the other – that same rum with a few drops of bitters.

This one makes sense. The rums obviously blend well, and this time I’m able to actually taste the spiced apple. Not overpowering, but definitely adds another dimension. Yeah – I get it.
Conclusion
I could see this enhancing a mediocre rum or allowing for a drinker to taste a decent one from a different perspective. I imagine you could mix into a number of different cocktails with different alcohols. (The instruction booklet names a few.)
The highlight for me though was the process. Enjoying a drink usually consists of nothing more than opening a bottle and pouring it. Occasionally this might involve stirring in a few extra ingredients–and sure–there are even bitters you could buy. But there was something very satisfying about the process; in the interaction with all the individual ingredients, in the ultimate unification of those flavors. There was something satisfying in the wait. Alcohol is one of those things that can take longer than anything to get right. We buy liquors that have been waiting for years, heck, decades to taste just right, then we sip them and they’re gone.
This kit represents the process, the time, the care that goes into a good drink. This probably won’t change my lineup of standby drinks or undying love of a good straight Scotch, but it was an interesting ride, I learned a bit, and I have something new to taste along with some of my old favorites. Nah, I ain’t bitter.
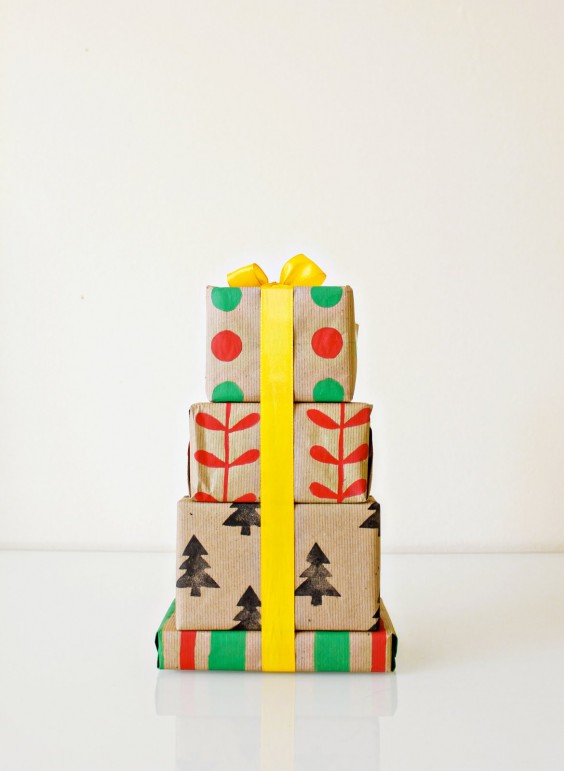
 Nothing says the holidays like a creative git-wrap design… and a giveaway!
 When us Marketing Team gals heard about the new
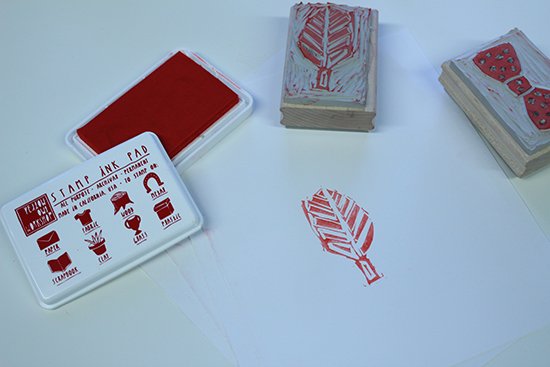
 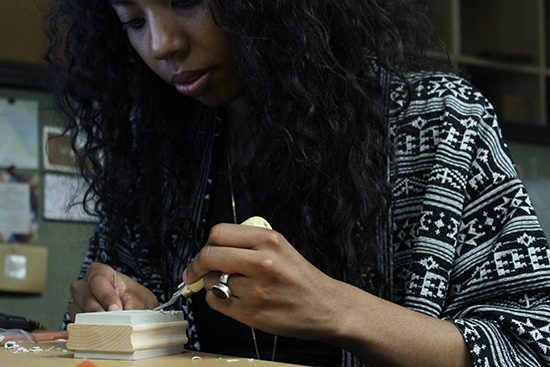 1. The kit comes with easy to follow and beautifully illustrated instructions, 25 original templates designed by Owl City Studio, transfer paper, a stamp block with two sides for carving, a carving tool with multiple blades, a red stamp pad, and a muslin bag to store your finished product.
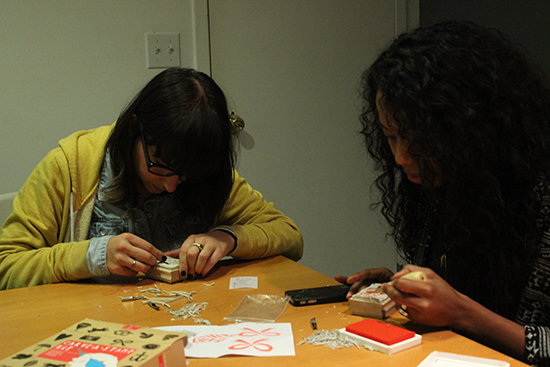 3. The transfer paper is super easy to use. All you had to do was trace one of the designs, place the paper on top of your stamp block, and rub gently to transfer the image onto the stamp. The image showed up nice and clear on the rubber and in the proper direction. Remember: stamps work backwards!
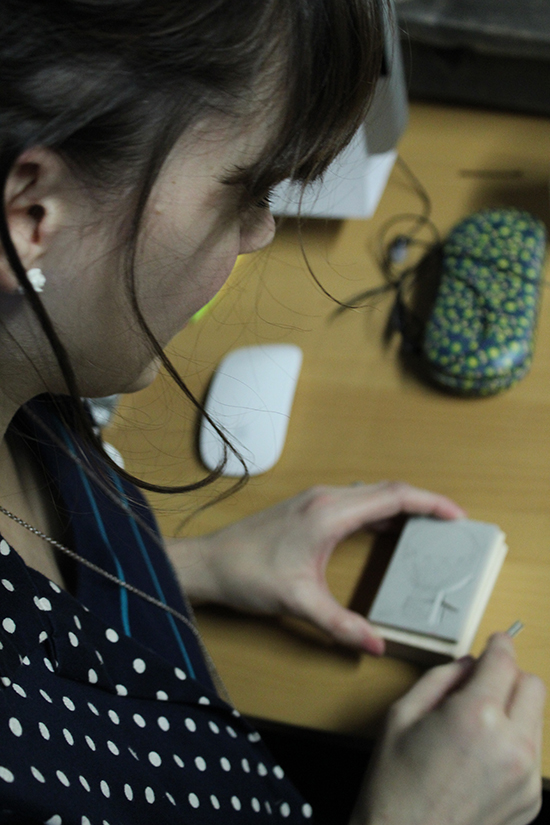 4. The transfer paper also comes in handy when you’re free-handing your design. Fancy-pants graphic designer Jessica drew her stamp creation by hand, a hot air balloon, and used the transfer paper to recreate her original design onto the stamp block.
 5. Not every carving tool is for everyone. Since all of our designs were so different – some curvy, another more jagged, some with tiny details and dots – we each found our own favorite carving tool. Test them all to figure out which one works best for you.
 6. The finished product is a lot prettier than what you carved. We all looked at our designs when we were done and said “ick” – in unison. But once we stamped the design on some paper, they all looked amazing. All those little imperfections you see (since your eyeballs are probably three inches from the stamp while you’re working) don’t show up when you use the stamp. Plus stamps are supposed to be a little imperfect. That’s their charm!
 A couple months ago, our staff threw a baby shower for Naomi. Hopeful for her little girl to be a
 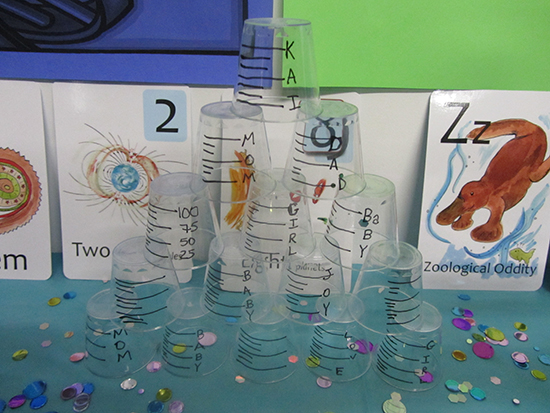 Clear plastic cups are easily transformed into beakers with the help of a marker.
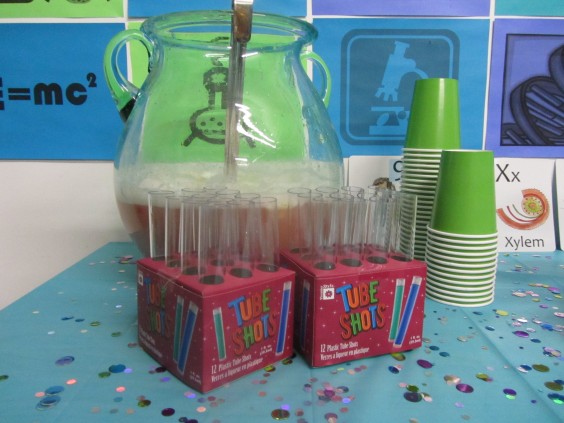 For those interested in taking smaller sips, test tubes are another beverage vessel choice. Plus they make the table look like a lab.
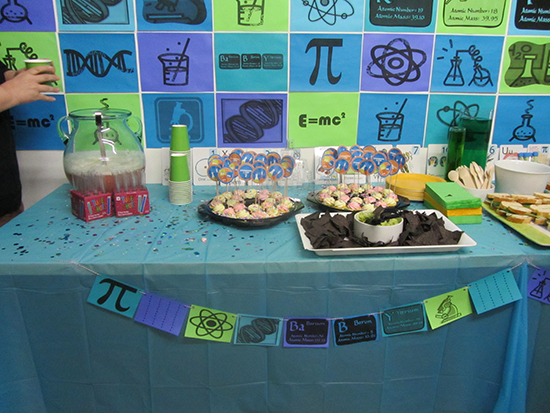
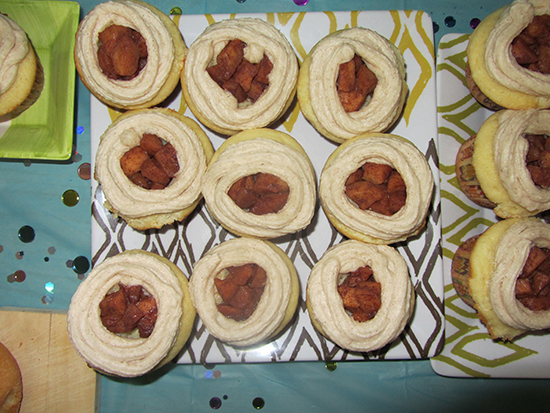 Apple Pi Cupcakes!
 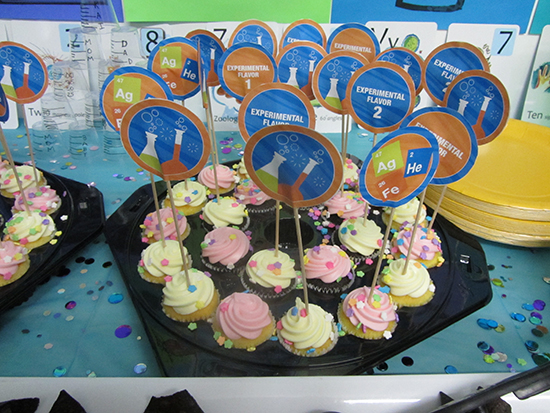 We made cupcake toppers from images we found on the web. Print out two identical images and glue with a toothpick or skewer in the middle.
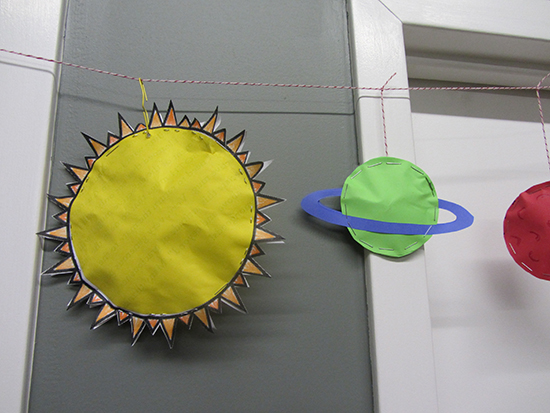 Just like in elementary school, a mobile of the solar system was a fun and easy project. With some paper, tempera paint, string, and cotton balls you can recreate the plants in our solar system for a colorful decoration.
 On the tables, we used the
  Judging by the smile on Naomi’s face, our crafts were worth the time and papercuts!


