Browsing Tag

DIY

Gift Guides

Gift Lab: Easy Weaving Without Jumping Through Hoops

September 29, 2015

Valerie

Product:  Easy Weaving Loom

Research:
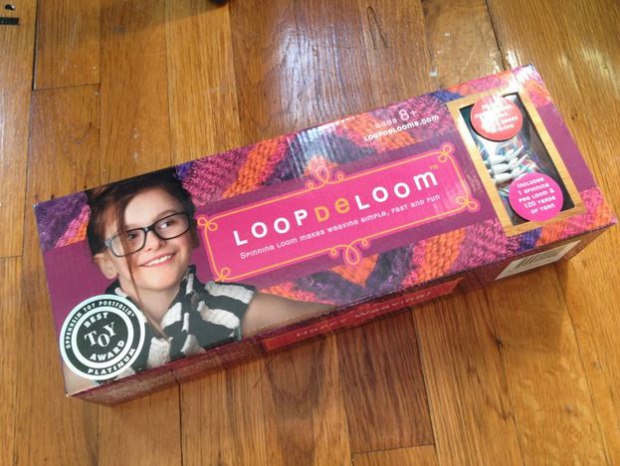
I already know how to knit and crochet, so I’m ready for a new textile challenge. The Easy Weaving Loom caught my eye the minute I saw it in This Just In. After watching this video I was sure I was up for the challenge. It seems simple enough, and once I get the hang of it I can begin to explore different materials and textures. There are endless possibilities!

Capture

Hypothesis:
I completed my experiment in June, and I wanted to make something that would be useful right away. The product story claims that when using this item, “In no time you’ll have a professional looking woven masterpiece than can become a stylish scarf, or cellphone or sunglasses case.” A stylish scarf, while fun to make, would not have be seasonally appropriate. And while the projects that are possible are not limited to these three, I decided a sunglasses case was a good place to start. It’s basic and small enough to finish quickly, so I figured it was good practice and I’d be making something to accompany me to the beach in no time!

Continue Reading…

Gift Guides

Gift Lab: Fun with Fabric–Solar Photography & Tie-Dyed Textiles

August 27, 2015

Jille | DIY Textiles Kit | UncommonGoods

Products: Indigo Textile Dye Kit & Solar Photography Kit

Research:

As a Graphic Designer who studied painting and drawing in undergrad, my entire life has revolved around different craft projects. Lately, I’ve gotten too far into the computer and am looking to take a step away from pixels to explore some analog creativity. I’ve decided to pair these two items  together because they both deal with positive/negative space relationships, one additive and one subtractive. Both kits also use the color blue and involve fabric. I remember doing tie-dye and photo imprint in high school, but haven’t experimented with it since then. I’m excited to jump in!

Continue Reading…

Maker Stories

This Just In-spiration: Meet Callie Meaney

August 24, 2015

Our makers never fail to motivate us, encourage our creativity, and fill us with inspiration. So, when a new design enters our assortment, we’re always excited to learn more about the person behind the product.

What gets an artist going and keeps them creating is certainly worth sharing, and every great connection starts with a simple introduction. Meet Callie Meaney, designer of the Literary Candles.

When did you know you wanted to be an artist?

I actually started making candles as a hobby. I love doing anything DIY and was happy to find something that combined artistry (drawing the labels) and the act of making something! When I started to use books as inspiration for the scents, that’s when I thought I could really make something out of it!

image1 (4)

What was the most exciting thing about becoming a professional artist?
It’s just amazing to me that I can do this as a full time job. I set my own hours, can be as creative as I like, and can call reading research. Nothing better than that!

What does your typical day in the studio look like?
I make my candles to order, so a typical day consists first of me drawing out a list of how many candles I need. I make them in the morning, do all shipping labels in the afternoon and label and pack them up at night!

image4

Is there a trinket, talisman, or other inspirational object you keep near? If so, what is it and what does it mean to you?
I like to keep the old jars I used when I first started. I bought them from a supermarket and handwrote the labels. It reminds me of where this all started, and how humbled I am that people like the things I make!

Imagine you just showed your work to a kindergartner for the first time. What do you think they would say?
I’m not sure they’d recognize the books used as inspiration, but hopefully they’d say they smell good!

image2 (1)

What quote or mantra keeps you motivated?
I actually love this quote by Lori Greiner: “Entrepreneurs are willing to work 80 hours a week to avoid working 40 hours a week.” Every time I feel overwhelmed, I remind myself that I am doing something I created and something I love. That beats working a job I’m not passionate about any day, and it makes the work seem so much easier.

27112_zoom1

What are your most essential tools?
My most essential tools are my oven and my pouring pots!

Gift Guides

Gift Lab: Rolling Out DIY Sushi

August 11, 2015

NeQuana_sushi_giftlab_forblog

Product: Sushi Making Kit

Research:
I typically eat sushi 2 – 4 times a month and it has never crossed my mind to make it myself. Upon seeing this product, I suddenly became obsessed with wanting to create it for myself and others – I craved sushi almost every day. The kit looked like it would be easy and not a fussy/stressful meal to prepare, which made me more eager to try.

Continue Reading…

Gift Guides

Gift Lab: Grow Your Own Organic Cilantro

July 2, 2015

Rachel

Product: Garden-in-a-Can: Grow Organic Cilantro & Citrus Juicer

Hypothesis:
I’ve been told cilantro is really hard to grow so I was skeptical. Could it really be that easy? Just pop the top, bury the seeds and water for a few weeks? And would lime juice help me win the guacamole competition? My answers were yes! and yes!

Research:
When I heard we would be doing a more gardener-novice-friendly grow kit, I jumped on the chance to test it out. If all goes well, I’d have fresh cilantro in the house for the Purchasing team guacamole competition in a few weeks! I also knew then that lime (and tons of it) would be my secret ingredient, so I employed the help of our new citrus juicer to get the best results!

Experiment:
So, I did just that! I opened up the can, gently buried all the seeds about an inch under the surface and then poured about 2 shot glasses of water in every day or two to keep it looking moist.

Continue Reading…

The Uncommon Life

Gift Lab: Learning How to Knit with the Knitty Kitty

June 2, 2015

Knitty Kitty Kit | Gift Lab | UncommonGoods


Product: Knitty Kitty Kit 

Research:

Five years ago, my talented and crafty friend Kate started hosting Sunday night knitting get-togethers in her dorm with movies, groups of friends, and snacks. I attended most weeks to be cool like Kate, and also for the snacks, but while everyone else flew past knitting and purling to more advanced patterns, I was never able to produce more than a few lopsided rectangles filled with dropped stitches, left unfinished and eventually abandoned. Every several months, I try to take up knitting again with similar results. I was excited that the Knitty Kitty Kit is described as a rainy-day activity for ages 5+, so it’s just my speed, and is more exciting to knit than a scarf. To prepare, I abandoned my current knitting project—another sad blue lopsided length of yarn—and broke open the Knitty Kitty Kit, which came with everything I needed to knit a cat stuffed animal.

Continue Reading…

Gift Guides

Gift Lab: Build Your Own Brooklyn

February 20, 2015

Rocky |UncommonGoods

Product: DIY Brooklyn Skyline Kits

Research:
I think images of artwork are great. But I think videos of artwork being created are so much better. That must mean that GoPro videos from the perspective of the artist creating a piece are the best! At least that’s my theory… which brings us to today’s Gift Lab. I took you out to the beach in my last blog post to demo a product. This time around, you’re going inside my head to see something cool get built from the bottom up.

Hypothesis:
Our DIY Brooklyn Skyline Kits offer the chance for you to craft a mini version of two signature structures in New York, the Kentile Floors sign and your ordinary rooftop water tower. It caught my eye after I saw the two shots of custom designed water towers on our product page.

DIY Watertower | UncommonGoods
DIY Brooklyn Skylines - Watertower | UncommonGoods

Perfect product to test my theory with! First off, these are hot. Nice job Zero Productivity and Atomiko. But more importantly, I can gauge how well we’re able to see something being constructed and designed, without spending hours on hours doing it. I haven’t drawn anything in years. A lot of effort would’ve been needed to produce something that gives my 5-year-old self some competition.

I was also glad to see that two different versions of the kit existed. While doing research on best practices for filming (read: watching GoPro videos on Youtube), I found it difficult to tell which GoPro dock to use for this; chest mount or head mount? So I bought both. I decided that I’d use one mount for one kit and another mount for the other.

Two DIY Brooklyn Skyline kits, two mounts, and one GoPro in hand later… the test was ready to begin.

Testing GoPro with DIY Brooklyn Skyline Kits | UncommonGoods

Experiment:
I started with the Water Tower kit first, for no other reason than wanting to get closer to fantasizing about being a graffiti artist. After I laid all of the cardboard pieces on the table as instructed, I strapped the GoPro chest mount on, pressed record and got to work.

Here’s a closeup of the major pieces made for the water tower.
Build Your Own Brooklyn Watertower | UncommonGoods

Now it was time to design it. I grabbed a pack of Crayola markers and started doodling.

Finished Watertower | UncommonGoods

The first immediate takeaway – Tagging my water tower before building it would’ve been the better idea. The advantage of utilizing a flat surface didn’t cross my mind even slightly; until it was time to record myself doing it. That explains the split between the clips. I had to game plan.

The other thing was the actual video. In order to learn more about using the GoPro, I turned to Wistia.com’s #GoProWeek as a resource. Every day for that week, they shared a different pro tip (no pun intended) for getting the best shot. One of the techniques I used was the time-lapse recording feature that snaps pictures every few seconds, instead of actually recording straight through. I wasn’t a fan of the final result, because the footage came out too choppy. I think I set the timer in between shots too far apart. I decided to make sure to use the other recommended method for the next kit; shooting normally and speeding up the footage in a video editor.

Besides that, the rest of the process was smooth sailing and more fun than expected. The maker’s of the kits provided clear step-by-step assembly directions and all pieces worked as intended. Any edge that needed folding went over smoothly. The laser cut tabs and indents fit perfectly into each other. Connecting the pieces was a snap (that pun, intended). The biggest surprise was the glue; it did not leave a mess on my hands or the table I worked on. It comes already setup in drops that are separated by perforated plastic. When the instructions tell you to grab one, just rip one dot from the pack, peel off the plastic covering, and apply to the marked area. That easy.

Glue Dots

Next up was recording the Kentile Floors sign DIY kit with the GoPro attached to the head mount. You’ll notice that it begins with me filling in the letters first, and then moving on to putting it together.

The simplicity of the structure’s design made assembly much quicker. There wasn’t much of a surface to draw on but filling in the narrow letters required a little bit of time. I really like the point of view that the head cam captured. It feels like you’re actually putting it together rather than observing someone else do it.

Kentile Floors Sign Kit | UncommonGoods

Conclusion:
All in all, I’m convinced that my theory is correct. Watching art creation from a GoPro perspective is a cool experience that helps anyone appreciate the process behind the final result more. It’s amazing to see what goes into pieces, especially from our assortment, I’d imagine. We have a wide selection of uncommon goods that obviously require an uncommon approach to create.

In retrospect, I see where areas for improvement lay. In a future flick, I would:

  • Adjust the speed back to its normal rate at certain points in the video. There are some scenes where it would have made a better experience, such as when I was working on a small detail like applying the glue dots. It also would’ve been a great way to end it so you see the final product as it is just completed.
  • Angle the GoPro camera on the head mount down a few more degrees.
  • Add some background music.

DIY Skyline Kits as Desk Accessories | UncommonGoods

The Skyline Kits made for a great GoPro test run, and I’d definitely recommend them to someone looking for a fun and easy DIY.  What’s even better? I’m left with two new desk additions that visitors can stop and admire. Long overdue, since the Levitron Lamp had been retired for some time now.


Gift Guides

Gift Lab: How to Make Tasty Homemade Cheese

October 30, 2014

Paul Allison | UncommonGoods

Product: Italian Cheesemaking Kit

Research:
One of my responsibilities here at UncommonGoods is to answer your questions when you want to know more about an item, and what better way than to actually give this a try and hopefully a taste as well!

To prepare for this endeavor I’ve checked out Mad Millie’s YouTube channel and watched her prepare and make her Mozzarella cheese. If there’s one thing I love it would be cheese and Italian cooking. (OK, that’s two things. But two GREAT things!) In addition I’ve managed to locate some non-homogenized whole milk, there’s no question in my brief readings on Wikipedia and the instructions that starting with the right milk is key.

Hypothesis:
Surely fresh, homemade bread is better than store bought bread so I would hope that homemade cheese would be equally as satisfying.

While I am a tad nervous about the results, I feel like the instructions are clear. Although I am super glad I watched the video, so I have a sense of what my goal should look like. I’m generally good about following directions, although when I cook there are times when I can get experimental and deviate from the recipe to add a dash of this or, OOH that’s a pretty color! I’m just going to have to reign in the wild side and stick to the basics–this time around at least.

I feel like the biggest challenges are the ones I can do little about. For those of you who don’t live in New York, you may be surprised by the size of my kitchen; most surfaces are needed for storage so there’s just a limited number of spots to do your mixing and cooking. Oh, and pardon our appearance while we’re in the middle of renovations (at home)! That and I’m concerned about the size pot to use. My current plan is to use our ancient (I think this is older than me) pasta pot.

Experiment:
Well I have everything laid out, and why yes those ARE our Nesting Prep Bowls back there! The instructions say to sterilize your equipment that will handle the milk for 5 minutes. The challenge will be the colander, so let’s get a bunch of pots a boiling. It’s at this point where I wonder why I decided to do this in a heat wave and without air conditioning. My large pot isn’t making it to a boil, and alas, the lid is lost somewhere in a pile of tools. So, I give it a good 10 minutes rather than 5. Thankfully my colander in the smaller pot has reached a boil as that is my greatest concern. I prepare my ingredients, but I don’t see when I add the salt!

1 - Everything Laid Out
Cheese Supplies

The recipe calls for a full gallon of milk, but my local whole foods only sold the milk in half gallons. And here’s where I have my first tip: Shake the milk before pouring it into the pot. I left a lot of good tasty stuff in the bottle. I decided to use the same smaller pot that was already in action, so it’s already warm and we’re just heating the milk up to just under my current room temperature. (Ouch! The thermometer is reading 103, and while the pot is hot from boiling the room temperature is in the ’90s.) And here’s my next mistake. I can only fit a half gallon of milk into this pot! It’s too late to stop going now, so I’ll just have to adjust on the fly.

Making Cheese | UncommonGoods
Milk for Cheese

I squeeze in the calcium chloride. With the stopper it’s not too hard to simply measure half and then the citric acid and decide to add a tablespoon of salt. I’d already mixed in the citric acid to let it dissolve as if I was going to do a gallon batch, so I have to guestimate how much to pour in. I choose to use more than half as I feel it’s likely that it’s not completely mixed. Because of the heat the mix is at the required temperature faster than I expected and before I can really get everything prepared.

Hot Pot

I quickly turn off the heat and it’s time to add the Rennet tablet. It hasn’t really dissolved, but I hope it should in the milk. I stir it in and cover the milk and set my timer for 25 minutes. After 20 minutes of refuge in air conditioning, I’m back in the kitchen and re-reading the instructions. OH NO! You add the salt in the very last step. So needless to say, I’m very nervous at this point and a bit frustrated at myself.

Ice for Cheese

I set up the ice water and I am trying to get the temperature right for the hot water. I started with warm water, from when I was boiling (rather, trying to boil) my tools to sterilize them and I decide to heat a kettle with boiling water and try to get the temperature right. I end up with water that’s just 140 degrees rather than 158, but I go with it. I check on the cheese and it looks like it’s firmed up to me.

My knife goes in and clearly separates the curds. I slice in the cubes and am a bit nervous. Did I allow enough time for the curds to set? It really just seems like a thin skin of what will become cheese. Once I begin to reheat the mixture and gently stir, the answer soon becomes clear. No. I didn’t. I think the key is to really watch the video. I recognized it wasn’t quite the same. This is definitely a case of being close enough is not going to cut the cheese so to speak.

Cheesemaking Kit

I decide to forge on. Once the curds have reached the warmer temperature I begin to scoop the curds into the cheese cloth and colander. As the curds are loose this takes a long long time and I was not able to maintain the temperature. The recipe calls for letting the curds drain for 5 minutes but the process of just getting them out of the pot takes closer to 15 minutes.

Scooping and Straining Cheese

A little forlorn, I begin to scoop up globs of curd and rest them in hot water briefly. They quickly begin to separate, so I simply start to work them quickly and it’s readily apparent that I do not have mozzarella cheese. I still give them a dunk in the ice water, though, and they do hold up better than I expected.

Squeeze the Cheese

It's not mozzerlla but...

At the end of this experiment it appears that while I failed to make mozzarella I did end up with some REALLY tasty Ricotta cheese.

So tomorrow once the kitchen is once again clean and not quite as hot it will be time to make some lasagna!

Conclusion:
When we did make lasagna with my homemade ricotta, it was AMAZING!

I clearly did not make this easy for myself, and as much as I tried to read and prepare myself, I should have started with the goal of making the simpler recipe for the first time around.

I would emphasize that it is a lot of work to make cheese at home, but that the work has much more to do with the preparation and the clean up rather than the cheesemaking itself. I think it would help to have greater counter space and I’m curious what would of happened if I’d had the larger pot to handle the milk.

I WILL make mozzarella, although not this week. Next time I’m going to do a little more research so I can be confident in the ratio of ingredients I’m going to use. I’m also going to have to have a pot of boiling water on hand so that I can properly prepare my curds and they can be stretched into mozzarella. And now that I know the drill, I won’t add the salt until the end! I’m very hopeful that with this adjustment I will be successful.