Getting the opportunity to try uncommon products is one of the great things about working at UncommonGoods. While many of these product-testing experiments become gift labs, every now and then we find a new good with so many uses we can’t fit them all in one “report.” The Woolfiller Sweater Mending Kit is an example of just such a product, AND, since associate buyer Katie and community moderator Cassie both had their eyes on this winter must-have, we decided to diverge from the traditional gift lab format and see just how many uses we could come up with for this clever kit. Four are outlined below, but Cassie and Katie agree that the fun doesn’t have to stop there!
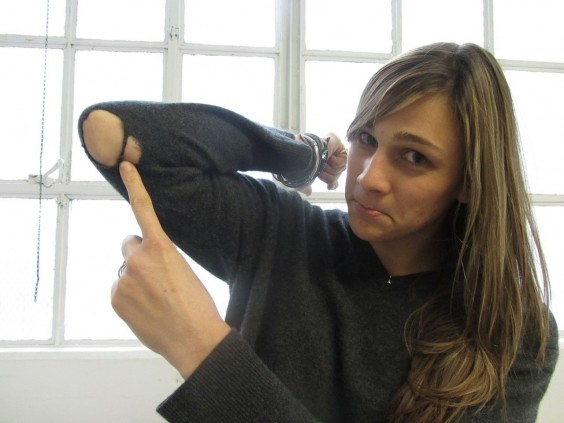
Katie: Having spotted the Woolfiller at a major New York trade show last year, I was anxious to get such a solution-oriented product into our assortment. A fun, hands-on kit to patch up an old favorite or add some flair to a basic sweater seemed like the perfect DIY project nearly anyone could adopt.To put this product to the test, I decided to tackle two specific projects, the first was to patch the embarrassingly large (and winter chill-inviting) elbow holes on one of my favorite sweaters. After completing the elbow hole patches, I wanted more – I had seen some fun images the company provided where people used the bright colored wool to add some creative patches as flair and I wanted to try this out, which lead to Project two: adding flair.
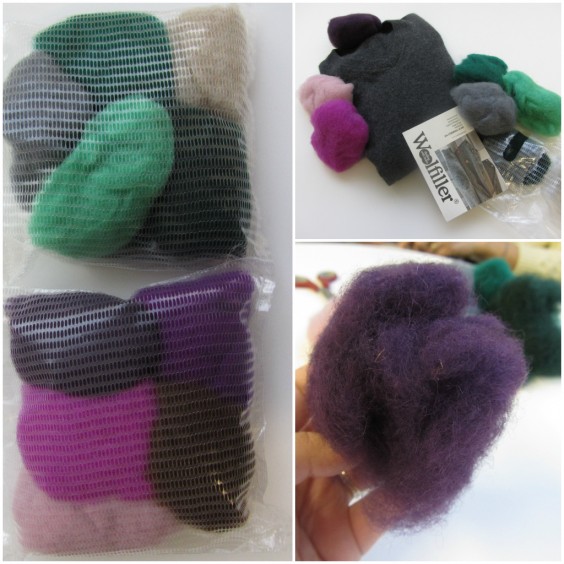
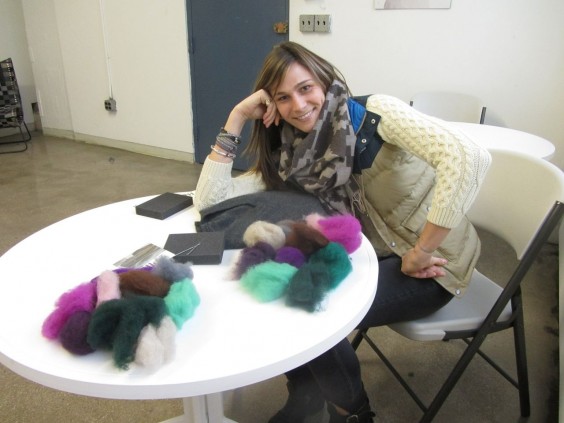
Cassie and I decided to each purchase one kit – a match made in heaven as this green-adoring girl, could partner with Cassie’s purple-loving self and combine to make a cornucopia of rich, jewel-tone wools mixed with solid staple colors (greys, blacks, beiges) which came in extra handy for my second project. But I would also say that one kit is entirely sufficient – each comes with bright color options as well as neutral, basic colors which should cover a range of sweater needs. And to that point, upon unloading our kits onto a communal table, we were both surprised by how much wool comes in each kit – we went about tearing each ball into half and divvying up our goods.
Project 1: Bold Elbow Patches
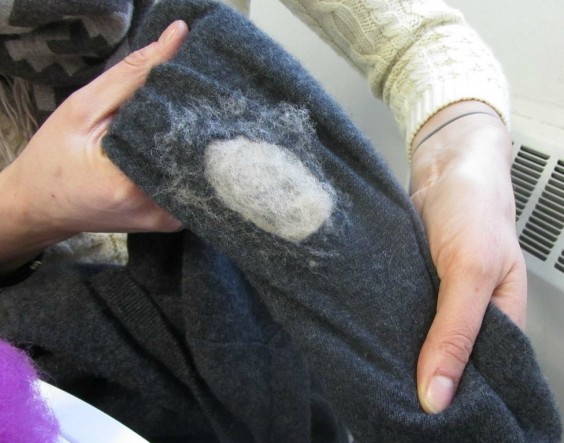
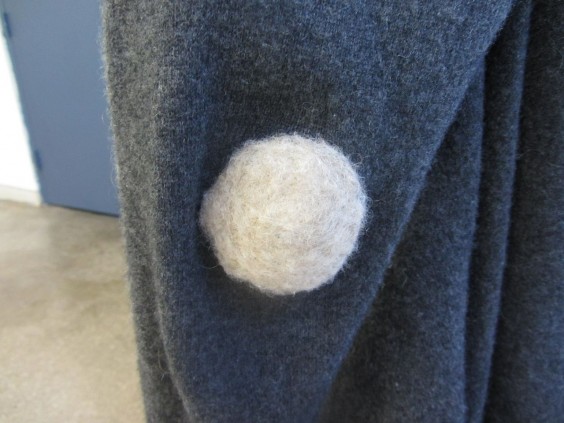
Katie: After some deliberation, I chose to patch the elbows of my dark, gray sweater with the natural beige wool – aiming for a contrast patch look – like your grandfather’s sweater.
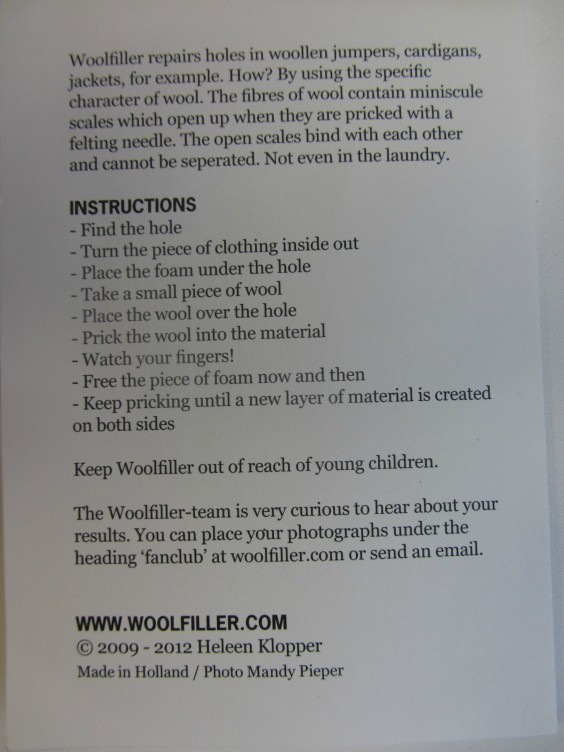
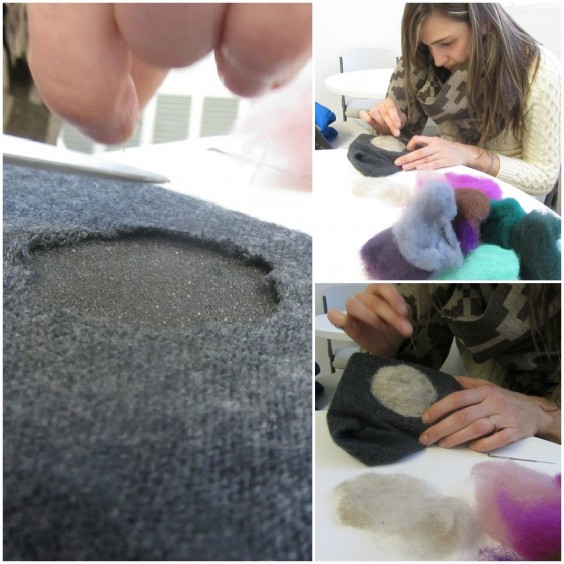
After choosing the color of wool, I reviewed the simple instructions and went to work. I used a pair of scissors to make the first of my ragged elbow holes into a smooth, even oval to ensure my patches would be as clean-looking as possible. Next, I ripped a decent amount (maybe the width of a lime) of wool off the main piece, turned my sweater inside out, put the provided foam piece in the sleeve, laid the wool over the hole, and began poking!
After completing the first of two patches, I turned my sleeve right-side out to inspect my work. Herein I learned one of the bigger lessons of the project – while the instructions suggest turning your piece inside-out to use the product, I found that by doing that I was less aware of the exact line of the hole (because the piece of wool covered it) and as a result I ended up with what can only be described as a “halo” effect around the patch – one sold patch, with a light ring of excess wool surrounding it.
On elbow #2 I decided to try another approach – again I cut away the ragged edge to make a smooth hole, but this time I left the sweater sleeve right-side out, I inserted the felt piece, and lined the wool up perfectly with the hole and started poking away. I found when I did it this way, I was able to guide the wool into a perfect oval while poking and overall felt much more in control of the overall work. When complete, the patch appeared much more perfect and solid.
After completing the elbow patches, I moved onto my next experiment…
Project 2: Adding a Little Flair
Katie: I decided to do a simple trio of mini circles with bright colors. Having learned from my elbow patches, I left my sweater right-side out, tore of tiny circles of wool (about the size of a quarter), and started poking away! I found my technique was much-improved, I used my fingers to expertly guide the wool and before I knew it I had my little flair added in.
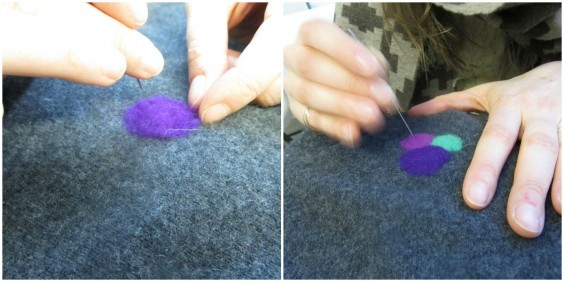
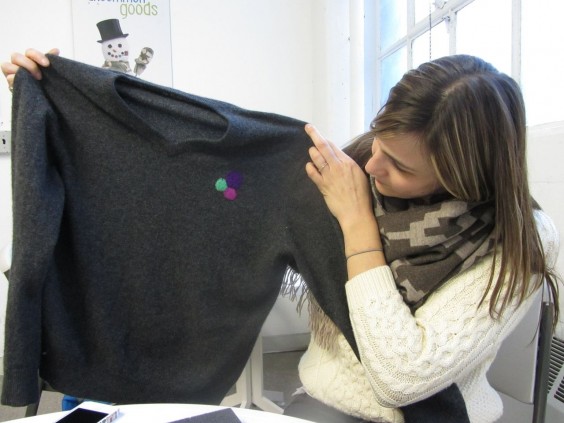
In the interest of science, here are my key Findings:
Finding #1:
This kit comes with a lot of wool. I was surprised by how little wool it took to patch up my rather large elbow holes. I have a lot of wool leftover and am just waiting for a quiet Sunday to get to patchin’ my slew of other well-worn sweaters.
Finding #2:
The more you poke – the more “felted” the wool becomes. Good thing poking is super fun.
Finding #3:
As mentioned above, the kit recommends turning the piece inside-out and then using the wool filler, however, I found this created a slight ‘halo effect’ around the actual patch, and when I tested using the kit the opposite way – with the sweater turned right-side out, I was very pleased with the results – I could control the pokes more and create a clean oval with no halo.
Finding #4:
The Woolfiller is a really easy, creative way to patch.
Having now completed two projects on one beloved, well-worn sweater, I can vouch for the usability and honestly–the fun– this product provided.I passed the DIY-sweater-patch torch along to Cassie.
Project 3: The No-Show Repair
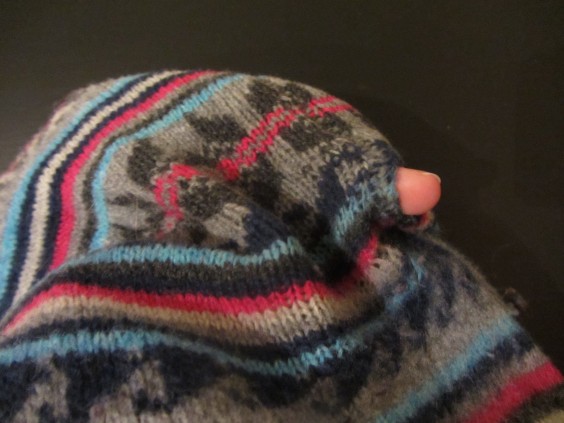
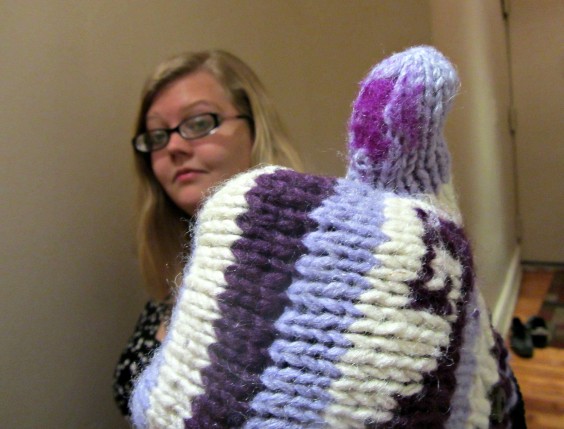
Cassie: I also had a beloved sweater with a hole in it. Unlike Katie, I didn’t want my repair job to be super noticeable. My hole was just under the arm of a multi-colored sweater, so I hoped I could blend the new wool in and make the sweater look like new. Taking her findings into consideration, I began my exercise in craftology.
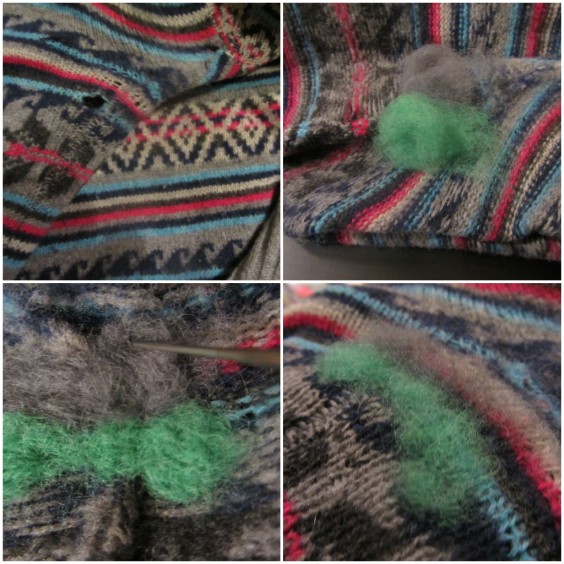
I started out the same way, by finding the hole, turning the sweater inside out, and inserting the foam block. Then I picked out a couple of colors that I thought would mix nicely with my sweater’s pattern.
I placed the wool over the holes and started poking. It was really fun, and, because the sweater is 100% wool the new wool took almost instantly. I pricked at the wool with the felting needle for less than a minute before the patch was completely attached, but I kept at it for a little longer, just to make sure it was blended well.
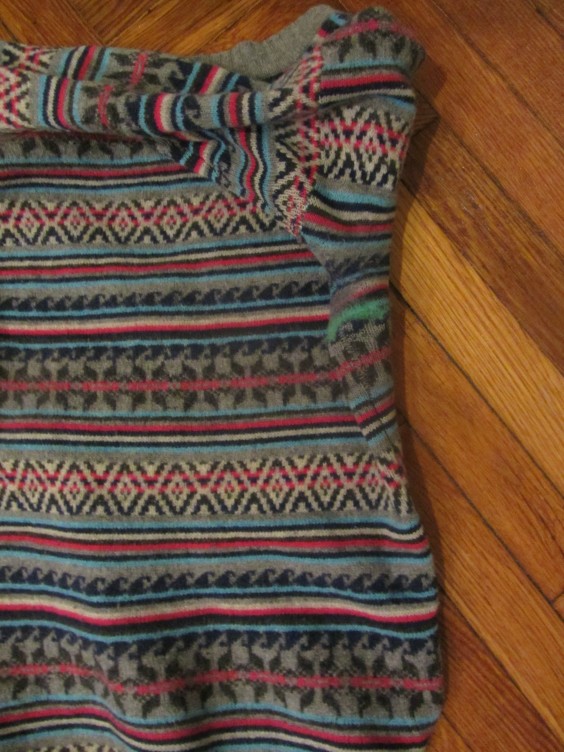
I turned the sweater back inside in and gave it a few more pokes, just to give the wool a smoother look. The finished product looked good, and the patch feels just like the rest of the sweater.
While I agree with most of Katie’s key findings, I found that starting with the sweater inside out worked great for a small, blended patch. She preferred the look of the patch when she placed the wool directly over the hole without turning her garment inside out first. I’d recommend doing a test on your own piece, by woolfilling just a small section of the patch, before completing your own project.
Project 4: Super Star Style
Cassie: Giving my sweater a quick fix was fun and easy, but after seeing Katie’s bold patches and the little bundle of flair she added to her project, I was a little jealous. I wanted to give my own colorful creation a try, so I decided to add a little shape to an old cardigan.
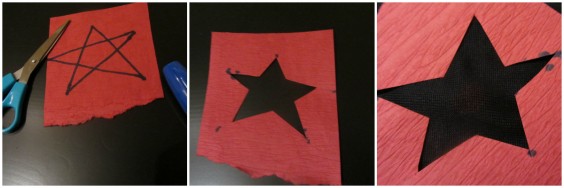
First I drew a star shape on a small piece of scratch paper. Then, I cut out the star, leaving an outline. Next, I placed the outline over the elbow of my sweater. (Remember to insert the foam block first.)
I didn’t turn the sweater inside out this time, since I wasn’t actually making a real “patch,” I was just covering up the existing material with new wool.
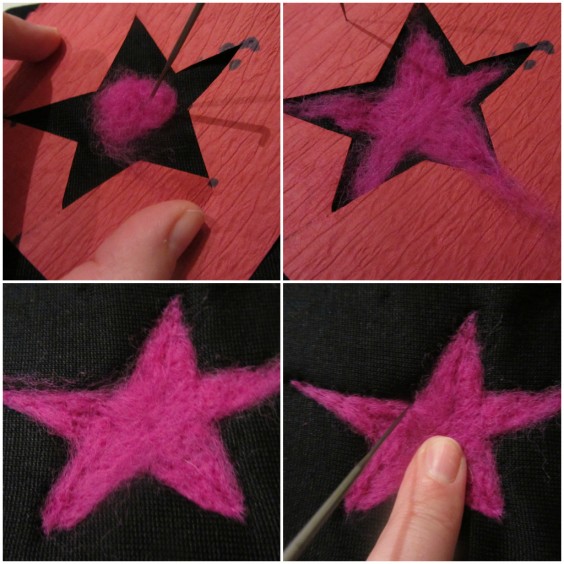
I put a little ball of bright pink wool in the center of the star shape, then started stretching it out to fill the cutout as I poked it with the felting needle. I didn’t secure the star before starting this process, which made it a little trickier than it had to be. Next time I’ll hold it in place with some fabric tape or a safety pin.
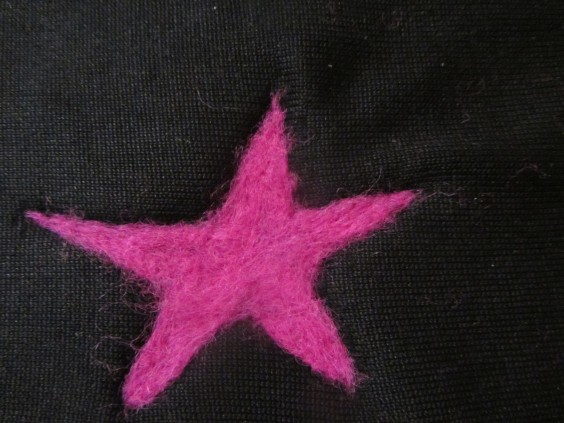
I gradually added more wool and pulled it into the shape of the star as I worked at it with the felting needle. Once I had the outline filled in I removed the paper and then poked carefully around the outside edges of the star to give it a sharper shape.
Since the cardigan isn’t entirely wool (it’s a blend also containing nylon and cotton), it took a lot longer for the woolfiller to adhere this time than it did with the 100% wool sweater I’d used it on before.
The star turned out well, but there was one problem. I was so focused on creating my shape that I forgot to move my foam block the whole time I was poking. The wool (and the sweater) got stuck to the block, so It was somewhat difficult to remove when I was done. Make sure to readjust the block several times during your project to make sure this doesn’t happen!
I’ll definitely try this again next time I want to give an old sweater a new look. Next time, I might try a heart, a triangle or square, or maybe even a letter.
Through our multiple sweater patching projects, we learned that the Woolfiller Sweater Mending Kit is a great way to repair a damaged sweater, give old wool a new look, or add a personal touch to your favorite pieces.
And, bonus, it’s not just for sweaters. It works on any pretty much anything made of wool!



4 Comments
You ladies are so clever! Love this one 🙂
Thanks so much – I have felting wool around and this is just the instruction I need to try using it on my fav sweater!
I am so pleased I found your blog – ordered the kit and followed your instructions – perfect for saving my favourite sweater!
[…] tried felting before, felting a hole in your knitwear is a great place to get your first taste. Uncommon Goods has a great tutorial to help get you […]