Browsing Tag

Cooking

Gift Guides

Gift Lab: Ctrl+Alt+Del (iciousness) with the Keyboard Waffle Iron

October 8, 2015

main-giftlabwaffle3

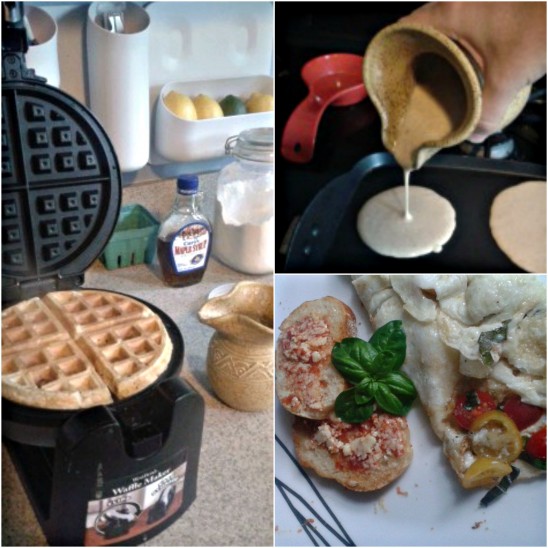
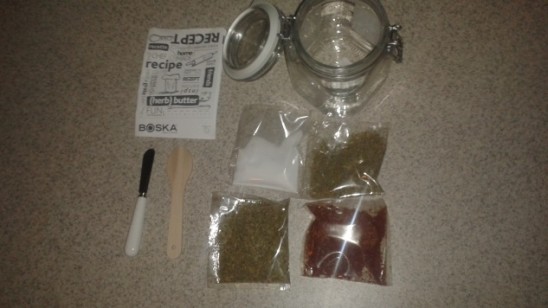
Product: Keyboard Waffle Iron

Research:

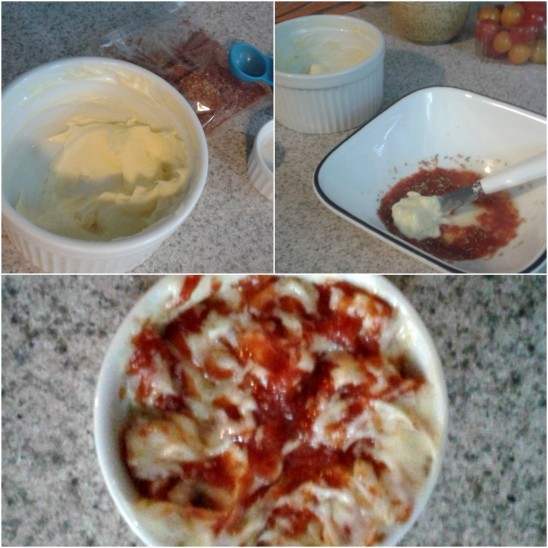
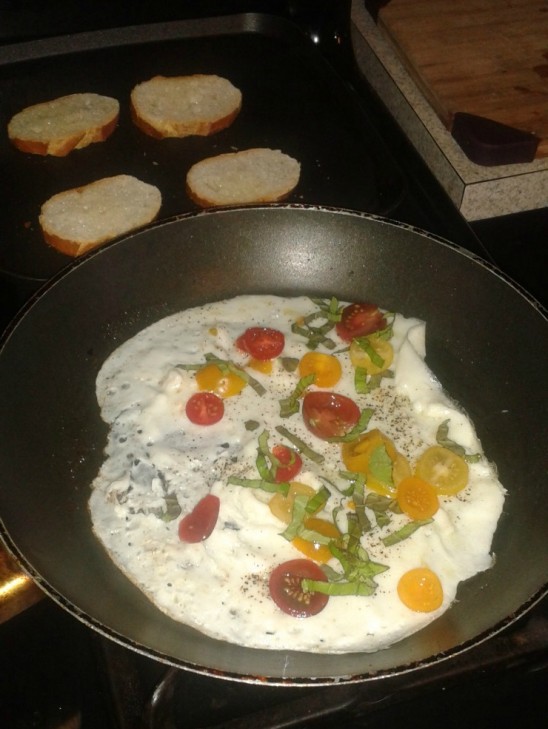
I used to love waffles, but forced myself into pancakes. I didn’t want to be bothered with finding a place to store a waffle maker once I purchased it or the hassle of having a bunch of cords in the kitchen. The Keyboard Waffle Iron, without explanation, is pretty cool, but the fact that I could (possibly) make a good looking waffle and be able to store it is what especially caught my interest.

Continue Reading…

Gift Guides

Gift Lab: How To Produce a Peppery Pickle

August 19, 2015

simon_giftlab_forblog

Product: Global Peppercorn Sampler and Pickling Jar Set

Research:
I’d like to speak about something really important to me and millions of other Americans like me: my personal relationship with the dill pickle. Consider this a Pickle Monologue.

7308126710_54b219c4f7_o

The first batch of pickles I ever made was bittersweet –and I’m not talking bread & butter: those are nasty. No, I’m talking about a metaphorical kind of flavor, one that you can’t actually taste over the vinegary brine, fresh dill, or zesty peppercorns, but is nonetheless real. It was the summer before I would be moving to Brooklyn for my last year of high school, and I made pickles late into the night for a pickle-party where I would be parting with several friends. The secret ingredient that made the brine so good? Tears.

No – I really decided to make pickles as a selfish and misinformed act of appropriation. I had this idea that Brooklyn was full of bearded men making sun tea (see below), and I wanted to make sure I would fit into place.

Continue Reading…

Maker Stories

This Just In-spiration: Meet Sandra Bonazoli and Jim Dowd

June 15, 2015

Our makers never fail to motivate us, encourage our creativity, and fill us with inspiration. So, when a new design enters our assortment, we’re always excited to learn more about the person behind the product.

What gets an artist going and keeps them creating is certainly worth sharing, and every great connection starts with a simple introduction. Meet Sandra Bonazoli and Jim Dowd, designers of the Make a Wish Measuring Spoon Set.

Sandra Bonazoli | UncommonGoods

When did you know you wanted to be an artist?

Even when I was very young, I had a love of drawing and making small things. I didn’t know it then, but I also loved beautiful old objects – I used to walk around my town and admire the architectural details on old homes. But I never really thought about being an artist or a craftsperson until I started to teach jewelry after college, and saw other people making a living with their artwork. Granted, their living may have been patched together, but they made a life for themselves being creative and doing what they loved. That had never occurred to me before that point, but that’s when I knew I wanted to be an artist/craftsperson.

What was the most exciting thing about becoming a professional artist?

To be honest, I wouldn’t really consider myself an artist. I don’t make work for exhibitions, galleries, or museums, or any other context other than people’s homes. It’s just not my intention. My intention (and my husband’s – we work together) is to make meaningful objects with an emphasis on function, that are professionally crafted, and as affordable as possible. Those things are usually not the criteria of an artist. I would say I’m very happy to be a designer and a craftsperson, particularly a metal-smith. The most exciting thing about what I do is seeing the physical manifestation of an idea. Every time something new comes out of the mold for the first time, I remember why I love doing this.

26723_zoom1

What does your typical day in the studio look like?

Being self-employed means wearing many hats, so a typical day involves answering email, dealing with inventory, quality control, working on new designs, making inventory, and being frustrated with computers. If there is ever a dull moment, it doesn’t last long!

What are your most essential tools?

Unfortunately, the computer. Also my jeweler’s saw with 4/0 blades (they’re pretty teeny), No.4 cut half round and barrette shaped files, rubber cement, and medium silver solder.

Sandra Bonazoli and Jim Dowd | UncommonGoods

Is there a trinket, talisman, or other inspirational object you keep near? If so, what is it and what does it mean to you?

We make a silver pendant in the shape of an anchor. I wear mine almost every day. We made this pendant after spending a couple of weeks in the South of France, where anchor motifs are everywhere – for example, the brackets for hanging streetlights are in the shape of an anchor. They are a part of the architecture and landscape. We live in Rhode Island, and there are a lot of anchor motifs around here too. It connects me to where I live, as well as special places I’ve been. But most of all, I love the symbolism. Anchors have traditionally been a symbol of hope. I love the idea that raising anchor literally means that one of is off to a new port, a new journey, and a new adventure and symbolizes all the hope one has when going somewhere new.

Imagine you just showed your work to a kindergartner for the first time. What do you think they would say?

We do make some kids products, so I happen to know they like things that they feel are made especially for them. Like spoons made for little hands. Otherwise, I still think they might say our other products are special too.

What quote or mantra keeps you motivated?

Again, being self-employed means having to do a lot of things you don’t want to do, in order to keep doing what you love to do. Therefore it’s good to keep in mind: If you can’t get out of it – Get into it! Helps every time.


blogcta-seethecollection4

Gift Guides

Gift Lab: Potato, Potahto, & Two More Potatoes (All Seasoned Differently!)

May 22, 2015

Louise Geller | UncommonGoods


Product: Potato Seasoning Set and Potato People

Research:
There is nothing more ubiquitous than the potato when it comes to filling the role of “starch” on a U.S. dinner plate. In fact, the average American eats over 140 pounds of potatoes per year! And yet, despite a centuries-old national love affair with potatoes, our most popular side dish often gets a bad rap, because so many of our 140+ pounds each come to us fried in oil, coated in preservatives, and slathered in fatty or sugary condiments. But it doesn’t have to be this way! When eaten with a more simple preparation (and with the skins left on!) potatoes are a great source of Vitamins C and B6, Potassium, Fiber, and Iron, and the complex carbohydrates are great for keeping your energy up.

I am a firm believer that food is at its most truly delicious when it is prepared simply and healthfully, so when I saw Julie Pederson’s Potato Seasoning Set I was immediately excited to take it for a test ride. Julie Pederson is wonderful at creating food and drink kits to help you explore new flavors and combinations, from herbal tea to baking salts. Since there are over 4,000 varieties of potatoes grown, and the kit has 12 different seasoning mixes, there are seemingly endless ways to play, create, and EAT! Who could resist?

Since I was already going to be playing with potatoes, I also wanted to try out our Potato People, a super fun set of potato nails that use the natural heat conducting power of metal to help potatoes cook faster on the grill or in the oven, and look hilarious while they are doing it.

Continue Reading…

Gift Guides

Gift Lab: Adding a Tropical Twist with Gourmet Island Sugar

December 22, 2014


Louise Geller | UncommonGoods

Product: Gourmet Island Sugar Set

Research:

I hadn’t heard of Old Salt Merchants until I saw their product on the UncommonGoods website, but their adorable packaging and interesting flavors prompted me to take a closer look. A family-run business out of Seattle, Old Salt Merchants makes a point of sourcing fair trade sugar, keeping their products cleanly and simply made, and focusing on a small product line of the highest quality. These are all values I really appreciate, and as an avid home cook I’m always looking for new ingredients and ideas for my kitchen, so I knew I’d have fun using the Gourmet Island Sugar Set to develop a great meal.

AllSugars

Hypothesis:

Using the Lime Slice, Jamaican Ginger, Rum Soaked and Coconut Breeze sugars, I will develop a full meal where each dish includes one of the flavors. They will elevate my recipes and inspire me to try out new ideas.

Experiment:

My boyfriend Paco joined me in my quest to find interesting ways to use the four sugars. We went shopping on a Saturday afternoon and came home loaded up with ideas and ingredients.

Lime_done

Lime Slice Sugar
We decided to start our evening with a cocktail. All four of these flavors could most certainly be used as cocktail ingredients and for delicious sugar rims, but we chose the Lime Slice sugar to try out with one of our favorite cocktails: the traditional Mojito. Paco muddled fresh mint and lime while I prepared a dish of the sugar and a bowl of water to line the rims of our cocktail glasses. The Lime Slice sugar is made with raw sugar, so the granules are large and have a great crunch. The lime adds a bit of acidity and a bit of bitterness – it’s not so delicious on its own, but I could tell when I taste tested it that it would add a lot as an ingredient.

Lime1

I can’t stand overly sweetened cocktails, so I liked the idea of a sugar rim that would allow me to control when I got a shot of sweetness and when my sips were more focused on booze and citrus. The raw sugar also added a textural element to the cocktail that we both found very pleasing. Our cocktails would have been delicious on their own, but the Lime Slice sugar rim definitely gave them a little something special. Although we were sitting on my couch and it was 39 degrees outside, I could have sworn we were poolside in Miami.

Lime2

After pre-dinner cocktails, it was time to get cooking! For the side dish to our meal, we decided to also use the Lime Slice sugar. It was autumn when we conducted the experiment, and that means brussel sprouts are everywhere. One of our favorite preparations for brussel sprouts is to sauté them in toasted sesame oil, then splash a bit of sriracha on top. This time, when they were almost done, we sprinkled on some Lime Slice sugar to temper the spice. The results were delectable – all the flavors married together with no one element overwhelming any of the others. We agreed that the Lime Slice sugar made a great addition to this dish, and I’m looking forward to making it many more times during brussel sprout season!

Lime2_Done

Lime2_1

Rum Soaked Sugar

There are many meats that work well with the use of sugar in glazes or marinades, but I definitely tend to think of pork products as standing up best to sweetness (eg pulled pork, maple bacon, glazed ham, spare ribs). The richness of the meat can hold its own next to a sugar-based topping. I generally don’t want to put too much sugar on my meat, but I thought a small amount of the Rum Soaked sugar would go a long way. A small taste test made it clear that “rum soaked” is an apt way to describe this sugar – it is obvious that there are no artificial flavors happening here. I mixed some garlic, cayenne, salt and pepper in with the sugar and rubbed it on both sides of the pork, then seared it on the stove before transferring to the oven (the best way to get a tender and juicy pork chop). As soon as the sugar started to caramelize, it was clear we were going to have some succulent pork chops on our hands. They were delicious – the rum blended fabulously with the other flavors, and the sweetness was present but not overwhelming. The chops were rich and juicy, and we made short work of them.

While I’m personally not a vegetarian, UncommonGoods is an animal-friendly company, so keep in mind that this recipe is my own. This sugar would also work well for vegetarian or vegan recipes, for those who don’t eat meat. Portobellos would make a good alternative to pork. Or, you  could also try this recipe with traditional meat substitutes like tofu.  The Rum Soaked sugar would also make nice glazed carrots.  Just remember that you’d need to add some oil or melted butter to the sugar and seasoning mixture for any of those, because they don’t have their own fat.

Rum_Done

Jamaican Ginger Sugar
The moment I saw the Jamaican Ginger sugar, I knew I had to pull out one of my favorite childhood recipes for chewy ginger and molasses cookies. The recipe calls for the cookie dough to be rolled into balls and then coated with granulated sugar before being baked. I figured this could only be improved by rolling them in sugar infused with the flavors of fresh ginger. The Jamaican Ginger sugar is also raw, so I knew there would be extra crunch on the cookies, which is a definite bonus in my book – I’m all about textural pairings, and crunchy + chewy is a winner. The ginger adds so much spice to the sugar that you can feel it in your sinuses when you taste it on its own. We were a little worried the flavors would be too strong, but we needn’t have been concerned – the cookie has enough sweetness of its own that the extra kick of ginger is nothing but a joy. This was a huge success, and I will soon be making these cookies again for the holidays!

Ginger_Done

Ginger1

Coconut Breeze Sugar
It’s getting chilly in New York, so hot chocolate has been on my mind. I never buy hot chocolate mixes; I prefer to make my own using unsweetened cocoa powder and adding sugar (again, I’m a bit of a control freak about sweetness). I’ve always loved the combination of coconut and chocolate, so I thought it would be fun to replace the regular granulated sugar I would typically use with the Coconut Breeze sugar. I am calling it CocoCocoa (feel free to use that).

Coconut_Done

I usually use about a tablespoon and a half of cocoa and a tablespoon of sugar to make my hot chocolate, but this time I used a one to one ratio because I was worried about the chocolate overwhelming the coconut flavor. My dutch process cocoa powder packs a big punch, and I still only got a hint of coconut in the finished product. It was delicious, but I was hoping for a more balanced flavor. Next time, I will probably use the coconut breeze sugar to sweeten my fresh whipped cream – I think that will help the flavor stand out more.

Coconut1

And of course, I can’t possibly enjoy cookies and hot chocolate without breaking out my UncommonGoods Face Mug!

FaceMug

Conclusion:

As I’d hoped, the Gourmet Island Sugar Set led us to a delicious meal that was outside the norm of what we’d usually make. We also came up with additional ideas for how to use the different flavors as we were working (lime sugar/sea salt margarita rim, ginger sugar with soy sauce and garlic as a beef marinade, and coconut sugar topping for banana nut muffins, to name a few). I felt good about using this product, knowing each flavor only had two ingredients, all the sugar was fairly traded, and that I was supporting a family-owned small business. I’m excited to use them again!


Gift Guides

Gift Lab: DIY Brunch Ideas (& Recipes!)

November 11, 2014

Laura Frost | UncommonGoods

Product: Itty Bitty Mixer, DIY Butter Kit, Egg Separator

Research:
Brunch on the weekends in Williamsburg, Brooklyn has plenty of great options. But, there are also really long lines for omelets or pancakes or waffles. My boyfriend and I love brunch at home where we can relax in PJs and sip our coffee without food-deprived crowd of folks waiting for breakfast. Only snag is that we usually want different things. He’s not big on the pumpkin craze, and I’m a fan. He prefers waffles and I like light little pancakes. Will we have a happy brunch despite our differences?

DIY Brunch Ideas | Kitchen Tools | UncommonGoods

Experiment:
The two-different-items-brunch menu also gives me the excuse to use the Itty Bitty Mixer! I’m not a huge fan of kitchen gadgets, but this one is pretty great. I love the handcrafted ceramic design. It’s also very practical for making two different pancake flavors, omelets, and dressings. (Seriously, I could do a whole separate blog on small-batch dressings.)

PJ Brunch for Two Menu:

  • Apple Sauce Waffles for Him
  • Pumpkin Pancakes for Her
  • Coffee Required

The night before my planned PJ Brunch I made some fresh butter and roasted pumpkin. I started off with the roasted pumpkin. I cut a sugar pumpkin in half. Sprayed a foil-lined cookie sheet with oil, and roasted them for 40 minutes at 425 degrees. While the pumpkin was in the oven I opened up the DIY Butter Kit so I could have fresh cinnamon-sugar butter for my waffles and pancakes.

The butter kit is really nice to look at, but not the fastest butter to make. Even though I was starting the night before, I didn’t give myself quite enough time. The kit’s butter recipe requires 3 ingredients and 120 minutes (60 of those minutes is just running a mixer). Dilemma: fresh butter is unbelievably good. It’s especially good using it as a spread rather than baking it into something. My waffles and pancakes deserve the best!

I have to confess here, I’ve used a simpler butter kit in the past that required less than 45 minutes, heavy cream, and a jar. I took this route with the butter kit so I still got the awesome fresh butter despite my poor planning.

DIY Butter Kit | UncommonGoods

I had already bought my favorite heavy cream, poured it into the kit’s jar and shook it for about 25 minutes. It’s fun to watch the cream turn into whipped cream then morph into a happy golden blob of fresh butter. The butter then gets rinsed in cold water. That leftover milk in the jar is buttermilk. It’s great to save for pancakes or waffles. (More on that later…)

I divided up my butter so I could make the cinnamon-sugar butter and use the kit to make tomato basil butter, and still have plain butter left over.
Homemade Butter with the DIY Butter Kit

Butter’s done. Pumpkin’s done. Time for bed. Happy brunch in my PJs in the very near future!

Saturday morning- PJ Brunch part one! I want pumpkin waffles with the freshly roasted pumpkin. My guy wants apple sauce waffles with some of the apple sauce I made the previous weekend. I set up shop in the kitchen so I could easily get started. I first made a large batch of batter that I could split for the pancakes and waffles. I put about half the batch into my Itty Bitty Mixer (did I mention I love this thing?!). I then added about a quarter cup of my fresh pumpkin puree. The Itty Bitty Mixer allows the ingredients to blend together quickly and smoothly. It’s also easy to pour the batter out onto my pan.

Making pancakes with the Itty Bitty Mixer

While my pancakes were cooking I put the remaining pancake batter in the Itty Bitty Mixer along with the homemade apple sauce.

Homemade waffles with the Itty Bitty Mixer

The fresh cinnamon-butter was the perfect addition to the pumpkin pancakes and apple sauce waffle.

Homemade brunch with fresh cinnamon butter

Sunday morning-I was on my own for brunch. Not a glum morning, though. I had just enough eggs in the fridge for one omelet!

PJ Brunch for One Menu:

  • Heirloom Cherry Tomato & Basil Egg White Omelet
  • Tomato Basil Butter Crostini
  • Coffee Required

The night before, I was again making butter. This time it was just blending the fresh butter with the DIY Butter Kit’s tomato basil seasoning. I measured out a teaspoon of the seasoning mix and let it soak in ½ teaspoon of warm water as the instructions noted. Then I blended about two tablespoons of the butter using the kit’s spreader. Result: tasty and pretty butter blend.

Homemade Herb and Tomato Butter

Sunday morning and I’m ready for an omelet! I have my Itty Bitty Mixer ready to go along with the Egg Separator also made by Karen & Stephen Steininger.

Egg Separator and Itty Bitty Mixer | UncommonGoods

Ok, so again, I’m not big on the gadgets. When I typically separate egg yolks from whites I just use the egg’s shells, pouring them back and forth until I’m only left with the yolk. Honestly, I usually ruin a fair portion of the eggs when I try this trick. The Egg Separator is ideal, however. The yolk willing hung back while the white slipped right through the gap in the cup. Also, the lip on both the Egg Separator and Itty Bitty Mixer are well-designed for cracking an egg.

Separate eggs easily | Stoneware egg separator

I whipped up airy egg whites in the Itty Bitty mixer and poured them straight into my hot, non-stick skillet. I then added slices of heirloom cherry tomatoes, basil, salt and pepper. While my eggs cooked on medium low heat I toasted my French bread.

Homemade Veggie Omelet

I folded the omelet just to finish it up. Next I put the tomato butter spread on my bread, then plated it all together. Such a happy plate of goodness!

Delicious Brunch

Conclusion:
The tools I used did make for two pretty great brunches. My boyfriend and I got to share brunch, get what we each wanted, and managed to stay away from crowded brunch hot spots. Plus, I had a happy brunch for one the next day. The DIY Butter Kit could be complicated, but does help make some pretty wonderful butter and butter blends. The Itty Bitty Mixer is currently my favorite thing in my kitchen. In fact the design of the mixer and Egg Separator are so nice they’ve both earned a permanent home displayed on my counter.

Recipes:
Apple Sauce Waffles
(Serves 2)
1 ½ cups pancake mix
¾ cup skim milk
1 egg
1 teaspoon vanilla
½ cup chunky apple sauce
½ tablespoon oil (olive oil, vegetable, etc)

In a mixing bowl, whisk together the mix, skim milk, egg, vanilla and oil. Air is your friend. Whisk so mix is smooth without chunks of pancake mix. Whisk in the apple sauce. (You may want to add more milk if the apple sauce does not make the mix into a smooth-pouring batter.)

Turn on your waffle iron to the desired temperature. I crank mine all the way to the “dark” setting for a crispy-on-the-outside waffle. While the waffle iron heats up, your batter needs to rest for a couple of minutes.

Once the waffle iron is at temperature, spray your iron with non-stick spray and slowly pour in your batter. Don’t leave it unattended—the mix might expand. Just open the waffle maker for a second if need be.

Once your waffle is browned and cooked through, pop it out on a plate. Top with happy cinnamon butter and enjoy!

Pumpkin Pancakes
(Serves 2)
1 ½ cups pancake mix
¾ cup skim milk
1 egg
1 teaspoon vanilla
½ cup pumpkin puree
1 teaspoon cinnamon
½ teaspoon nutmeg
(You can most certainly use pumpkin spice instead of mixing your own spices.)

In a mixing bowl, whisk together the mix, skim milk, egg, vanilla and spices. Air is your friend. Whisk so mix is smooth without chunks of pancake mix. Whisk in the pumpkin. (You may want to add more milk if the pumpkin does not make the mix into a smooth-pouring batter.)

While your batter rests for a moment, heat a non-stick pan on medium heat. Just before you pour out your pancakes spray the pan with non-stick spray. When the pancakes begin to bubble and they’re golden brown on the bottom flip them over. Once that side is golden brown remove the pancake. As you plate them top with happy cinnamon butter and enjoy!

Egg White Omelet with Heirloom Cherry Tomatoes and Basil
(Serves 1)
3 egg whites
Olive oil or butter
Heirloom cherry tomatoes (or any tomatoes) thinly sliced
Basil chopped
Salt & Pepper

Heat a non-stick pan over medium low heat. Whisk the eggs whites—air is an omelet’s friend! Don’t let the eggs rest. Go straight from whisking to pouring the eggs into the pan. Season the eggs. As the eggs set gently drag a fork through them so the whites cook. As the omelet is setting, add the tomatoes and basil. Once the omelet has set, with the top still a bit wet, but not runny, fold your omelet. Once heated through plate and serve.

If you have good French bread, toast this up before you start your omelet and use the Butter Kit’s tomato basil butter. Enjoy!

Gift Guides

Gift Lab: How to Make Tasty Homemade Cheese

October 30, 2014

Paul Allison | UncommonGoods

Product: Italian Cheesemaking Kit

Research:
One of my responsibilities here at UncommonGoods is to answer your questions when you want to know more about an item, and what better way than to actually give this a try and hopefully a taste as well!

To prepare for this endeavor I’ve checked out Mad Millie’s YouTube channel and watched her prepare and make her Mozzarella cheese. If there’s one thing I love it would be cheese and Italian cooking. (OK, that’s two things. But two GREAT things!) In addition I’ve managed to locate some non-homogenized whole milk, there’s no question in my brief readings on Wikipedia and the instructions that starting with the right milk is key.

Hypothesis:
Surely fresh, homemade bread is better than store bought bread so I would hope that homemade cheese would be equally as satisfying.

While I am a tad nervous about the results, I feel like the instructions are clear. Although I am super glad I watched the video, so I have a sense of what my goal should look like. I’m generally good about following directions, although when I cook there are times when I can get experimental and deviate from the recipe to add a dash of this or, OOH that’s a pretty color! I’m just going to have to reign in the wild side and stick to the basics–this time around at least.

I feel like the biggest challenges are the ones I can do little about. For those of you who don’t live in New York, you may be surprised by the size of my kitchen; most surfaces are needed for storage so there’s just a limited number of spots to do your mixing and cooking. Oh, and pardon our appearance while we’re in the middle of renovations (at home)! That and I’m concerned about the size pot to use. My current plan is to use our ancient (I think this is older than me) pasta pot.

Experiment:
Well I have everything laid out, and why yes those ARE our Nesting Prep Bowls back there! The instructions say to sterilize your equipment that will handle the milk for 5 minutes. The challenge will be the colander, so let’s get a bunch of pots a boiling. It’s at this point where I wonder why I decided to do this in a heat wave and without air conditioning. My large pot isn’t making it to a boil, and alas, the lid is lost somewhere in a pile of tools. So, I give it a good 10 minutes rather than 5. Thankfully my colander in the smaller pot has reached a boil as that is my greatest concern. I prepare my ingredients, but I don’t see when I add the salt!

1 - Everything Laid Out
Cheese Supplies

The recipe calls for a full gallon of milk, but my local whole foods only sold the milk in half gallons. And here’s where I have my first tip: Shake the milk before pouring it into the pot. I left a lot of good tasty stuff in the bottle. I decided to use the same smaller pot that was already in action, so it’s already warm and we’re just heating the milk up to just under my current room temperature. (Ouch! The thermometer is reading 103, and while the pot is hot from boiling the room temperature is in the ’90s.) And here’s my next mistake. I can only fit a half gallon of milk into this pot! It’s too late to stop going now, so I’ll just have to adjust on the fly.

Making Cheese | UncommonGoods
Milk for Cheese

I squeeze in the calcium chloride. With the stopper it’s not too hard to simply measure half and then the citric acid and decide to add a tablespoon of salt. I’d already mixed in the citric acid to let it dissolve as if I was going to do a gallon batch, so I have to guestimate how much to pour in. I choose to use more than half as I feel it’s likely that it’s not completely mixed. Because of the heat the mix is at the required temperature faster than I expected and before I can really get everything prepared.

Hot Pot

I quickly turn off the heat and it’s time to add the Rennet tablet. It hasn’t really dissolved, but I hope it should in the milk. I stir it in and cover the milk and set my timer for 25 minutes. After 20 minutes of refuge in air conditioning, I’m back in the kitchen and re-reading the instructions. OH NO! You add the salt in the very last step. So needless to say, I’m very nervous at this point and a bit frustrated at myself.

Ice for Cheese

I set up the ice water and I am trying to get the temperature right for the hot water. I started with warm water, from when I was boiling (rather, trying to boil) my tools to sterilize them and I decide to heat a kettle with boiling water and try to get the temperature right. I end up with water that’s just 140 degrees rather than 158, but I go with it. I check on the cheese and it looks like it’s firmed up to me.

My knife goes in and clearly separates the curds. I slice in the cubes and am a bit nervous. Did I allow enough time for the curds to set? It really just seems like a thin skin of what will become cheese. Once I begin to reheat the mixture and gently stir, the answer soon becomes clear. No. I didn’t. I think the key is to really watch the video. I recognized it wasn’t quite the same. This is definitely a case of being close enough is not going to cut the cheese so to speak.

Cheesemaking Kit

I decide to forge on. Once the curds have reached the warmer temperature I begin to scoop the curds into the cheese cloth and colander. As the curds are loose this takes a long long time and I was not able to maintain the temperature. The recipe calls for letting the curds drain for 5 minutes but the process of just getting them out of the pot takes closer to 15 minutes.

Scooping and Straining Cheese

A little forlorn, I begin to scoop up globs of curd and rest them in hot water briefly. They quickly begin to separate, so I simply start to work them quickly and it’s readily apparent that I do not have mozzarella cheese. I still give them a dunk in the ice water, though, and they do hold up better than I expected.

Squeeze the Cheese

It's not mozzerlla but...

At the end of this experiment it appears that while I failed to make mozzarella I did end up with some REALLY tasty Ricotta cheese.

So tomorrow once the kitchen is once again clean and not quite as hot it will be time to make some lasagna!

Conclusion:
When we did make lasagna with my homemade ricotta, it was AMAZING!

I clearly did not make this easy for myself, and as much as I tried to read and prepare myself, I should have started with the goal of making the simpler recipe for the first time around.

I would emphasize that it is a lot of work to make cheese at home, but that the work has much more to do with the preparation and the clean up rather than the cheesemaking itself. I think it would help to have greater counter space and I’m curious what would of happened if I’d had the larger pot to handle the milk.

I WILL make mozzarella, although not this week. Next time I’m going to do a little more research so I can be confident in the ratio of ingredients I’m going to use. I’m also going to have to have a pot of boiling water on hand so that I can properly prepare my curds and they can be stretched into mozzarella. And now that I know the drill, I won’t add the salt until the end! I’m very hopeful that with this adjustment I will be successful.

The Uncommon Life

Gift Lab: Flip & Tumble + Wine Tote + Bentgo: A-leftovering we will go

November 22, 2013

Research

I hate waste. I’m really OCD about it. Disposable shopping bags, takeout containers, and water bottles really bug me. And yet, I do shop, eat on the go, and need H2O. Thus was born my quest for the perfect personal food transport equipment.

3-ItemCollageHypothesis

Our Flip & Tumble Reusable Shopping Bags are light and small and hold a lot. Sounds promising. Our BentGO Lunch Box is good looking. Most of its lunch-toting brethren are decidedly not. It’s also a good size, and except for the lids, microwaveable (for warming up, not cooking), and dishwasher safe. Also promising. Our Wine and Beverage Tote, with its tough canvas outer skin, seems a lot sturdier than fold-up plastic bottles I’ve used before.

Experiment

Step 1: Shopping.

This was mostly accomplished at the Park Slope Food Coop, of which I am an enthused member. A sustainability-minded organization since forever, the coop doesn’t give out shopping bags. Flip & Tumbles are perfect for shopping there. They weigh virtually nothing, open up in a jiffy (faster and easier than any shopping bag I’ve ever used), hold a lot, and are strong and sturdy. The even have a non-slip patch on the inside top of the shoulder strap.

Giftlab food-bags 016-CROPPED

Here’s how they look full of groceries.

Giftlab food-bags 019-CROPPED

Here are most of the ingredients, spread out. (The bags actually held a lot more than this.)

Step 2: Cooking.

I bought a spaetzle maker no less than 6 years ago, and until now, had never used it. Sound familiar, gadget lovers? I saw this recipe in the New York Times, and knew this was what would make spaetzle happen in my kitchen.

To round out the meal, I decided to make mashed sweet potatoes with lime and honey (the recipe calls them yams, but they are NOT; shame on you, Saveur!) with broiled grapefruit for dessert.

11-18-13UG-giftlab-cooking 004-CROPPED

I put the sweet potatoes in a casserole dish and stuck them in the preheated 350 degree oven.

I then sliced the leeks and cabbage (separately) very thinly in the food processor. I melted a bunch of butter in a big frying pan and sauteed the leeks. But I forgot to take photos of all that, so you’ll have to use your imagination.

CabbageCookingCollage

The savoy cabbage, sauteeing on top of the already-sauteed leeks.

11-18-13UG-giftlab-cooking 021

Above is the mixed white all-purpose, whole wheat, and whole rye flour (yes, I ground it from the berries, here’s why), to which I added an egg and whole milk. It’s supposed to end up like cake batter, not bread dough, so you keep adding milk until it feels right. Because I used whole wheat flour, which the recipe doesn’t call for, I used more milk than recommended, because whole wheat flour absorbs more liquid.

11-18-13UG-giftlab-cooking 001

My spaetzle maker in action, at long last. You pour the batter gradually into the white hopper which you then slide along the holey stainless steel part that’s straddling the pot of boiling, salted water. The dough slips through randomly, drops into the pot, and cooks very quickly, rising to the top.

11-18-13UG-giftlab-cooking 022

It’s pasta…it’s dumplings….it’s spaetzle!

11-18-13UG-giftlab-cooking 027-CROPPED

11-18-13UG-giftlab-cooking 017

The recipe calls for thyme, which I conveniently have growing in one of my kitchen windowboxes.

Now it’s time for it to be topped with grated Gruyere cheese, put in a casserole dish, and baked. But wait–where’s that dish?!

11-18-13UG-giftlab-cooking 044

Oh yeah, it was baking these. When I took them out, I didn’t bother cleaning it, because sugary, gooey sweet potato ooze can only improve a dish. I did mix it in, though, so it wouldn’t just burn on the bottom.

11-18-13UG-giftlab-cooking 032-CROPPED

The casserole in a state of baking readiness.

11-18-13UG-giftlab-cooking 045-CROPPED

The sweet potatoes, mashed with a fork and mingling with their new BFFs: butter, fresh lime juice, and honey.

11-18-13UG-giftlab-cooking 051-CROPPED

20 minutes after being put into the 425 degree oven: Done.

11-19-13UG-giftlab-cooking 018-CROPPED

Now for the broiled grapefruit. Easiest thing ever: cut in half, top with brown sugar (or not), turn broiler on, pop in citrus.

~An interlude, during which I eat this delicious dinner, and sleep. A new day dawns.~

11-19-13UG-giftlab-cooking 025-CROPPED

The true and ultimate destiny of this food, of course, was being consumed as leftovers. I added some homemade kefir I put into a can that I’d fished out from the recycling and washed (see above re: “OCD about waste;” also, it was the perfect size), because I thought it would go well with both the casserole and the grapefruit.

11-19-13UG-giftlab-cooking 038

Stick a fork in it–it’s done.

Step 3: A) Eating and B) Drinking

A) The spaetzle dish, like most casseroles, was even better the next day. It nuked up beautifully in its spiffy BentGO container. I ate it in about two minutes flat. No, I will not show you what that looked like. My mother might be reading this, and it would make her cry to see that all those years of table manners lessons were wasted on me.

UG giftlab-wine tote 004-CROPPED

B) The Wine and Beverage Tote, alas, was filled only with water, because I was at work. (You think I can write all juiced up? No. I leave that to pros.) For purely scientific purposes, I did fill it with wine the night before. Miraculously, it holds an entire, normal-sized bottle, though you have to make sure the bag is poufed out all the way while (carefully) pouring. I recommend red wine, because the Tote isn’t insulated, so the wine will be at room temperature before long.

I really appreciated its sturdy canvas exterior, because it freed me from the nagging worry that something sharp in my bag might gouge it. If there’d been red wine inside, I would have appreciated it even more–no, not because of the alcohol; because of the potential for mess. (OK, the alcohol, too.) Note that I swapped out the original petite black carabiner with a larger one of my own, partly–but ONLY partly, I swear–because mine is pink.

Recipe links:
New York Times: Rye spaetzle gratin with savoy cabbage, leeks and caraway
Saveur: Mashed sweet potatoes with lime and honey
TheKitchn: Sweet and smoky broiled grapefruit