Browsing Tag

Drinks

Gift Guides

From Beer to Booze: Gift Picks for the Home Bartender

October 25, 2017


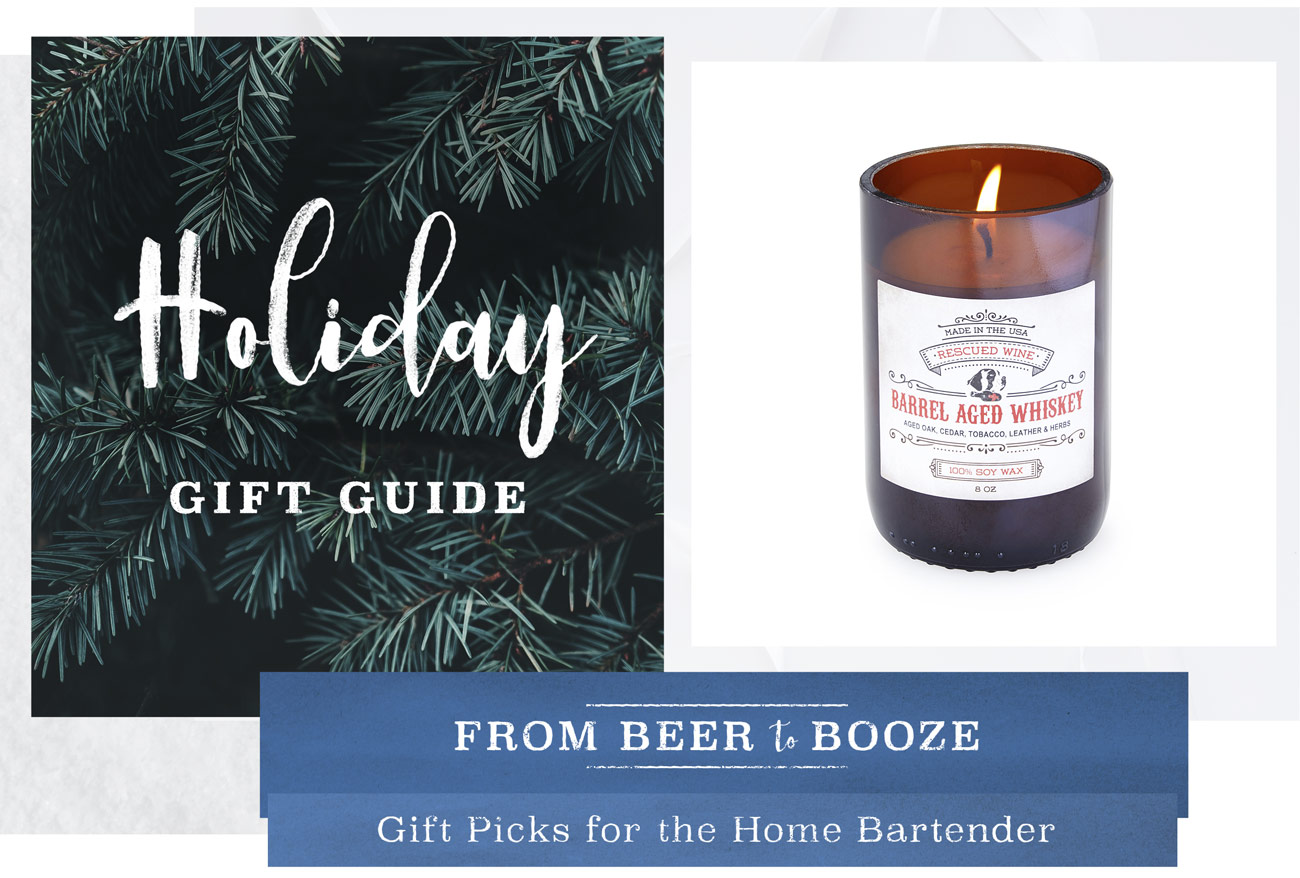
Their fridge is fully stocked with the perfect combination of craft brews and classic beers. Their wine rack is loaded with reds, whites, and maybe even a bit of the bubbly. And don’t even get them started on what it takes to mix the perfect cocktail—the glass, the garnish, whether it’s shaken or stirred—they have all of the details down. That’s right, we’re talking about the Home Bartender. Chances are, you know one of these masterful mixologists, so we’ve gathered a collection of gifts that will surely make any adult beverage connoisseur raise their glass.

Continue Reading…

Gift Guides

Gift Lab: How to Make DIY Tonic

June 10, 2015

MarisaGiftLab_TonicKitedited

Product: Tonic Making Kit


Government quinine factory, Mungpoo, IndiaGovernment quinine factory, Mungpoo, India. Established in 1864 during British rule, via Wikipedia

Research:
Full-blown summer has arrived. In Cocktail Land, the hotter the weather, the lighter and crisper people want their drinks. Which brings us to the gin and tonic.

Tonic water’s bitter flavor derives from quinine, a chemical in the bark of certain species of Cinchona trees native to the Andes mountains of Peru. Quinine’s association with gin – a British booze – came about when India was part of the British Empire.

Continue Reading…

Gift Guides

Gift Lab: How to Stay Cool & Caffeinated with Cold Brew Coffee

May 15, 2015

Abi tests the Cold Brew Coffee Set

Product: Coffee Cold Brew Gift Set

Hypothesis:
Iced coffee is one of my favorite morning treats, so I was super excited to try out the Cold Brew Coffee Gift Set (and drink the coffee in the morning at work). I hypothesized that this set would be a great alternative to spending money at coffee shops.

Research:

The set includes instructions, which I followed to the best of my ability. I am rather impatient, so there were parts that I was tempted to skip, but I stayed faithful to the directions throughout.

Experiment: 
I began by boiling the filter (the instructions say to boil the filter before its first use, to pre-shrink it) in water for 10 minutes. The instructions say that filters “will continue to shrink slightly for the next few uses and will produce the best quality brew from then on.” I don’t have any proof of this yet, but I look forward to tasting all the future cold brew coffee batches to see if taste improves over time.

Boiling the Filter

The provided recipe says to use 2 cups of freshly ground coffee of your choice (the kit comes with two cups ready to go for your first batch).

Coffee Beans

I added the coffee to the fabric filter and “bloomed” the grounds, as per the directions. In this case, to bloom the grounds means to wet them thoroughly and let them stand for 60 seconds.

Grounds

I twisted the neck of the filter, as tightly as I could, and wrapped the tie string around the neck a few times, then slipped the neck of the filter through the glass ring (which is attached to/hanging from the filter bag).

Tightening Filter

Then I inserted the filter into the jar and filled the jar with cold water.

Cold Brew Coffee In The Works!

Luckily I did this at the end of the day in the office, because it takes 12-16 hours to cold brew in the fridge till it’s ready. The next morning, I would get to sample my first batch of cold brew!

Conclusion: 
Fresh Coffee | UncommonGoods

Ta da! I opened the fridge to find some actual cold brewed coffee. It looked pretty good, smelled delightful, and was also tasty. I did feel that it was a little weak, though. I removed the filter, dumped the grounds into the compost bin, washed the filter out, and set it out to dry until I made my next batch.

Finished Coffee

The kit comes with a pouring device that fits inside the lid, which works quite nicely for pouring the coffee once its done.

Drinking Cold Brew Coffee

People don’t naturally look at a camera when they are drinking coffee, but I wanted to show you that I was trying the coffee I just made, and allow you to fully see the expression on my face while I first tasted it. I look pretty strange, but I assure you, the coffee tasted good and I was excited to be trying it out.

Yumzies! |Delicious Iced Coffee with Coconut Milk
Here I am, showing off the final product, in my favorite glass, complete with almond/coconut milk. So yummy!

In case you are wondering (and you really might be curious about this), I do not add sugar to my coffee, unless it tastes completely awful. I did not even consider adding sugar to this batch. I found it very yummy (though, like I said, I would have liked it to be a bit more concentrated).

During my next trial, I filled the filter as much as possible (this was probably almost 3 cups of coffee grounds). It was delicious but quite strong. I think two and half cups is probably the ideal amount of coffee grounds that should be used for this cold brew coffee (at least for it to be just right for me). I’m excited to use the Coffee Cold Brew Set this summer to beat the heat in a very delicious way!

blogcta-abigiftlab

Gift Guides

Gift Lab: How to Make More Creative Cocktails (Through Science!)

April 6, 2015

Erica gives the Molecular Mixology Mojito Kit a Try | UncommonGoods

Product:  Molecular Mixology Kit – Mojito Set 

Research:
I’m usually a straight whiskey or red wine drinker, mostly due to laziness and complete lack of skill with any drink that requires shaking, stirring, or straining, but I was curious to see if the Molecular Mixology Mojito Kit could help me hone my cocktail skills. My idea of mixing a drink is adding a little Diet Coke to the whiskey, so there’s a lot of room for improvement. To prepare, I watched the product’s Youtube video, which led me to believe that I, too, could create fancy drinks in just a few steps and stocked up on rum and mint leaves.

Hypothesis:
I will be the best bartender since Sam Malone and impress my friends. Besides, Molecular Mixology sounds somewhat hipster, and with my recent move to Brooklyn, maybe this kit could help me better fit in to the new neighborhood.

Experiment: 
Materials Needed:
Molecular Mixology Kit
Hand Blender
Bowls
Mint
Rum
Club Soda
Ice
Sugar
Stove
Pots
Friends

I cut the recipes in half because they make a huge amount of mojitos and it was a school night. Since my mission this evening is to be fancy, I decided to start with the mint caviar recipe. What could be fancier than caviar?

Experiment 1, Mint Caviar:

Step 1:
I first read through the instructions and gathered materials.

Step 2:

Making Caviar Mojitos | UncommonGoods
Impatience won out over the instructions I just read, so rather than bringing the sugar, mint, and water to a boil on the stove, I used an electric kettle to boil the water and poured it over the sugar and mint leaves.

Blending the Mojito Caviar | UncommonGoods
Step 3:
I then blended the mixture together, strained it, and added the Sodium Alginate packet before letting the mixture sit for 30 minutes.

Step 4:
Watch an episode of something on Netflix while the Sodium Alginate mixture sits (for best results, try Unbreakable Kimmy Schmidt).

Step 5:
Add Calcium Lactate to a separate bowl of water and stir.

Caviar Dropper | UncommonGoods


Caviar Dropper and Bowl
Step 6:
Fill the pipette with the Sodium Alginate mixture and add to the Calcium Lactate bowl in drops. This was by far my favorite part, because the mint caviar formed right away and this step felt the most like I was doing science. Having wine on hand helps the process and is good insurance in case the molecular mixology doesn’t end well.

Rinsing Mojito Caviar | UncommonGoods
Step 7:
Remove the mint caviar from the solution with a sieve and rinse with water.

Step 8:
Put the Caviar in the bottom of a glass and cover with blended ice, rum, and club soda.
Molecular Mojito | UncommonGoods
Step 9:
Stir and sip. This wasn’t the best mojito I’ve ever tasted, mostly because the mint flavor isn’t distributed throughout the drink, so depending on how much caviar you get in each sip, it tastes more or less like the cocktail should. But what it sometimes lacked in consistent flavor it made up for in cool factor, and I would eat those mint caviar drops by themselves. Next time—and they give you enough of the chemical packets for several next times—I would add food coloring to the mint solution so it is more festive and interesting to look at in the glass. I also might try making the caviar for different types of drinks and flavor combinations.

Experiment 2, Mojito Bubbles:

Mojito Bubbles | UncommonGoods
Step 1:
Put Calcium Lactate, sugar, mint, and lime wedges in a high ball glass and crush wish a muddler. Since I have neither a highball glass nor a muddler, I bashed them together with a spoon in a plastic cup. Less classy, but it got the job done.

Step 2:
Add rum and club soda. Mix until the calcium is dissolved and filter.

Mint Bubbles | UncommonGoods
Step 3:
Place mint leaves in the bubble mold and fill them with the liquid mixture. Freeze.

Step 4:
SCIENCE! Dissolve the Sodium Alginate in a bowl and blend. Unmold the iced mojitos into the bowl and stir. Because I didn’t read the directions first to see that they needed to freeze and started these late, I didn’t get to this part until the following morning.

Step 5:
Pick up the spheres with a slotted spoon and rinse them in a bowl of water.

Molecular Mixology - Mojito Bubbles | UncommonGoodsBreakfast of Champions

Step 6:
Enjoy! While slightly more involved, I much preferred these to the mint caviar mojitos. The bubble bursts in your mouth and fills it with an intense mojito flavor. Kind of like grown up Gushers.

Conclusion:
I could see using this kit to make drinks for a special dinner or event, but it was also very fun as an activity for a night in. The directions were easy to follow and provided fun science facts about the process. My friends all really enjoyed the science aspect of the kit, and there was something very satisfying about completing the full process and presenting a beautiful drink rather than just gulping it down. Next time, I might try experimenting with different drinks using the chemical compounds provided. While I won’t be leaving UncommonGoods to open my own bar any time soon, I learned something new and now have a fun activity to use again in the future.

Get the Molecular Mixology Kit!

Gift Guides

Gift Lab: Adding a Tropical Twist with Gourmet Island Sugar

December 22, 2014


Louise Geller | UncommonGoods

Product: Gourmet Island Sugar Set

Research:

I hadn’t heard of Old Salt Merchants until I saw their product on the UncommonGoods website, but their adorable packaging and interesting flavors prompted me to take a closer look. A family-run business out of Seattle, Old Salt Merchants makes a point of sourcing fair trade sugar, keeping their products cleanly and simply made, and focusing on a small product line of the highest quality. These are all values I really appreciate, and as an avid home cook I’m always looking for new ingredients and ideas for my kitchen, so I knew I’d have fun using the Gourmet Island Sugar Set to develop a great meal.

AllSugars

Hypothesis:

Using the Lime Slice, Jamaican Ginger, Rum Soaked and Coconut Breeze sugars, I will develop a full meal where each dish includes one of the flavors. They will elevate my recipes and inspire me to try out new ideas.

Experiment:

My boyfriend Paco joined me in my quest to find interesting ways to use the four sugars. We went shopping on a Saturday afternoon and came home loaded up with ideas and ingredients.

Lime_done

Lime Slice Sugar
We decided to start our evening with a cocktail. All four of these flavors could most certainly be used as cocktail ingredients and for delicious sugar rims, but we chose the Lime Slice sugar to try out with one of our favorite cocktails: the traditional Mojito. Paco muddled fresh mint and lime while I prepared a dish of the sugar and a bowl of water to line the rims of our cocktail glasses. The Lime Slice sugar is made with raw sugar, so the granules are large and have a great crunch. The lime adds a bit of acidity and a bit of bitterness – it’s not so delicious on its own, but I could tell when I taste tested it that it would add a lot as an ingredient.

Lime1

I can’t stand overly sweetened cocktails, so I liked the idea of a sugar rim that would allow me to control when I got a shot of sweetness and when my sips were more focused on booze and citrus. The raw sugar also added a textural element to the cocktail that we both found very pleasing. Our cocktails would have been delicious on their own, but the Lime Slice sugar rim definitely gave them a little something special. Although we were sitting on my couch and it was 39 degrees outside, I could have sworn we were poolside in Miami.

Lime2

After pre-dinner cocktails, it was time to get cooking! For the side dish to our meal, we decided to also use the Lime Slice sugar. It was autumn when we conducted the experiment, and that means brussel sprouts are everywhere. One of our favorite preparations for brussel sprouts is to sauté them in toasted sesame oil, then splash a bit of sriracha on top. This time, when they were almost done, we sprinkled on some Lime Slice sugar to temper the spice. The results were delectable – all the flavors married together with no one element overwhelming any of the others. We agreed that the Lime Slice sugar made a great addition to this dish, and I’m looking forward to making it many more times during brussel sprout season!

Lime2_Done

Lime2_1

Rum Soaked Sugar

There are many meats that work well with the use of sugar in glazes or marinades, but I definitely tend to think of pork products as standing up best to sweetness (eg pulled pork, maple bacon, glazed ham, spare ribs). The richness of the meat can hold its own next to a sugar-based topping. I generally don’t want to put too much sugar on my meat, but I thought a small amount of the Rum Soaked sugar would go a long way. A small taste test made it clear that “rum soaked” is an apt way to describe this sugar – it is obvious that there are no artificial flavors happening here. I mixed some garlic, cayenne, salt and pepper in with the sugar and rubbed it on both sides of the pork, then seared it on the stove before transferring to the oven (the best way to get a tender and juicy pork chop). As soon as the sugar started to caramelize, it was clear we were going to have some succulent pork chops on our hands. They were delicious – the rum blended fabulously with the other flavors, and the sweetness was present but not overwhelming. The chops were rich and juicy, and we made short work of them.

While I’m personally not a vegetarian, UncommonGoods is an animal-friendly company, so keep in mind that this recipe is my own. This sugar would also work well for vegetarian or vegan recipes, for those who don’t eat meat. Portobellos would make a good alternative to pork. Or, you  could also try this recipe with traditional meat substitutes like tofu.  The Rum Soaked sugar would also make nice glazed carrots.  Just remember that you’d need to add some oil or melted butter to the sugar and seasoning mixture for any of those, because they don’t have their own fat.

Rum_Done

Jamaican Ginger Sugar
The moment I saw the Jamaican Ginger sugar, I knew I had to pull out one of my favorite childhood recipes for chewy ginger and molasses cookies. The recipe calls for the cookie dough to be rolled into balls and then coated with granulated sugar before being baked. I figured this could only be improved by rolling them in sugar infused with the flavors of fresh ginger. The Jamaican Ginger sugar is also raw, so I knew there would be extra crunch on the cookies, which is a definite bonus in my book – I’m all about textural pairings, and crunchy + chewy is a winner. The ginger adds so much spice to the sugar that you can feel it in your sinuses when you taste it on its own. We were a little worried the flavors would be too strong, but we needn’t have been concerned – the cookie has enough sweetness of its own that the extra kick of ginger is nothing but a joy. This was a huge success, and I will soon be making these cookies again for the holidays!

Ginger_Done

Ginger1

Coconut Breeze Sugar
It’s getting chilly in New York, so hot chocolate has been on my mind. I never buy hot chocolate mixes; I prefer to make my own using unsweetened cocoa powder and adding sugar (again, I’m a bit of a control freak about sweetness). I’ve always loved the combination of coconut and chocolate, so I thought it would be fun to replace the regular granulated sugar I would typically use with the Coconut Breeze sugar. I am calling it CocoCocoa (feel free to use that).

Coconut_Done

I usually use about a tablespoon and a half of cocoa and a tablespoon of sugar to make my hot chocolate, but this time I used a one to one ratio because I was worried about the chocolate overwhelming the coconut flavor. My dutch process cocoa powder packs a big punch, and I still only got a hint of coconut in the finished product. It was delicious, but I was hoping for a more balanced flavor. Next time, I will probably use the coconut breeze sugar to sweeten my fresh whipped cream – I think that will help the flavor stand out more.

Coconut1

And of course, I can’t possibly enjoy cookies and hot chocolate without breaking out my UncommonGoods Face Mug!

FaceMug

Conclusion:

As I’d hoped, the Gourmet Island Sugar Set led us to a delicious meal that was outside the norm of what we’d usually make. We also came up with additional ideas for how to use the different flavors as we were working (lime sugar/sea salt margarita rim, ginger sugar with soy sauce and garlic as a beef marinade, and coconut sugar topping for banana nut muffins, to name a few). I felt good about using this product, knowing each flavor only had two ingredients, all the sugar was fairly traded, and that I was supporting a family-owned small business. I’m excited to use them again!


Gift Guides

Gift Lab: How to Make Cocktail Bitters

December 19, 2013

Morgan | Bitters

Research
I’m a devoted whisky (and occasionally whiskey) drinker and usually enjoy my Scotch like I enjoy the top shelf of my dresser: neat. But I was intrigued to see if bitters might prove an opportunity to salvage a liquor I’ve all but quit–rum. The recipe calls for a high-proof rum, so I picked up one of my favorite antiseptics, Bacardi 151. I also bought an aged rum (to test my bitters in later) that I was hoping might change my opinions of the drink. That rum, Plantation Grande Reserve (note the fancy pants name), was a vast improvement over any rum I could remember tasting (in either direction), in my younger days, so I was looking forward to a different experience, perhaps.
Bitters 1

Bacardi 151? Hello old friend.

Hypothesis
I don’t think I’ve ever tried bitters before, but I’m coming in with a semi-open mind. I like bitter things. There’s something smart-sounding about the word “bitters.” As I have a general preference for straight alcohol, I’m not sure how much this will “add” to the experience, but perhaps since I’m less predisposed towards rum, it may make that drink more enjoyable. (Spoiler alert: I cheated and came up with this last line after the experiment.)

Experiment
Preparing the mixture is actually a good bit of fun, adding the composite spices and ingredients as if your high school science teacher were a part-time bartender. (I didn’t see you and you didn’t see me, Mr. Chard.)

DIY Cocktail Bitters | UncommonGoods

Here I am masterfully peeling an apple and not cutting myself, the skins to be mixed into the jar of rum and spices. No blood! Easy enough.

The preparation requires a morning and evening shake of the mixture in its jar, which is a fun way to interact with your little blooming bundle of joy, and to appreciate the visual richness and beauty of the concoction as it does its thing. Eventually you’ll forget to shake it one morning and you’ll feel guilty for the rest of the day. Just let it go–it’ll be fine.

DAY 1 TEST
Finally, after a long and eager wait, 2 weeks are up and it’s time to open my present! Hold on there just a minute, bud–a few more steps before we’re ready for cheers. First we have to strain through cheesecloth (which doubles as gauze if you cut yourself peeling that apple earlier–try to use the clean portion).

Bitters | UncommonGoods

The liquid is separated from the solid ingredients, which are placed on the stove to simmer with water then cool. This is a good opportunity to be extremely impatient, blow on the mixture, and just dump it in hot anyway. (Again, you’re probably fine.)

Bitters in Process | UncommonGoods

After cooling, we strain the mixture once again. OK, this is your exit solids! In the trash you go! We then get started on simple syrup (a sugar and water mixture that is heated and added in equal parts to the rum mixture). Add to dropper bottle then the big payoff.

I decided on bourbon because, well, I like bourbon and it seems to feature in a good number of bitters cocktails. I could make a cocktail, but I’d rather really taste the bitters here just to see how they work with the alcohol. A bit of bitters drip drop into some Buffalo Trace bourbon.

Drinking Bourbon

Unfortunately, it wasn’t doing it for me. Nope. Had I done something wrong? I don’t think so. Was it last Friday when I neglected to shake the bitters? Were they exacting their revenge? Nah – I don’t think bitters hold grudges (although they are called bitters…). I think it was just the combination. The iconic Buffalo Trace flavor now muddled into something indecipherable and a bit all over the place. I added a bit more but that just added to the confusion. My eyes saw the Buffalo Trace and my mouth was failing to compute.

Give up? No way. We’ll try again tomorrow.

DAY 2 TEST
New shirt, new day, new opportunity to drink.

Back on the saddle and off the wagon with something a bit more compatible, perhaps – rum. Yes, my aged rum would make a late-game, surprise guest appearance in a highly unscientific evaluation.

In one glass – straight aged rum
In the other – that same rum with a few drops of bitters.

Bitters and Rum

This one makes sense. The rums obviously blend well, and this time I’m able to actually taste the spiced apple. Not overpowering, but definitely adds another dimension. Yeah – I get it.

Conclusion
I could see this enhancing a mediocre rum or allowing for a drinker to taste a decent one from a different perspective. I imagine you could mix into a number of different cocktails with different alcohols. (The instruction booklet names a few.)

The highlight for me though was the process. Enjoying a drink usually consists of nothing more than opening a bottle and pouring it. Occasionally this might involve stirring in a few extra ingredients–and sure–there are even bitters you could buy. But there was something very satisfying about the process; in the interaction with all the individual ingredients, in the ultimate unification of those flavors. There was something satisfying in the wait. Alcohol is one of those things that can take longer than anything to get right. We buy liquors that have been waiting for years, heck, decades to taste just right, then we sip them and they’re gone.

This kit represents the process, the time, the care that goes into a good drink. This probably won’t change my lineup of standby drinks or undying love of a good straight Scotch, but it was an interesting ride, I learned a bit, and I have something new to taste along with some of my old favorites. Nah, I ain’t bitter.

The Uncommon Life

Mixtape Mixed Drinks: Wine (Not a Cocktail, but still in the Mix.)

September 15, 2013

I like cocktails, but I love wine a whole lot more. Nothing sounds better to me than pouring a glass of red wine into my new Mixtape Glass and playing these 7 feel good songs that gets me smiling (and, unfortunately for my neighbors, singing) every single time. I would title my mixtape mix: Keep Calm & Treat Yo’ Self (to a little wine). Some may call this the Lazy Girl Drink, and …I’m okay with that.

Wine in a Mixtape Glass

No time or just don’t feel like mixing a drink? There’s nothing wrong with a little fresh-from-the-bottle wine!

The Drink:
1. Uncork the Cabernet Sauvignon (or that cheap wine bottle you bought from your nearest bodega).
2. Pour.

The Playlist:
1. Part of This World – The Little Mermaid
2. Don’t Stop Believing – Glee Cover
3. The Way You Make me Feel – Michael Jackson
4. Quelqu’un M’a Dit -Carla Bruni
5. Dog Days Are Over – Florence & The Machine
6. Anything Could Happen – Ellie Goulding
7. Let’s Get it On – Marvin Gaye

Gift Guides

Gift Lab: How to Stay Chill & Kick Back Cold Ones

June 11, 2013

Research
I was already familiar with the Corkcicle, but was excited to hear of the introduction of the Chillsner— a stainless steel tool you freeze and then put in your beer, juice, or soda.

Hypothesis
My hope is that my beverage remains cold, even if I get distracted playing video games.

Experiment
I have to admit I was a little skeptical about using the Chillsner. Also I was a little nervous my lips would get stuck to it, due to the Chillsner’s time in the freezer. So on the first night, I put the product in the freezer for an hour. (The instructions call for 45 minutes.) I took it out and stuck it in the bottle, but not following the instructions, I spilled some of my beer because I didn’t take a sip first. Stupid physics.

The first attempt worked pretty well, even though I purposely put the Chillsner in a warm beer, and it cooled it pretty quickly. Yum.

The next night, the Chillsner had been in the freezer for 24 hours. My lips still didn’t get stuck. Also I made sure not to spill my beer. It kept my chilled beer chilled as I nursed it for an hour and a half. Normally I don’t take this long to drink a beer, but sacrifices must be made in the name of science.

Conclusion
Overall, I was pleased. My beer stayed cold for much longer than I was used to. I look forward to using the Chillsner this summer.