Browsing Category

Gift Guides

Gift Guides

Kinetic Sand: Sculpt it, Spread it, Move it

May 31, 2013

The moment I saw Kinetic Sand, I was addicted. At first, I played with it and felt like I was a kid at the beach again, playing with sand castle molds. I couldn’t wait to bring it into our assortment. I brought it to the office to pass around to my coworkers – my teammates absent-mindedly played with it during meetings and at their desks. It’s fun for kids and also the perfect stress ball or thinking toy. I love sharing this item with friends, because as soon as people understand what it is and what it does, they can’t get enough.

Here are a few examples of what happened when I introduced some unsuspecting members of our team and artist family to this workable, sandy substance.

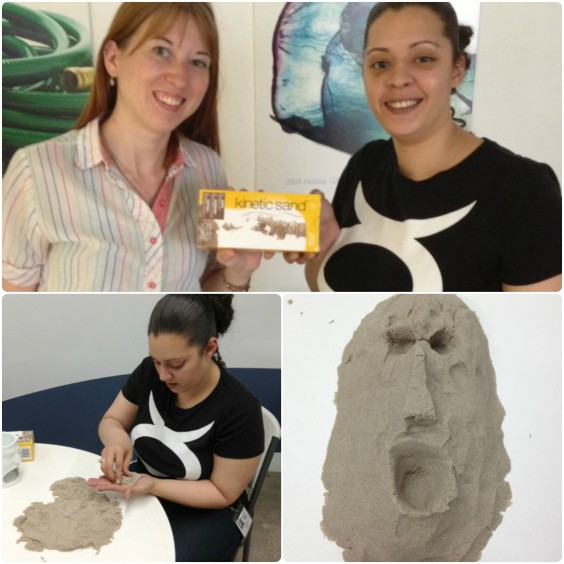
First, customer service specialists Valerie and Lauren gave this not-quite-putty a try.

They mushed it, squished it, and watched it flow.


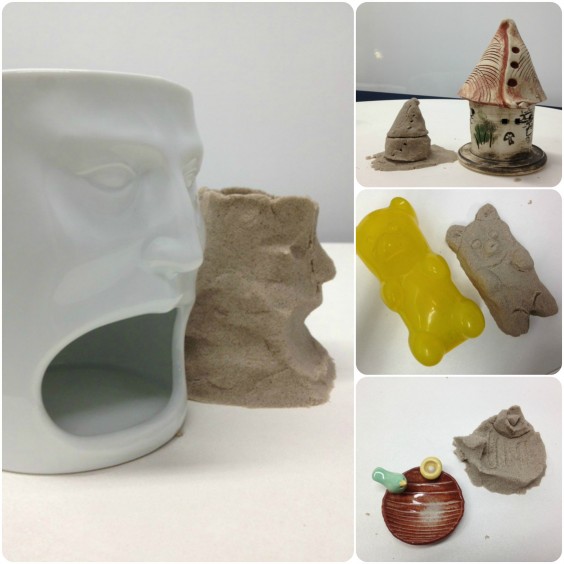
Then they practiced their sculpting skills by reproducing some of their favorite uncommon goods.

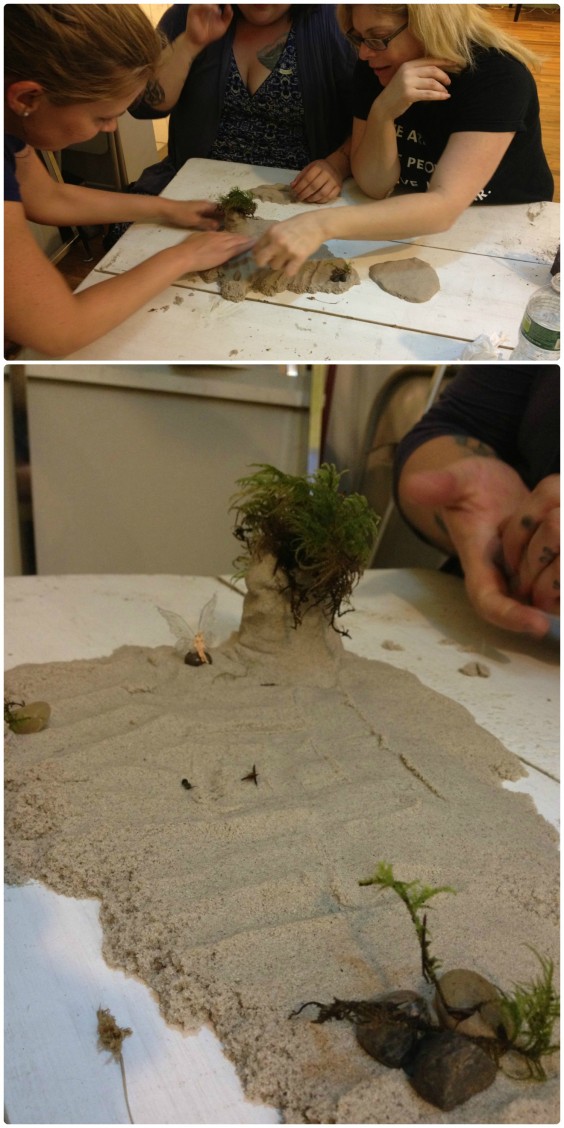
Tabletop Buyer Candace brought her sand on a visit to Twig Terrariums, and Michelle and Katy’s reaction was priceless.


I’m sure keeping a few piles of Kinetic Sand around the office will result in many more impromptu product testing sessions. After all, it’s proof that you can have fun in the sand without spending a day at the beach.

Gift Guides

Gift Lab: From Wine Bottle to Watering Globe

May 28, 2013

RESEARCH
Ok, so I don’t have the greenest green thumb, but I love having fresh herbs and veggies on hand. When I’ve planted in the past my poor plants’ main downfall has been lack of water. If my sprouts are not directly in sight every day I tend to forget them. The backyard for my apartment building is accessible, but it isn’t exactly easy to get to each day, so I need a watering system that will babysit my sprouts a few days a week. I’m hoping the Plant Nanny is up for the job!

HYPOTHESIS
The Plant Nanny will keep my herbs and tomato plants well-hydrated without daily watering sessions on my part.

EXPERIMENT
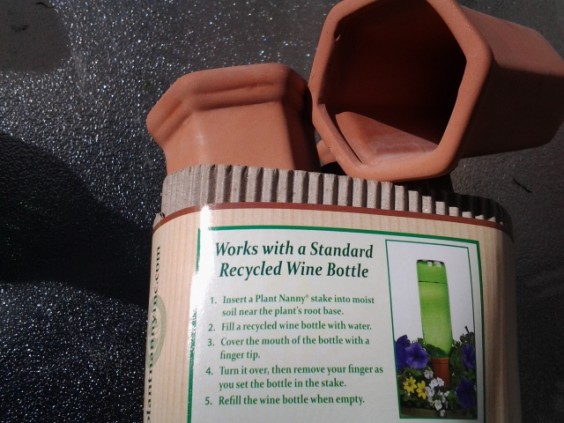
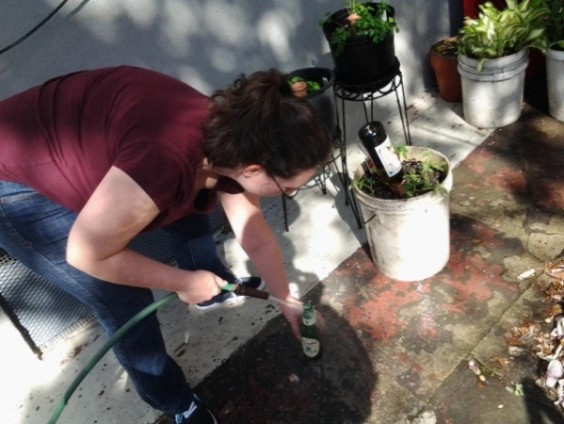
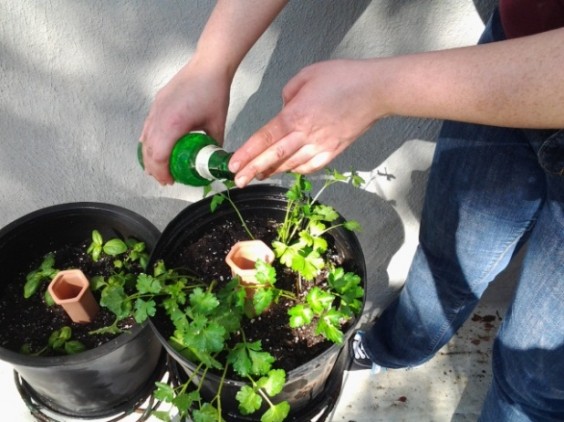
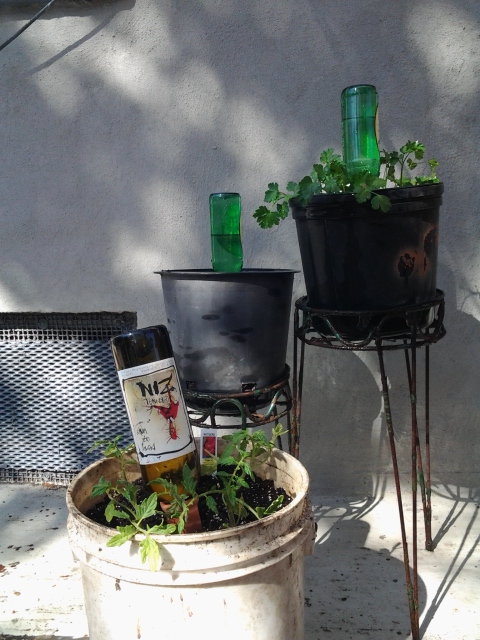
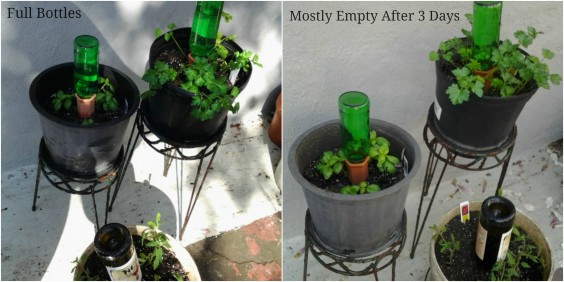
I got my seedlings home and potted in a sunny spot. I also brought home the Plant Nanny wine bottle set. Because my herbs went into pots on the small side I decided to try empty beer bottles for their Nannies. The tomato plants went into a larger pot, so they got a wine bottle. The necks of the beer bottles fit just about perfectly into the wine bottle Plant Nannies. But I wasn’t certain that the water would hold out in them over the next few days.

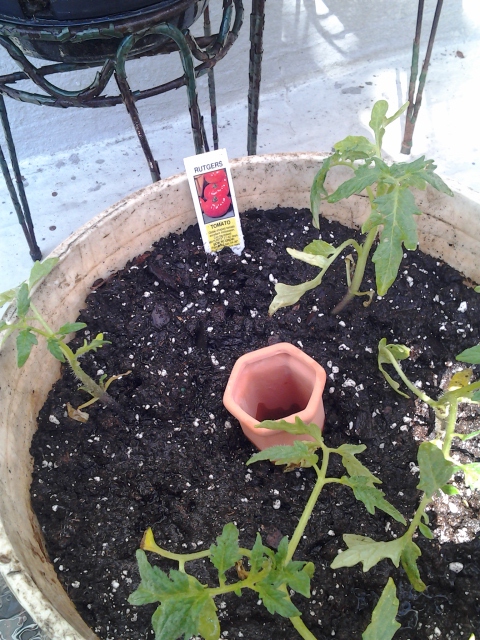
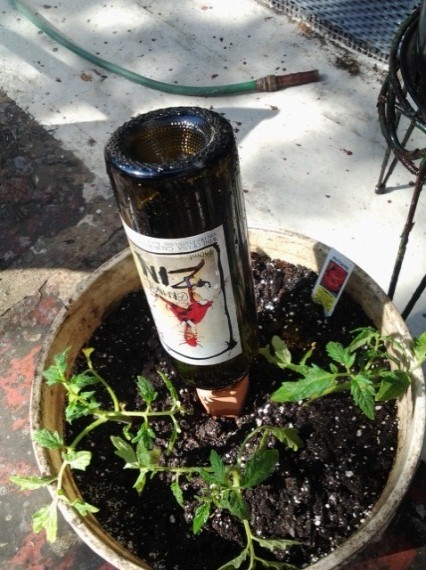
The directions recommended that the end of the Plant Nanny should be pushed down by the roots. This was easily accomplished without over-packing the soil too tight or crowding out my seedlings.

It was also really simple to get the full bottle into the Plant Nanny. The directions noted to put a finger or two over the top of the bottle before tipping it into the Plant Nanny. The water filled the base of the nanny and balanced out without losing hardly a drop.

Ok, so I have to admit I thought the upside-down bottles might not be that great looking. (Course, neither do the re-used pots I got from a neighbor that was going to chuck them.) It turns out that they look pretty cool, and I can already tell that they’ll blend in a bit better once my plants start to fill out.

CONCLUSION
So, I did my planting on a Sunday afternoon. By Wednesday morning there was only a bit of water left in the both the beer bottles and the wine bottle Nannies. The small-bottle-to-small-pot and large-bottle-to-large-pot idea worked out well with the wine bottle Plant Nannies! The soil in all three pots was moist without being overly flooded.

Looks like I’ll be able to let the Plant Nannies “babysit” for about 2-3 days at a time. If we hit a dry spell I plan on checking my plants every 1-2 days to be on the safe side.

Gift Guides

How to Create Your Dream Wedding Registry

May 20, 2013

Not to sound overly girlie or cliché, but getting engaged was absolutely one of the happiest, most blissful moments (weekends) of my life. And sure, now five months later I am entirely wrapped up in comparing caterers and photographers and yes trying on many, many white dresses and making many, many decisions (who knew there were so many decisions to make?). It’s been a total blast. As it turns out, I love planning! Now, that’s not to say I haven’t had my moments – total emotional breakdowns/spazz moments … I am somewhat comforted to know that I have found this to be a shared experience among just about all my engaged/married friends. (This is a highly emotional time, people!) but I am getting better at thinking big picture and turning any moments of stress into excitement. I think by the time our wedding date rolls around, I’ll have this down to a science. Until then: lots of deep breaths, long runs and on certain nights: copious amounts of wine.

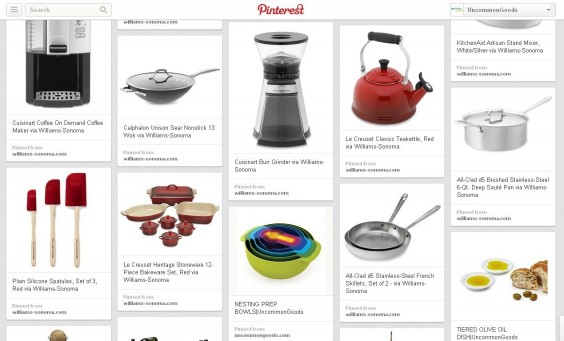
Katie’s Uncommon Registry board on Pinterest

As for some of those details – while we are taking some liberties with certain “traditions”, building a registry was one of the most fun projects I have worked on during this flurry of planning – and we approached this in a somewhat traditional sense – all while infusing our personalities into it from bottom to top. I have been to enough weddings in the past 2-3 years to see several approaches to registries, and being in the retail business and overall a product-passionate person, I am at somewhat of an advantage as to knowing what is in the competitive landscape for products. Here are some tips of the trade and from my experience that might be useful for anyone who is just getting started in this:

(1.) SET UP MORE THAN ONE REGISTRY:
We tried a few different approaches, and in the end, we chose to register with four different sites. We wanted to make sure we gathered the best products from the best sources to match our taste and needs, rather than trying to retro-fit into one or two retailers who might not have exactly what we wanted. Not to mention, a lot of traditional retailers don’t carry the really unique, wow items to add personality into your home. I also really love when my friends register at a few different places, so that I can mix and match gifts and price points to give them what feels like a cohesive package of goodies.

The first place we registered with was the service Knack. We used this to pull in items from sites that did not have their own registry or if there were not enough items on the site to rationalize an entire registry. I had used Knack for friends’ registries and found it exciting to see items aggregated from funky, smaller stores. I liked that it opened up the market for registering outside of traditional retailers, but the checkout process was somewhat laborious to use. (E.g.: to purchase an item, you click into the item page from the main registry page, select “Buy Now” – which then takes you to the separate retailer site to purchase. Once you purchase it through the other retailer (and have to enter in all address information, etc), then you have to click back to Knack to tell the service you purchased it. Not the easiest, I did not check out correctly the first time I used it and I consider myself a pretty tech-savvy person! After imagining some of the less tech-savvy folks in our life trying to use this service, I decided to break out what I could onto separate, more traditional registry sites.


Your wedding registry is an opportunity to show off your style and point to the “wow” items you’re dreaming of.

(2.) ASK FOR HELP!
After building out registries which solved for pots and pans, plates and cups, coffee makers and cookbooks, I thought I had thought of everything. Well, thankfully, I sent our registry links around to my mom, sister-in-law, and my fiancé’s mom. Definitely ask around, while there are tons of wedding planning books and websites, I found getting advice from the people who know us best to be the most helpful. They knew we didn’t need overly ornate plates or silver serving pieces, but they also jumped on the fact that I had missed sheets and towels and silverware.

(3.) MAKE SURE TO GET YOUR PARTNER’S SIGN OFF
Building the registry was something I decided to take on and consult with my partner after I was more or less finished. I built out the above described registries, added the links to our wedding website, and before I knew it our family and friends were jumping on items as engagement gifts. (What a lovely surprise!) Luckily, my fiancé and I definitely share a similar taste level and aesthetic so I was not too far off. However, once I saw people starting to buy items, I decided I ought to run the registries by my fiancé. The process of editing was funny, while I tried to pretty much stick to the essentials, I may have tried to slide in a few decorative accents that he quickly and swiftly gave the axe (a handmade bell, Katie, really??). So, make sure you are BOTH on the same page to avoid glares from your one and only after the wedding.

Overall, building a registry is a super fun project; I think this is because it allows you to start picturing what this next phase of our life might look like. Sure, we have lived together for going on 4 years now and have stocked cabinets, but our kitchen is largely a patchwork style collection of cast off odds and ends from our moms’ kitchens (happy to clean out their pantries), plates we picked up from the free shop at a oft-visited dump in New Hampshire, and–most notably–our collection of pots and pans from a particularly successful yard sale day. For two people who love to cook and entertain, curating a collection of items to use on a daily basis was an exciting foray into – dare I say – true adulthood. Because really, I think it’s when you own your first Cuisinart that you can call yourself an adult. But it was during the selection of goods that I realized we could hand pick the items that we would use not only to use to heat up soup on a typical Monday night of netflix-marathon watching, but to make our home with, to serve holiday dinners with our families, and in someway, to define who we are as a couple and how we want to make our home. That being said, I believe our kitchen, and our home will always be a patchwork of odds and ends, but at least now we might have matching tops to all our pots and a functioning coffee maker!

My biggest words of advice: Make it about who you are as a couple. If you never bake, don’t register for bake ware; if you aren’t the formal type, register for some high quality, but funkier versions of things – everyone needs plates to eat off of, you don’t need to go for the super expensive kind if they don’t suit your lifestyle. The rules have changed a lot, embrace the freedom to build your home together and have fun with it. When in doubt, consult your family and friends for help, they will love it!

Get your registry started at UncommonGoods!

Gift Guides

10 Gadgets That Every Kitchen Needs

May 20, 2013

I am a newlywed (1 month on the 27th) and when going to register I thought that I wouldn’t really need much. I mean I have lived in NYC for 13 years so I have acquired lots of stuff. I’m not much of a cook… I guess I was spoiled by my mother who had an amazing dinner almost every night for us, and a new hubby that seems to have more energy than me at the end of the day. I know, a little ironic since I’m the tabletop buyer. And I live in NYC which means space is limited.

But… THERE IS SO MUCH GREAT STUFF OUT THERE! Get rid of the clutter and ask for new kitchen tools that are well designed, efficient, not difficult to use and functional. Here are some items from the UncommonGoods that every kitchen needs and even make me want to help out more.

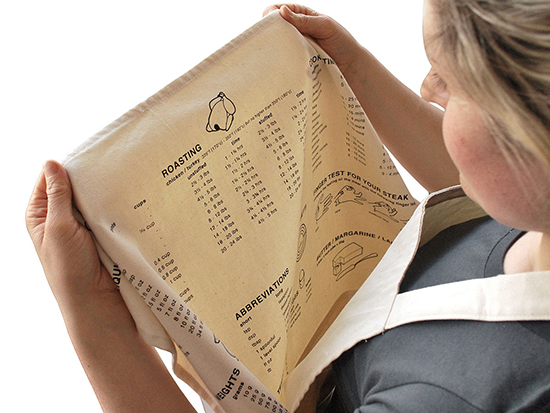
This apron is perfect for people like me that don’t cook enough to remember how long I should steam those carrots and too tired at the end of the day to remember how many pints are in a cup. Apron is much better to put your dirty hands on rather than an expensive smart phone!

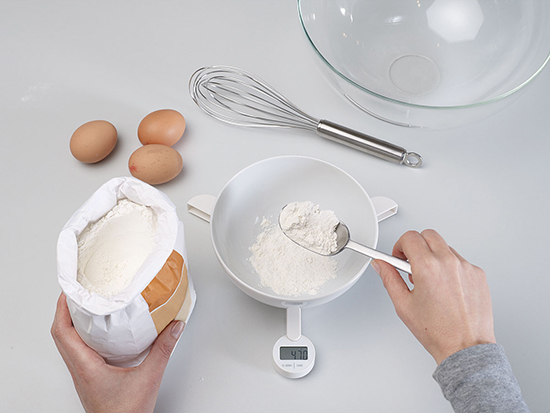
Again, I live in NYC which equals NO SPACE. This is the perfect! It folds up neatly into your utensil drawer. I mean what kitchen doesn’t need scale… weighing food or other things like a toy fox terrier (mine is only 5 lbs).

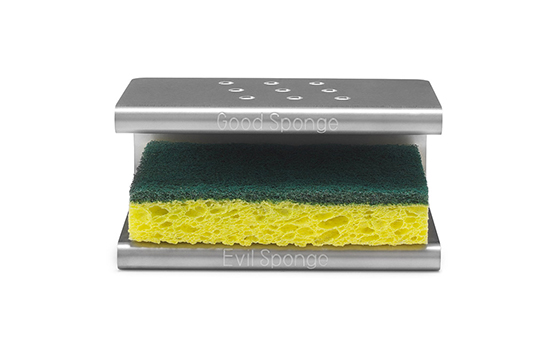
I am so appreciative of my lovely new husband. He helps so much. That being said, it completely grosses me out to use the gross older counter sponge when washing the dishes. That is why we have two sponges… Spongester keeps things straight.
Modern and lovely! We have started composting since we have started juicing. So much great compost material! This is a sleek way for any home to compost, concealing unsightly mess and odors.

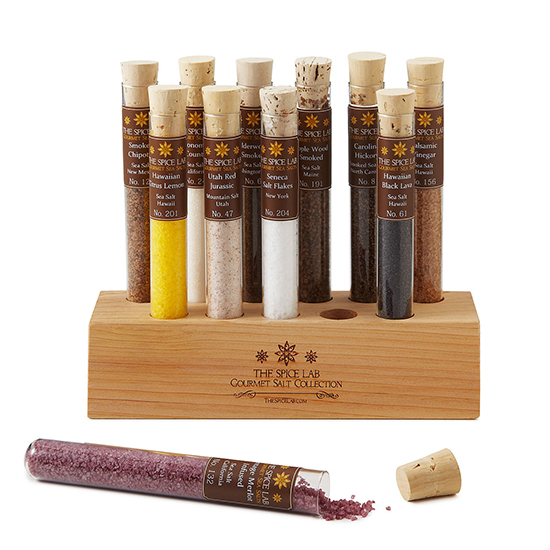
Flavors of America Salt Collection takes my taste buds around the US. It is attractive display and the test tubes are reusable. Sold!

Once again, NYC space constraints… 10 bar tools in one… ’nuff said. (I like my cocktails fancy so the channel/zester tool is my favorite.)

I adore the Horseshoe Heart Trivet. It brings me back to my Texas roots a little, and you never really realize how much you need a trivet until you don’t have one. This one is perfect. The design is cool and has well thought function, the craftsmanship is outstanding, it is handmade in the USA, and it is good luck (horseshoe) and reminds you of love (heart) and/or your childhood in ‘fill in the blank’. You can leave it out as a functional décor piece, or it can even moonlight as a spoon rest. So great!

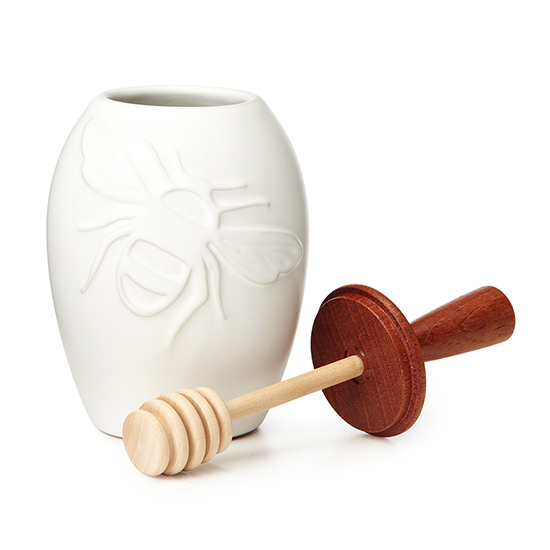
I have a sweet tooth but I try to stay as healthy as possible. I use honey in my tea, on toast, on cereal, with brie… the list goes on. This is a really beautiful container to keep honey out and at arms’ reach at all times. It fits perfectly with our décor as well; modern minimalist meets artsy and slightly shabby chic.

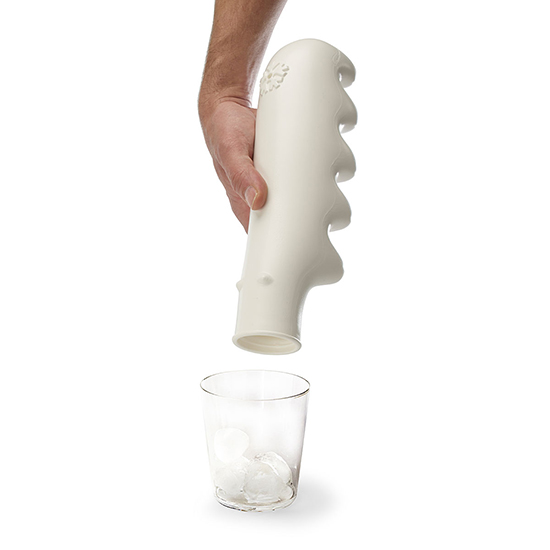
First, polar bears are cute. Second, I just hate when my ice smells like everything else in the freezer, problem solved with the Polar Bear Ice Tray by Black & Blum. Third, it is inevitable that I will not be able to get all the ice out of the tray then I turn it upside down to shake out and it falls on the floor. Ice tray fail! BUT problem solved with the Polar Bear Ice Tray.

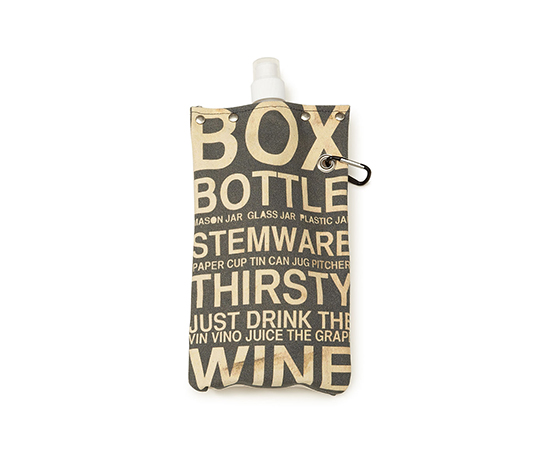
The Wine and Beverage Tote holds an ENTIRE BOTTLE of wine. In the summer I love to sit in the park, on the beach, camp, etc. and the Wine and Beverage Tote HOLDS AN ENTIRE BOTTLE OF WINE… ’nuff said.

Get your registry started at UncommonGoods!

Gift Guides

Gift Lab: How To Be a Real Smooth Guy

April 29, 2013

Research
Hard work comes at a price; rough hands! I chose the 7 Day Hand Repair Kit for Men for my experiment because it seemed like the perfect product to give my hands an overhaul. The designer of this kit was a mechanic for 20 years, and his damaged hands pushed him to make this product. Coupled with the fact that I have never tried anything like a hand repair kit before (although my neighbor wore gloves everywhere because she was a hand model), I figured that this might have interesting results.

Hypothesis
I was very active as a teenager, and I work in a warehouse now, so this seemed ideal given that my hands have lost many battles in the hand-aesthetics department. I predict that I will have softer, more moisturized hands by the end of the seventh day of me using this repair kit.

Experiment
I figured that Monday morning would be a good day to start this experiment. I opened the kit, which includes soap, hand repair lotion, knuckle wax, night salve, cotton gloves and butter nub along with instructions.

The instructions on the kit state that there is a morning and evening routine. The first step in the morning routine was to thoroughly wash your hands with the hand scrub soap. The soap actually made my hands feel smooth and soft after using it.

Next, the instructions state that after the soap, I should use the hand repair lotion followed by the knuckle wax. After the first couple of days I did not really notice much of a difference. However, at around the fourth day, my hands did in fact feel somewhat softer.

The evening routine varied slightly. After using the soap and hand repair lotion, the instructions stated that I must coat my hands with the night intense salve instead of knuckle wax and then cover them with the cotton gloves. The main ingredients in the salve were cocoa butter and shea butter, which left my hands shiny and slippery (even after rubbing the moisturizer in for a couple minutes). I left the gloves on overnight and took them off when I woke up the next morning.

The butter nub, which has skin healing oils and is meant for on-the-go moisturizer, took a bit of extra effort to get out of the container as it was of a more solid consistency. My wife described the smell of it as similar to shea butter, although it definitely seemed harder than the night salve. Throughout the seven days of hand repair, I used the butter nub in an attempt to moisturize my hands while at work and home.

Conclusion
My hypothesis was correct. My hands actually felt softer after using the 7 Day Hand Repair Kit for Men. This was a cool experiment that allowed me to improve my hand texture and keep them moisturized. If I did this again, I would probably use less of the butter nub as that seemed to have the least effect on my hands. Overall, though, the morning and night time routine seemed to work after a few days, and now I have great hands! Well, maybe not great, but definitely smoother than before I started using this kit.

Gift Guides

Gift Lab: How to Make Fruit-flavored H2O

April 18, 2013

Research
A glass water bottle with a built in fruit infuser. What a brilliant idea! is the first thought that came across my mind. I’ve never heard about this product and finding out about it would make a change in my lifestyle. All of my life I’ve grown accustomed to drinking soda and juice, neglecting water which is necessary to keep our bodies properly hydrated. Breaking this bad habit by using the Flavor Infuser Water Bottle would help me transition from my lack of water intake.

Hypothesis
Infusing fruits into water on a daily basis will lead to a healthier lifestyle and water being an essential part of my life.

Experiment
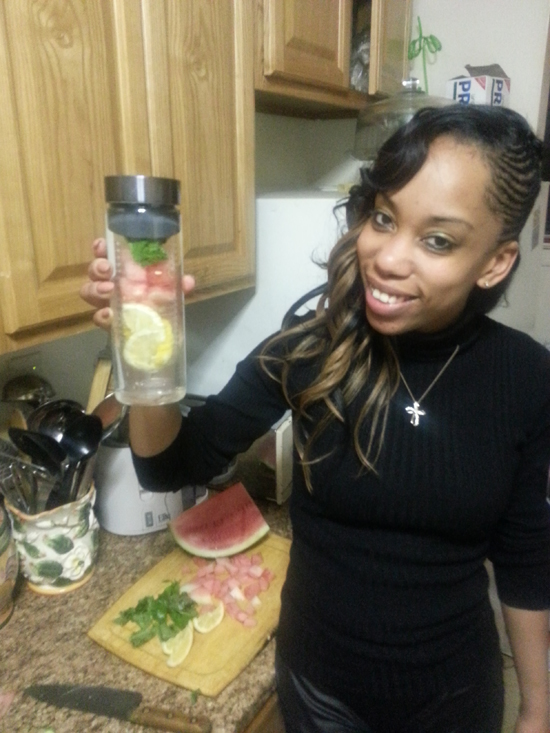
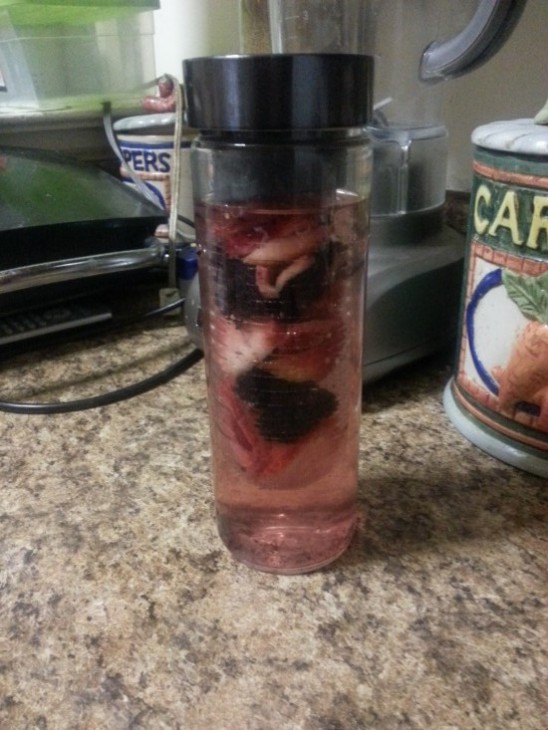
With a variety of fruits I will mix and match them and properly infuse them into water creating a couple of different types of fruitful H2O. Below was my favorite concoction.

Watermelon Lemon Basil Water
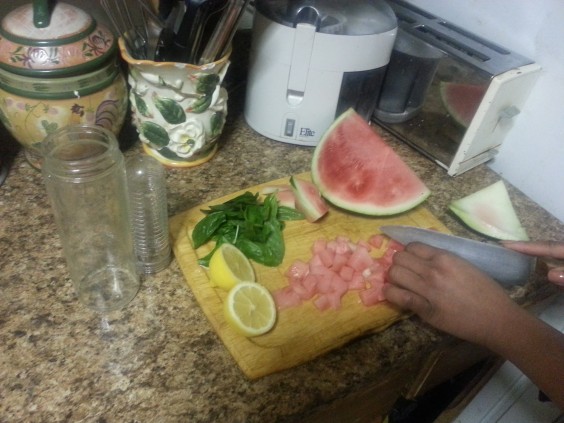
Step 1: Finely slice lemons into 6-8 pieces
Step 2: Cut watermelons into small cubes (10-12 cubes)
Step 3: Chop 8 basil leaves in half
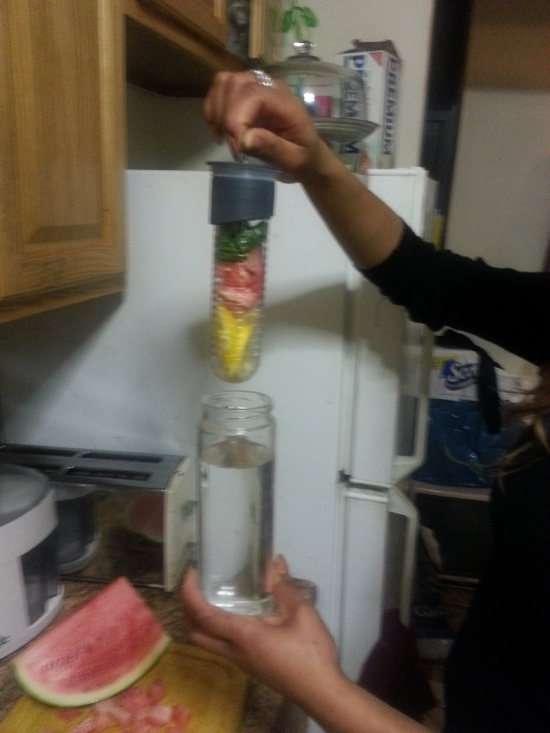
Step 4: Take the center piece of the infuser and add lemons, watermelons, and basil leaves together.
Step 5: Place the top onto the center piece.
Step 6: Fill the glass water bottle with water.
Step 7: Place the center piece inside of the glass bottle and place the main top on to seal the bottle.
Step 8: Let the infusion begin! Wait 30 minutes until you drink the water. Enjoy!

Conclusion
This infuser is definitely a hit. After experimenting with different fruits my outlook on drinking water has changed. Using this product created a fun experience. Researching the different fundamentals of fruits and water helped me in having a want to drink water. It’s simple, it’s easy and I am becoming a water-loving person.

Gift Guides

Melissa’s Game Night: DysFUNction

March 29, 2013

Welcome to another installment of Melissa’s Game Night. Recently, I had the comical pleasure of playing Dysfunction with two of my good friends – Rachel and Bennett. These two are close to my heart, as we lived 2 blocks from each other when we all lived in San Francisco, and then I followed them out to NYC (as they like to tell everyone) and now live 2 blocks away from them here. Needless to say, I enjoy their company.

When they invited me over a couple of weeks ago to third wheel their dinner (Rachel is an amazing cook and was the star member of my SF cooking club which we are trying to restart out here), I couldn’t help but bring a game along. Once the lasagna was done and the martinis were poured, we broke out DysFUNction. Warning: this game is not for the light of heart, or for children (actually!). Here is how you play:
“Find the fun in your dysfunction! The object of the game is to be the player with the most Baggage. Baggage is claimed by having and sharing your dysfunctional family stories. The first player to claim 15 Bags and fill their Baggage Cart wins the game.”

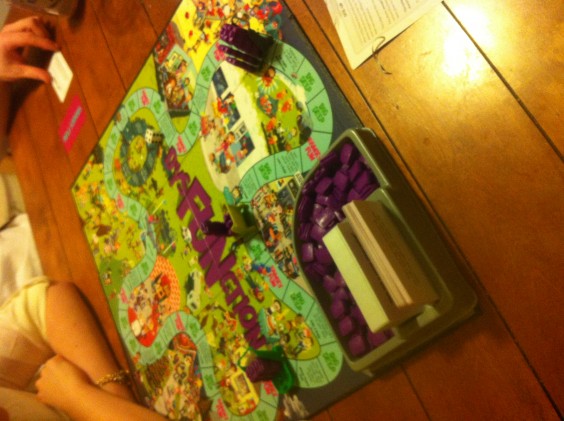
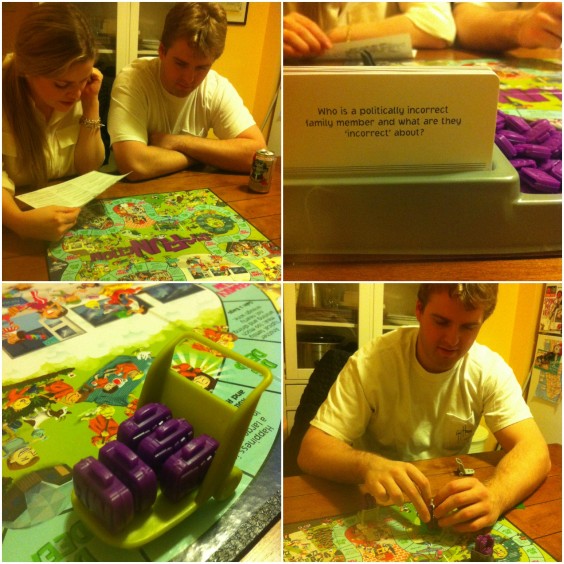
The board had a classic, winding look – along the lines of childhood favorites – and you rolled dice to move along the spaces. Some spaces had prompts on them – for example, the one I kept landing on was “Your family joins a cult, but the food is way better there. Lose 3 Bags.” Most of the spaces have either “Dig Deep” or “Family Fun” on them, and if you land on either of these, you pull a card. The Family Fun cards are mostly cards that say something sassy (again, warning, some of these were hard hitting – hilarious, but hard hitting) like “Your roll is a disappointment to your mother and me. Roll again. Get it right this time.” The Dig Deep cards were the most intense slash hilarious slash interesting slash fun. These cards prompt you to tell a story in theme of family or childhood dysfunction, and then appoint a judge for your story from the table. The Judge of the story would give you 1 to 3 bags based on the quality of your story – the better the story, the more Bags the Judge awards. Some of our funnier stories were told in response to these cards:

All in all, we definitely enjoyed this game and were rolling in laughter the whole time, with high scoring anecdotes ranging from “my dad’s fiancée is younger than I am” (three bags) to “I monogram all my clothes so my family members can’t steal them” (one bag). That said, even with just three of us and all of us knowing each other well, the questions were still comically and awkwardly probing – the beauty and the curse of the questions is that they “dig deep” into questions and memories that you don’t typically address – which is great because you remember stories that you don’t usually tell, but awkward because they ask you to tell stories that you wouldn’t typically share.

I definitely recommend this game as a way to get to know good friends better – it might be more challenging with a group that is more on the acquaintance side.

If you revel in a little bit of awkwardness and love reclaiming old memories, this game is for you. The three of us actually ended up enjoying the game so much that we brought the cards with us on a ski road trip the next weekend and continued the bumbling hilarity.

Gift Guides

Gift Lab: The Levitron Lamp’s Floating Fluorescence

March 20, 2013

Rocky tests the Levitron Lamp | Uncommongoods

The Levitron Lamp in action. Read on for Rocky’s Step-By-Step floating lamp tutorial.

Research
I remember it like yesterday..

About 6-7 weeks ago I’m sitting at my desk, headphones on, Spotify playlist blasting, putting in work on the current task at hand. I get to a point where I feel like a mini break is warranted and decide to relax a bit, sinking into my chair and mentally preparing myself to go full on into daydream mode. However, right before I get the chance to picture myself on a foreign beach, drinking margaritas out of umbrella decorated coconuts, something catches my eye…

Sitting on a shelf behind the neighboring desk to mine, there is a fairly large box with “Levitron Lamp” in bold print, accompanied by a photograph of a lamp underneath … I think. Why the uncertainty? Because according to the picture I’m now staring at, the lamp’s shade that sits on top, actually doesn’t “sit” at all, but FLOATS. Yes.. I’m sure now. There is definitely a minimum of 1-1.5 inch of space between the lamp’s shade and its base, with nothing connecting the two..

W. T. F. ?

See, working at UG for about a year and a half now, I’ve grown accustomed to expecting the unexpected when it comes to the products we carry. Time and time again, I find myself floored by the level of creativity and innovation applied. So much so, that I’ve made myself a permanent resident in the Merchants’ area of our office so I can scope out the samples of potential new products as they come in. (Marketing team, I promise I love you guys.. but yes, I have something on the side with the merchants.) Needless to say, this just became another time to add to that list of ‘time and time again’ I mentioned earlier.

*Pauses music. Snatches off headphones. “KATIE.. What.. is… that?!”. *

Katie (UncommonGoods Associate Buyer and my desk neighbor) informs me more about the newly received lamp and confirms that it purportedly does have floating pieces incorporated, although no one has yet to see it with their own eyes. Then after a brief pause, she adds…

Hypothesis
I have to assume that because someone out there took the time to mass manufacture, officially name, professionally package, and ship this product to our office, there is some truth about what it claims to do. However, I’m suspicious about how well it will work and for how long. My past experiences from life teach that often, things like these don’t stick around for very long, once out of the box and put to continuous use (and of course, that doesn’t fly at UG). That said, I’m predicting ‘oohs’ and ‘ahhs’ for a short-lived amount of time before it becomes a has been.

Experiment
Setting up the lamp is fairly simple, just pay close attention to the directions, because between the different parts to the lamp and the various laws of science at play, there’s a chance of some confusion if you do not. Take it from me–I admit, at first I quickly threw the directions right to the side and had at it.

It took 1 minute and 20 seconds for me to pick them right back up again… which brings me to

STEP ONE Use the directions to identify all the pieces.

You see that first picture on the left up there? Take a real good look at it. It identifies all the pieces you will need to put the floating lamp into play and gives you the ABCs of what goes where, when, and why. You will see later that this is very key to this whole operation.

STEP TWO Read the directions thoroughly.

By now you get the point. Directions = good.

STEP THREE Find desired location for lamp and plug it in.
You will want to do this. Trust me. You will see why.. eh, I’ll just tell you now. Once setup is complete, you will not want to A. Unplug it (unless you want to practice setting it up all over again), because the way it floats is due to electromagnetism. That’s short for ‘no electricity, no magnetism.’ B. Even if you do not need to unplug your lamp, sliding or carrying it will require very slow movement. The lamp’s magnetic field is easily thrown off balance (causing the shade to fall off) when knocked too hard.

STEP FOUR This is where you get your David Blaine on and make some magic happen.

Grab the clear plastic disc and find the side that has a tiny peg poking out from the center of it. Then look at the top of the lamp’s base and find the little hole at the center of that. Once found, place the clear plastic disc, peg side facing down, on top of base’s center and slide it around until the peg falls into the little hole, securing the disc in place.

Now grab your black cylinder/tube/thingamajig. Notice one end will have a thick border and the other end will not. Place the end that doesn’t have the thick border into your clear plastic disc. (You will know you’ve done it correctly because it also will slide securely into place.) At this point, find your little hockey-puck-looking magnet, hold it over the top of the cylinder as if you’re going to drop it in and take a trip down memory lane to junior high science class. If you feel that the magnet is trying to run away from the cylinder’s opening, that means it is repelling and you need to flip the magnet over for the side we need to work with. If there is no repelling, then we’re good to continue.

Next, drop the magnet into the center of the cylinder. The directions say to start much higher for this to work, but I found that starting right over the cylinder is fine. When dropped into the cylinder correctly, it will float on its own directly in the center. If done incorrectly, it will still float, but also rest on the walls of the cylinder. That’s a no-no. You will have to redo it.

Once you have the magnet floating in the center, you can now take the cylinder off by pulling it straight up. After that, push the plastic disc off the side. Neither of these are needed anymore.

STEP FIVE Place your lamp shade on the magnet.

So after spending some time looking at how cool the magnet looks floating there (because you’re definitely going to), you’re now ready to place your lamp shade. There is a groove in the bottom of the shade that allows it to sit perfectly on top of the magnet. Using some finesse (so to not knock the magnet out of ‘orbit’), place the shade on top.

WALLAH! Floating Lamp Goodness complete.

Conclusion
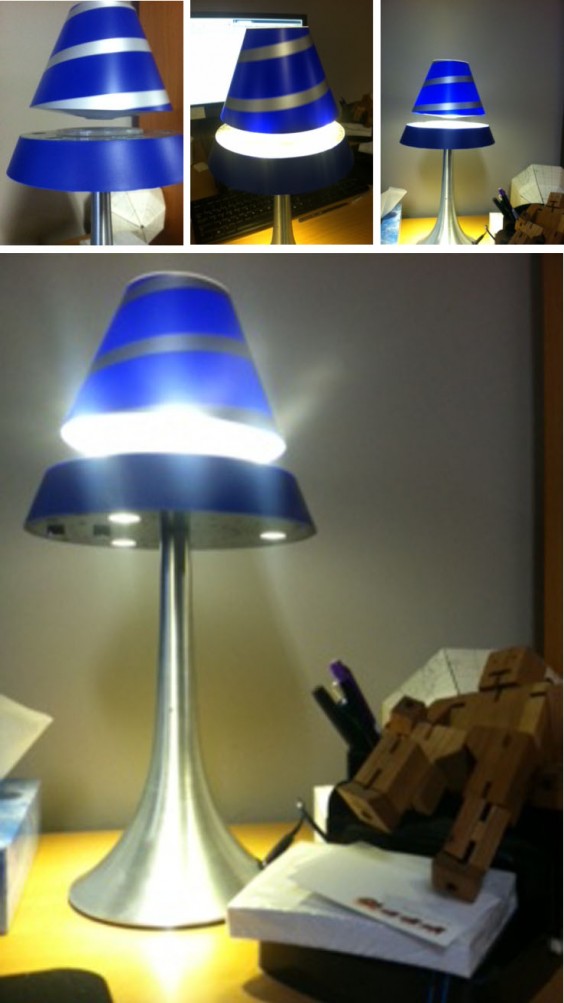
I also want to highlight that besides the floating feature, the lamp itself is pretty nice. As you can see from the pictures, it has a modern, sleek/Jetsons futuristic hybrid look to it. The light comes from the top of the base and the bottom of the base, with two separate touchpad light switches controlling the different sides.

Wherever you find yourself setting up this lamp, it will be a conversation starter for sure. My desk has easily become the coolest desk at UG (I’m accepting any challengers, what up?!) and anyone who notices it while walking by stops to take a closer look.

WARNING: With great power comes great responsibility. Like I said, this lamp will draw people in to take a closer look. They also WILL play with it, and they will knock the shade off over.. and over.. and over again. So get use to setting it up. But after the first couple of times, it’s easy as pie–Scratch that. I don’t know how to make pie, bad example. It’s easy as buying pie–and you’ll come to enjoy watching people’s expressions when they do knock it off. (Everybody’s face always look like they just broke an irreplaceable ancient artifact and are about to get hauled off to serve hard time for it.. or at least have to buy me a new one.)

At the end of the day, simply said, this is one cool lamp. And today it’s still on my desk, working as great as the day it came out of the box.

Also, that ‘lil guy basking in the lamp’s light in the picture? That’s Blocky. He makes sure my pens don’t go missing while I’m away from my desk.