Archives

Gift Guides

Gift Lab: Can This Filter Bottle Provide Hydrated Hiking without a Heavy Pack?

September 28, 2016

Laura Gift Lab Water Bottle

Research:

Anytime I go hiking, I make sure to bring plenty of water. This usually means hauling around a 2-liter water bottle that’s too big for my hip-pack. (I know, it’s really a fanny pack, but “hip-pack” sounds so much cooler than a bad fashion choice circa 1989.) A big water bottle means hiking with an even bigger backpack to hold it in. So, how can I use my lighter pack and still carry enough water? Perhaps I should give the Adventure Filter Water Bottle a try.

I haven’t gone on hikes any longer than 10 miles, so I’ve never purchased any kind of trail-side water filtration system. My guy and I planned to do a 4+ mile trip where we were camping at Mongaup Pond Campground, so I figured this would be a good time to test out something in that category. I wanted to fill up my bottle from one of the spouts with drinkable water before we headed out.

Hypothesis:

The Adventure Filter Water Bottle will be easy to use on the trail, and it’ll filter water so it’s clean and tasty.

Continue Reading…

Gift Guides

Gift Lab: These Grilling Goods Turn Camping into Glamping

August 1, 2016

Laura Tests Grilling Goods

Research

I may not be the most glamorous glamping girl, but I do like to get out of Brooklyn once in a while to see some open, green spaces. Recently, my guy and I packed up a rental car, dropped the cats off with a sitter, and headed for the Catskills. Due to the joys of city traffic we made it to Mongaup Pond Campgrounds 5 hours later (just a couple hours later than expected).

I have been stocking up on fun camping gear all winter long, including some things for the grill from UncommonGoods. I already had the Grilled Cheese Maker, the Kabob Grilling Baskets, and both Coffee and Pine Firestarters ready to go.

Continue Reading…

Gift Guides

Gift Lab: DIY Brunch Ideas (& Recipes!)

November 11, 2014

Laura Frost | UncommonGoods

Product: Itty Bitty Mixer, DIY Butter Kit, Egg Separator

Research:
Brunch on the weekends in Williamsburg, Brooklyn has plenty of great options. But, there are also really long lines for omelets or pancakes or waffles. My boyfriend and I love brunch at home where we can relax in PJs and sip our coffee without food-deprived crowd of folks waiting for breakfast. Only snag is that we usually want different things. He’s not big on the pumpkin craze, and I’m a fan. He prefers waffles and I like light little pancakes. Will we have a happy brunch despite our differences?

DIY Brunch Ideas | Kitchen Tools | UncommonGoods

Experiment:
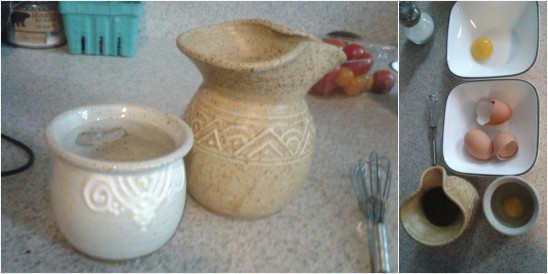
The two-different-items-brunch menu also gives me the excuse to use the Itty Bitty Mixer! I’m not a huge fan of kitchen gadgets, but this one is pretty great. I love the handcrafted ceramic design. It’s also very practical for making two different pancake flavors, omelets, and dressings. (Seriously, I could do a whole separate blog on small-batch dressings.)

PJ Brunch for Two Menu:

  • Apple Sauce Waffles for Him
  • Pumpkin Pancakes for Her
  • Coffee Required

The night before my planned PJ Brunch I made some fresh butter and roasted pumpkin. I started off with the roasted pumpkin. I cut a sugar pumpkin in half. Sprayed a foil-lined cookie sheet with oil, and roasted them for 40 minutes at 425 degrees. While the pumpkin was in the oven I opened up the DIY Butter Kit so I could have fresh cinnamon-sugar butter for my waffles and pancakes.

The butter kit is really nice to look at, but not the fastest butter to make. Even though I was starting the night before, I didn’t give myself quite enough time. The kit’s butter recipe requires 3 ingredients and 120 minutes (60 of those minutes is just running a mixer). Dilemma: fresh butter is unbelievably good. It’s especially good using it as a spread rather than baking it into something. My waffles and pancakes deserve the best!

I have to confess here, I’ve used a simpler butter kit in the past that required less than 45 minutes, heavy cream, and a jar. I took this route with the butter kit so I still got the awesome fresh butter despite my poor planning.

DIY Butter Kit | UncommonGoods

I had already bought my favorite heavy cream, poured it into the kit’s jar and shook it for about 25 minutes. It’s fun to watch the cream turn into whipped cream then morph into a happy golden blob of fresh butter. The butter then gets rinsed in cold water. That leftover milk in the jar is buttermilk. It’s great to save for pancakes or waffles. (More on that later…)

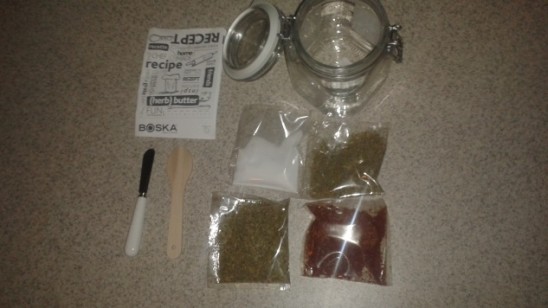
I divided up my butter so I could make the cinnamon-sugar butter and use the kit to make tomato basil butter, and still have plain butter left over.
Homemade Butter with the DIY Butter Kit

Butter’s done. Pumpkin’s done. Time for bed. Happy brunch in my PJs in the very near future!

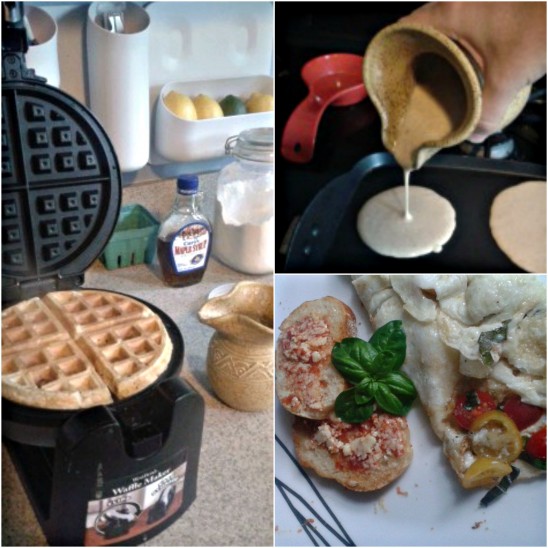
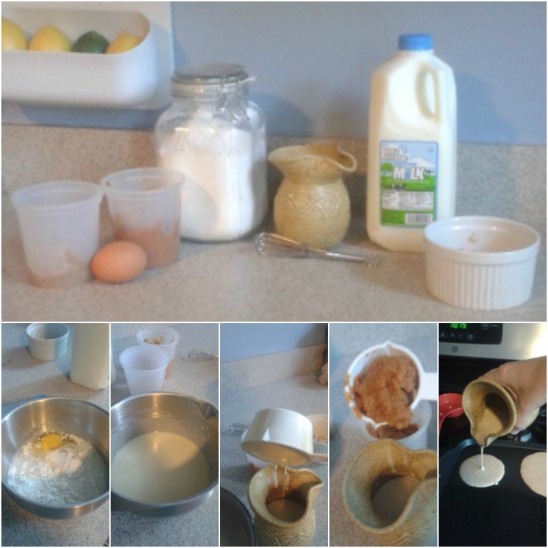
Saturday morning- PJ Brunch part one! I want pumpkin waffles with the freshly roasted pumpkin. My guy wants apple sauce waffles with some of the apple sauce I made the previous weekend. I set up shop in the kitchen so I could easily get started. I first made a large batch of batter that I could split for the pancakes and waffles. I put about half the batch into my Itty Bitty Mixer (did I mention I love this thing?!). I then added about a quarter cup of my fresh pumpkin puree. The Itty Bitty Mixer allows the ingredients to blend together quickly and smoothly. It’s also easy to pour the batter out onto my pan.

Making pancakes with the Itty Bitty Mixer

While my pancakes were cooking I put the remaining pancake batter in the Itty Bitty Mixer along with the homemade apple sauce.

Homemade waffles with the Itty Bitty Mixer

The fresh cinnamon-butter was the perfect addition to the pumpkin pancakes and apple sauce waffle.

Homemade brunch with fresh cinnamon butter

Sunday morning-I was on my own for brunch. Not a glum morning, though. I had just enough eggs in the fridge for one omelet!

PJ Brunch for One Menu:

  • Heirloom Cherry Tomato & Basil Egg White Omelet
  • Tomato Basil Butter Crostini
  • Coffee Required

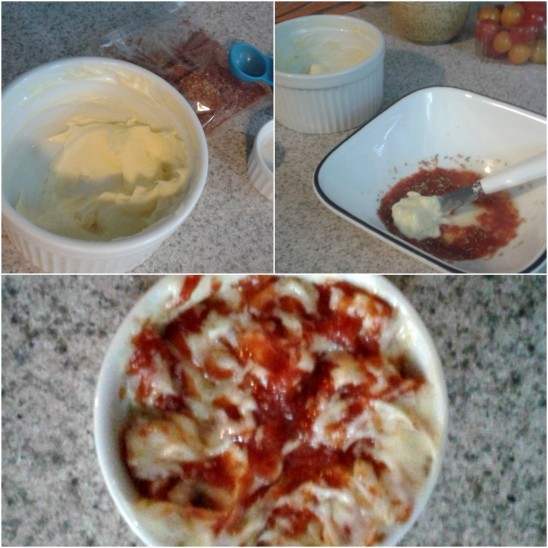
The night before, I was again making butter. This time it was just blending the fresh butter with the DIY Butter Kit’s tomato basil seasoning. I measured out a teaspoon of the seasoning mix and let it soak in ½ teaspoon of warm water as the instructions noted. Then I blended about two tablespoons of the butter using the kit’s spreader. Result: tasty and pretty butter blend.

Homemade Herb and Tomato Butter

Sunday morning and I’m ready for an omelet! I have my Itty Bitty Mixer ready to go along with the Egg Separator also made by Karen & Stephen Steininger.

Egg Separator and Itty Bitty Mixer | UncommonGoods

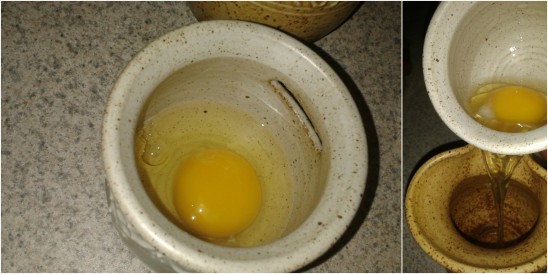
Ok, so again, I’m not big on the gadgets. When I typically separate egg yolks from whites I just use the egg’s shells, pouring them back and forth until I’m only left with the yolk. Honestly, I usually ruin a fair portion of the eggs when I try this trick. The Egg Separator is ideal, however. The yolk willing hung back while the white slipped right through the gap in the cup. Also, the lip on both the Egg Separator and Itty Bitty Mixer are well-designed for cracking an egg.

Separate eggs easily | Stoneware egg separator

I whipped up airy egg whites in the Itty Bitty mixer and poured them straight into my hot, non-stick skillet. I then added slices of heirloom cherry tomatoes, basil, salt and pepper. While my eggs cooked on medium low heat I toasted my French bread.

Homemade Veggie Omelet

I folded the omelet just to finish it up. Next I put the tomato butter spread on my bread, then plated it all together. Such a happy plate of goodness!

Delicious Brunch

Conclusion:
The tools I used did make for two pretty great brunches. My boyfriend and I got to share brunch, get what we each wanted, and managed to stay away from crowded brunch hot spots. Plus, I had a happy brunch for one the next day. The DIY Butter Kit could be complicated, but does help make some pretty wonderful butter and butter blends. The Itty Bitty Mixer is currently my favorite thing in my kitchen. In fact the design of the mixer and Egg Separator are so nice they’ve both earned a permanent home displayed on my counter.

Recipes:
Apple Sauce Waffles
(Serves 2)
1 ½ cups pancake mix
¾ cup skim milk
1 egg
1 teaspoon vanilla
½ cup chunky apple sauce
½ tablespoon oil (olive oil, vegetable, etc)

In a mixing bowl, whisk together the mix, skim milk, egg, vanilla and oil. Air is your friend. Whisk so mix is smooth without chunks of pancake mix. Whisk in the apple sauce. (You may want to add more milk if the apple sauce does not make the mix into a smooth-pouring batter.)

Turn on your waffle iron to the desired temperature. I crank mine all the way to the “dark” setting for a crispy-on-the-outside waffle. While the waffle iron heats up, your batter needs to rest for a couple of minutes.

Once the waffle iron is at temperature, spray your iron with non-stick spray and slowly pour in your batter. Don’t leave it unattended—the mix might expand. Just open the waffle maker for a second if need be.

Once your waffle is browned and cooked through, pop it out on a plate. Top with happy cinnamon butter and enjoy!

Pumpkin Pancakes
(Serves 2)
1 ½ cups pancake mix
¾ cup skim milk
1 egg
1 teaspoon vanilla
½ cup pumpkin puree
1 teaspoon cinnamon
½ teaspoon nutmeg
(You can most certainly use pumpkin spice instead of mixing your own spices.)

In a mixing bowl, whisk together the mix, skim milk, egg, vanilla and spices. Air is your friend. Whisk so mix is smooth without chunks of pancake mix. Whisk in the pumpkin. (You may want to add more milk if the pumpkin does not make the mix into a smooth-pouring batter.)

While your batter rests for a moment, heat a non-stick pan on medium heat. Just before you pour out your pancakes spray the pan with non-stick spray. When the pancakes begin to bubble and they’re golden brown on the bottom flip them over. Once that side is golden brown remove the pancake. As you plate them top with happy cinnamon butter and enjoy!

Egg White Omelet with Heirloom Cherry Tomatoes and Basil
(Serves 1)
3 egg whites
Olive oil or butter
Heirloom cherry tomatoes (or any tomatoes) thinly sliced
Basil chopped
Salt & Pepper

Heat a non-stick pan over medium low heat. Whisk the eggs whites—air is an omelet’s friend! Don’t let the eggs rest. Go straight from whisking to pouring the eggs into the pan. Season the eggs. As the eggs set gently drag a fork through them so the whites cook. As the omelet is setting, add the tomatoes and basil. Once the omelet has set, with the top still a bit wet, but not runny, fold your omelet. Once heated through plate and serve.

If you have good French bread, toast this up before you start your omelet and use the Butter Kit’s tomato basil butter. Enjoy!

The Uncommon Life

Uncommon Personalities: Meet Laura Frost

September 13, 2013
UncommonGoods Customer Service Assistant Manger Laura Frost
Laura Frost, UncommonGoods Assistant Manager – Customer Service

My hometown is…
Brooklyn, NY. (Before that is a list that’s way too long.)

The best customer interaction I’ve had at UncommonGoods was…
I had a customer who had a big Great Dane. Her dog was getting on in years, and the vet didn’t think her dog would have too much more time on this earth. She wanted to get the Custom Nose Print Necklace while her pooch was still around, but she wasn’t sure his nose would fit the mold since he’s such a big doggy. We figured out the dimensions on the phone, and it was super cute to hear him snuffle the phone and the ruler while she checked his nose-size. She was able to order the necklace with full confidence she’d be able to keep a token of her favorite dog’s nose forever.

I’m inspired by…
Farmer’s markets and flea markets.

My guilty pleasure is…
Action movies.

An uncommon fact about me…
I’ve lived in 9 states.

My favorite place to hang out in New York City is…
Brooklyn Ale House—the best little corner bar in Brooklyn.

My style is…
Casual, quirky, comfy.

Since working at UncommonGoods I’ve learned…
That Excel is my friend.

Would you rather… Have to sing everything you said out loud for a week or not be able to sing for a month?
While I do like to sing around the house, I’m not up for a solo act. So, I’d stick with no singing for a month.

Gift Guides

Gift Lab: From Wine Bottle to Watering Globe

May 28, 2013

RESEARCH
Ok, so I don’t have the greenest green thumb, but I love having fresh herbs and veggies on hand. When I’ve planted in the past my poor plants’ main downfall has been lack of water. If my sprouts are not directly in sight every day I tend to forget them. The backyard for my apartment building is accessible, but it isn’t exactly easy to get to each day, so I need a watering system that will babysit my sprouts a few days a week. I’m hoping the Plant Nanny is up for the job!

HYPOTHESIS
The Plant Nanny will keep my herbs and tomato plants well-hydrated without daily watering sessions on my part.

EXPERIMENT
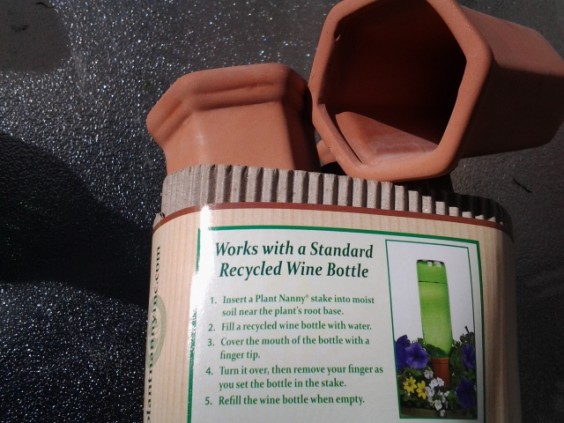
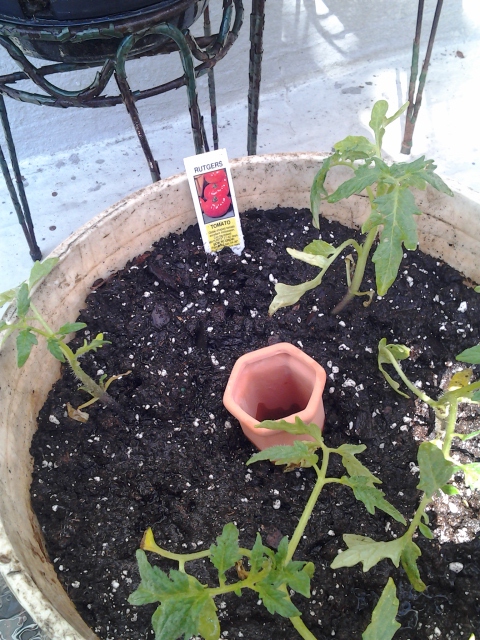
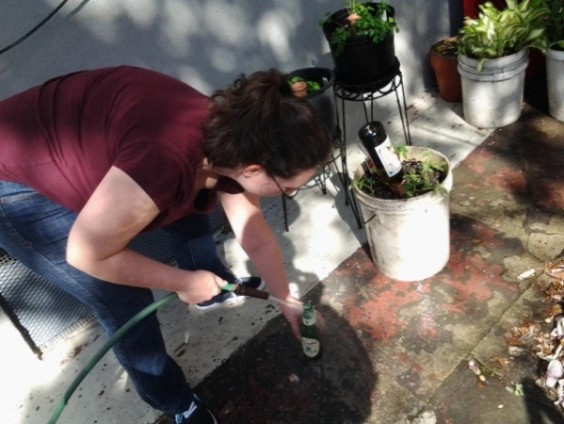
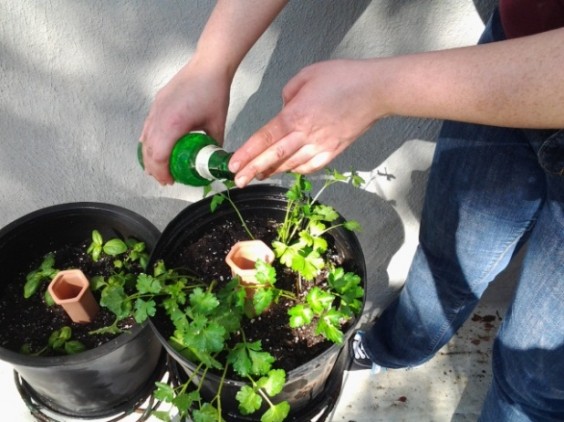
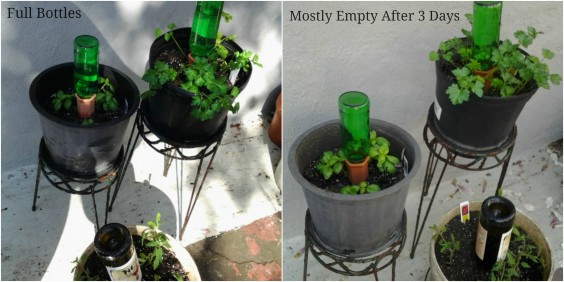
I got my seedlings home and potted in a sunny spot. I also brought home the Plant Nanny wine bottle set. Because my herbs went into pots on the small side I decided to try empty beer bottles for their Nannies. The tomato plants went into a larger pot, so they got a wine bottle. The necks of the beer bottles fit just about perfectly into the wine bottle Plant Nannies. But I wasn’t certain that the water would hold out in them over the next few days.

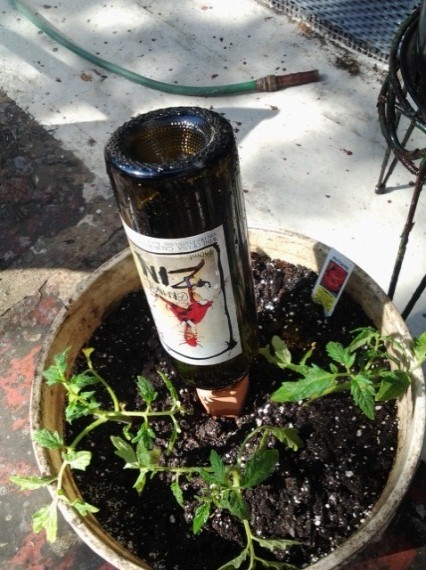
The directions recommended that the end of the Plant Nanny should be pushed down by the roots. This was easily accomplished without over-packing the soil too tight or crowding out my seedlings.

It was also really simple to get the full bottle into the Plant Nanny. The directions noted to put a finger or two over the top of the bottle before tipping it into the Plant Nanny. The water filled the base of the nanny and balanced out without losing hardly a drop.

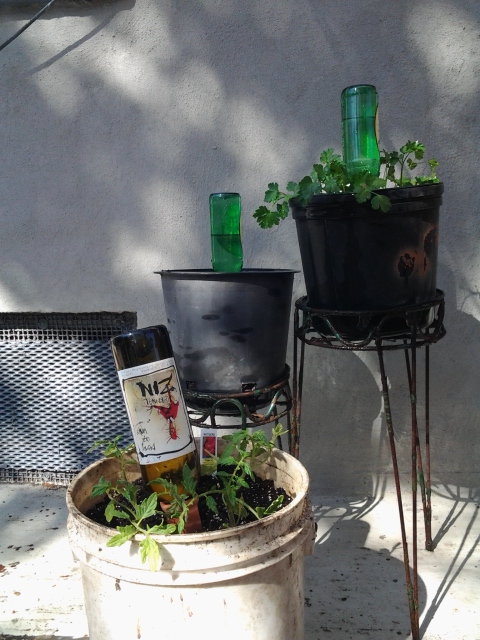
Ok, so I have to admit I thought the upside-down bottles might not be that great looking. (Course, neither do the re-used pots I got from a neighbor that was going to chuck them.) It turns out that they look pretty cool, and I can already tell that they’ll blend in a bit better once my plants start to fill out.

CONCLUSION
So, I did my planting on a Sunday afternoon. By Wednesday morning there was only a bit of water left in the both the beer bottles and the wine bottle Nannies. The small-bottle-to-small-pot and large-bottle-to-large-pot idea worked out well with the wine bottle Plant Nannies! The soil in all three pots was moist without being overly flooded.

Looks like I’ll be able to let the Plant Nannies “babysit” for about 2-3 days at a time. If we hit a dry spell I plan on checking my plants every 1-2 days to be on the safe side.

Gift Guides

Gift Lab: Laura’s Fishing Expedition

November 4, 2010

On a recent fishing trip to the Catskills Mountains, Customer Service Supervisor Laura Frost tests out a solar-powered water bottle to see whether it holds up in bear country.

1) Product Name: Solar-Powered Illuminating Water Bottle

The water bottle in action


2) Background Research: I haven’t been camping or fly-fishing in years, and I was itching to embark on a nature adventure. I also have quite the collection of electronic gadgets that I didn’t want to drown while on the river. I needed the phone since I was out on the water by myself, a flashlight in case I was still out after twilight (when the trout are happy and active), and a camera to document my trip. On top of all that a night-light is a must have for dark, Catskill nights… in bear country. Gulp!

3) Hypothesis: This double-duty bottle can be a gadget-container during the day and a cheery night-light at night.

4) Experiment: Use the bottle to carry my camera and cell while on the river during the day and have a light that won’t depend on batteries at night while fishing and camping Willowemoc Creek in Sullivan County, NY.

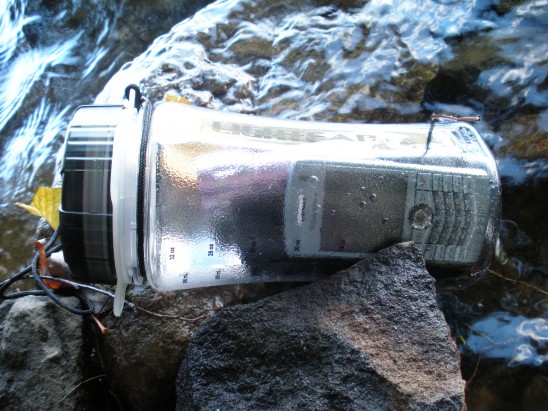
5) Results: If you haven’t ever fly-fished a river know that you have to carry a lot of gear. There’s the rod, the net, the fly vest full of tackle and what-not, plus water-proof waders, and heavy felt-bottomed boots. One is then expected to traverse moving water going over slick, mossy rocks. Grace while doing all this is not an easy thing to pull off. Within the first 10 minutes on the Willowemoc on the first day I stepped on a slick rock and found myself sitting in 10 inches of creek. The good news? My camera and phone were perfectly safe in the Bottle, bobbing in the water while attached to my waders!

This water bottle features a really wide mouth, so my camera and phone fit with room to spare. The draw-sting that comes with it turned out to be handily adjustable. It attaches to the lid and the bottle, so I could attach it to my fishing waders without the worry that I’d drop the bottle while walking the stream.

Back at camp I emptied my gadgets and clicked the light on. It gave off a both a soft white glow and a red glow, which the packaging claims is better for night vision. The light was really handy while I prepped my hot dogs and s’mores.

It was also a welcome night light in my tent. The solar panel charged all day, so it was ready to glow for 8 hours. (It has a really cool, smart solar panel so the light won’t glow using precious battery life, while the sun’s shinning.) The red light was good inside the tent while I settled into my sleeping bag for the night.

The only let down? It was not a good flashlight for getting to the campground’s restrooms. The glow is good in a contained tent, or sitting on a picnic table, but couldn’t throw a long beam like a flashlight can.

The rest of the weekend I kept a mini-flashlight tucked in the bottle along with my cell and camera. My feet got steadier, and I was able to fish deeper water with confidence that my electronic gadgets would be safe. I was able to get some beautiful pictures of the stream and the rainbow trout I caught as well as get a good night’s sleep with my night light nearby.

The perfect view