Archives

Gift Guides

How to Create Your Dream Wedding Registry

May 20, 2013

Not to sound overly girlie or cliché, but getting engaged was absolutely one of the happiest, most blissful moments (weekends) of my life. And sure, now five months later I am entirely wrapped up in comparing caterers and photographers and yes trying on many, many white dresses and making many, many decisions (who knew there were so many decisions to make?). It’s been a total blast. As it turns out, I love planning! Now, that’s not to say I haven’t had my moments – total emotional breakdowns/spazz moments … I am somewhat comforted to know that I have found this to be a shared experience among just about all my engaged/married friends. (This is a highly emotional time, people!) but I am getting better at thinking big picture and turning any moments of stress into excitement. I think by the time our wedding date rolls around, I’ll have this down to a science. Until then: lots of deep breaths, long runs and on certain nights: copious amounts of wine.

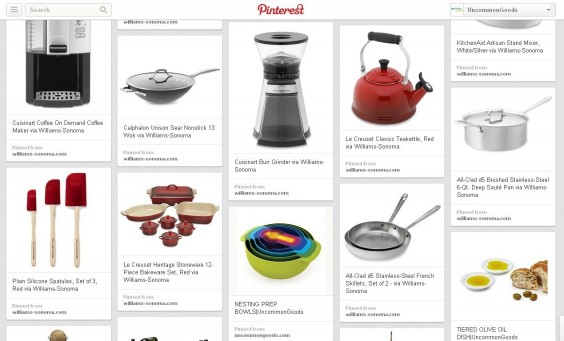
Katie’s Uncommon Registry board on Pinterest

As for some of those details – while we are taking some liberties with certain “traditions”, building a registry was one of the most fun projects I have worked on during this flurry of planning – and we approached this in a somewhat traditional sense – all while infusing our personalities into it from bottom to top. I have been to enough weddings in the past 2-3 years to see several approaches to registries, and being in the retail business and overall a product-passionate person, I am at somewhat of an advantage as to knowing what is in the competitive landscape for products. Here are some tips of the trade and from my experience that might be useful for anyone who is just getting started in this:

(1.) SET UP MORE THAN ONE REGISTRY:
We tried a few different approaches, and in the end, we chose to register with four different sites. We wanted to make sure we gathered the best products from the best sources to match our taste and needs, rather than trying to retro-fit into one or two retailers who might not have exactly what we wanted. Not to mention, a lot of traditional retailers don’t carry the really unique, wow items to add personality into your home. I also really love when my friends register at a few different places, so that I can mix and match gifts and price points to give them what feels like a cohesive package of goodies.

The first place we registered with was the service Knack. We used this to pull in items from sites that did not have their own registry or if there were not enough items on the site to rationalize an entire registry. I had used Knack for friends’ registries and found it exciting to see items aggregated from funky, smaller stores. I liked that it opened up the market for registering outside of traditional retailers, but the checkout process was somewhat laborious to use. (E.g.: to purchase an item, you click into the item page from the main registry page, select “Buy Now” – which then takes you to the separate retailer site to purchase. Once you purchase it through the other retailer (and have to enter in all address information, etc), then you have to click back to Knack to tell the service you purchased it. Not the easiest, I did not check out correctly the first time I used it and I consider myself a pretty tech-savvy person! After imagining some of the less tech-savvy folks in our life trying to use this service, I decided to break out what I could onto separate, more traditional registry sites.
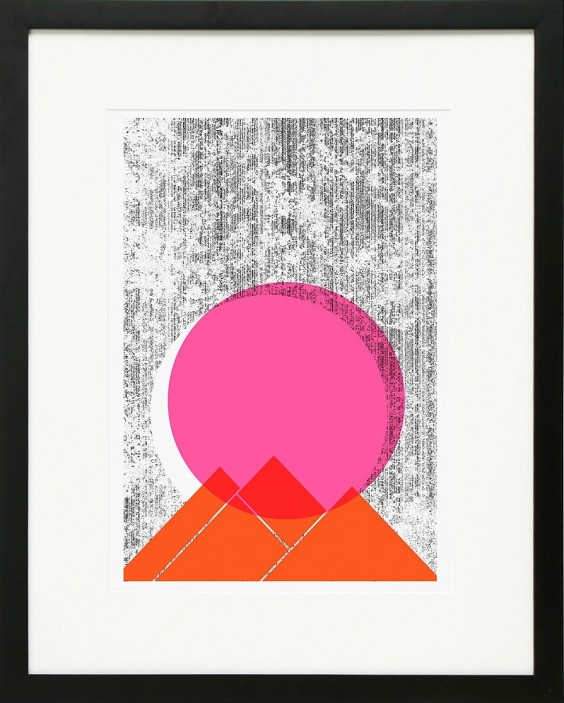


Your wedding registry is an opportunity to show off your style and point to the “wow” items you’re dreaming of.

(2.) ASK FOR HELP!
After building out registries which solved for pots and pans, plates and cups, coffee makers and cookbooks, I thought I had thought of everything. Well, thankfully, I sent our registry links around to my mom, sister-in-law, and my fiancé’s mom. Definitely ask around, while there are tons of wedding planning books and websites, I found getting advice from the people who know us best to be the most helpful. They knew we didn’t need overly ornate plates or silver serving pieces, but they also jumped on the fact that I had missed sheets and towels and silverware.

(3.) MAKE SURE TO GET YOUR PARTNER’S SIGN OFF
Building the registry was something I decided to take on and consult with my partner after I was more or less finished. I built out the above described registries, added the links to our wedding website, and before I knew it our family and friends were jumping on items as engagement gifts. (What a lovely surprise!) Luckily, my fiancé and I definitely share a similar taste level and aesthetic so I was not too far off. However, once I saw people starting to buy items, I decided I ought to run the registries by my fiancé. The process of editing was funny, while I tried to pretty much stick to the essentials, I may have tried to slide in a few decorative accents that he quickly and swiftly gave the axe (a handmade bell, Katie, really??). So, make sure you are BOTH on the same page to avoid glares from your one and only after the wedding.

Overall, building a registry is a super fun project; I think this is because it allows you to start picturing what this next phase of our life might look like. Sure, we have lived together for going on 4 years now and have stocked cabinets, but our kitchen is largely a patchwork style collection of cast off odds and ends from our moms’ kitchens (happy to clean out their pantries), plates we picked up from the free shop at a oft-visited dump in New Hampshire, and–most notably–our collection of pots and pans from a particularly successful yard sale day. For two people who love to cook and entertain, curating a collection of items to use on a daily basis was an exciting foray into – dare I say – true adulthood. Because really, I think it’s when you own your first Cuisinart that you can call yourself an adult. But it was during the selection of goods that I realized we could hand pick the items that we would use not only to use to heat up soup on a typical Monday night of netflix-marathon watching, but to make our home with, to serve holiday dinners with our families, and in someway, to define who we are as a couple and how we want to make our home. That being said, I believe our kitchen, and our home will always be a patchwork of odds and ends, but at least now we might have matching tops to all our pots and a functioning coffee maker!

My biggest words of advice: Make it about who you are as a couple. If you never bake, don’t register for bake ware; if you aren’t the formal type, register for some high quality, but funkier versions of things – everyone needs plates to eat off of, you don’t need to go for the super expensive kind if they don’t suit your lifestyle. The rules have changed a lot, embrace the freedom to build your home together and have fun with it. When in doubt, consult your family and friends for help, they will love it!

Get your registry started at UncommonGoods!

Design

Trend Spotting: Kantha Quilting

April 24, 2013

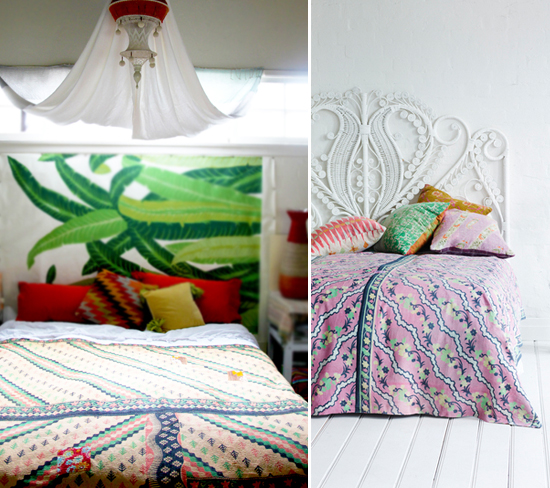
We recently introduced Kantha Blankets to our assortment and I couldn’t be more excited to bring these to our customers. These eclectic, one-of-a-kind quilts each have a special story to tell while brightening up any room. I thought it would be fun to share a bit about the history of Kantha as well as some fun decorating tips.

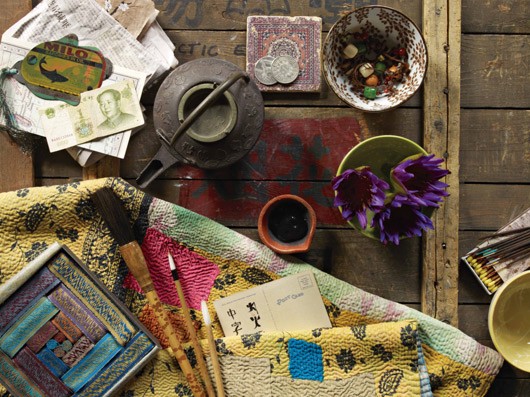
Decor8, Celadon, Desh Crafts


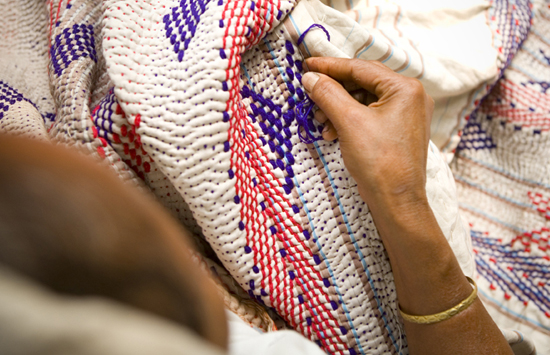
Kantha, a word meaning “old cloth” or “rag”, refers an age-old art form traditionally practiced by the women of Bengal. Kantha blankets are made from recycling worn saris originally intended to keep warm during the cooler months. In the traditional Kantha style, five layers of used saris are sewn together with a single running stitch to make a quilted blanket. Once the blanket is finished, Bengali women “sign” their pieces with their name, a mark of pride and identity. Such blankets are passed on as heirlooms to future generations. While this tradition dates back to the late 16th and early 17th century, Kantha is still the most popular form of embroidery practiced by rural women. Aside from providing a source of income for Bengali women, the popularity of Kantha products has given this traditional folk art a stake in the modern global marketplace.

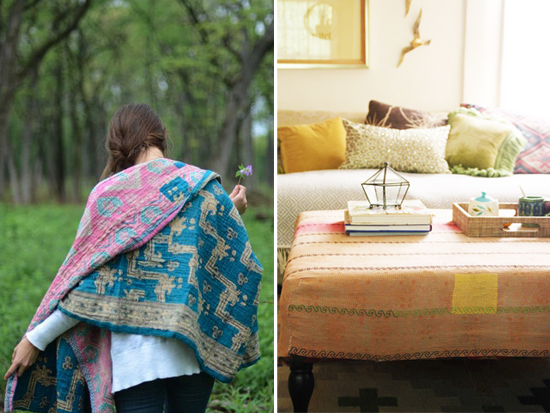
Justina Blakeney, Apartment Therapy


Nowadays, this age-old tradition is finding its way into modern home décor and design. Traditional Kantha is used on a wide array of products, from personal accessories, to pillows, and upholstered furniture. No matter what the execution, the unique, one-of-a-kind nature of this traditional folk art is a show stealer. Each piece is unique and one-of-a-kind and you can truly see the fingerprint of the artisan women who created them.

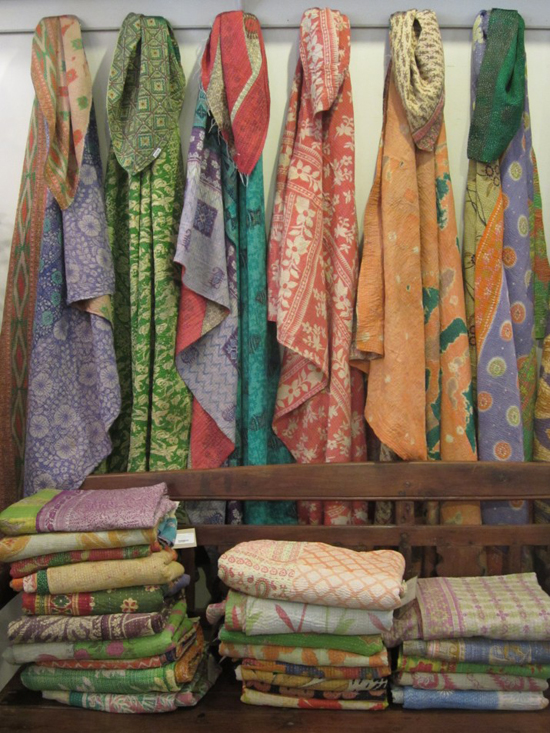
Hand & Cloth, Justina Blakeney, Anthropologie


I see Kantha as an easy way to incorporate a little colorful, bohemian touch to your living space. Suddenly you can integrate a splashy touch to your otherwise monotone bedding; the blanket, casually strewn over a couch or chair can transform the look of the room to that of one occupied by a world traveler and collector.

The Uncommon Life

Uncommon Personalities: Meet Katie Giannone

April 5, 2013

*Editor’s Note: Katie left UncommonGoods on May 10, 2013 to embark on a new adventure. We wish her the best of luck in all of her future endeavors!

Katie Giannone, UncommonGoods Associate Buyer – Home Décor, Seasonal, Desktop, Art

My hometown is…
Wilton, CT; a smallish, ruralish town about an hour outside of NYC.

My favorite product that I’ve brought into the assortment at UncommonGoods is…
VERY hard to pick just one, but I would have to go with one I brought in recently – the Grow Old With You Terrarium – a solid mix of sweet sentiment, creativity, and handcrafted, clean home décor.

I’m inspired by…
My friends, the masses of extremely talented and creative handmade designers sprouting up across the US, and the outdoors.

My guilty pleasure is…
Relishing the sun.

An uncommon fact about me…
Let’s see… pick your fave: at 6’1”, I am the tallest person in my family. I broke my arm sledding onto an iced over pond in VT when I was about 8 years old. I had a pet bunny named Flopsy when I was little, but my mom didn’t like caged animals so we treated it more or less like a domestic cat – it would go out into our yard and the woods behind our house during the day and explore, coming in at night for dinner and shelter. I practiced jazz dance until I was nearly 14.

My favorite place to eat in New York City is…
Three way tie between St. Anselm, Marlow & Sons, and Peasant.

My Style is…
I’m aiming for timeless.

Since working at UncommonGoods I’ve learned…
How wonderful it is working with handmade designers who are extremely passionate about their work.

With a pile of stuff in front of me I would make…
(You’re given paper, glue, glitter, sticky notes, an aluminum can, bakers twine, and a rubber band. What do you make and who is it for?)

I would make a kinetic mobile to hang above my nephew Grady’s crib.

Gift Guides

How to Repair a Wool Sweater

February 22, 2013

Getting the opportunity to try uncommon products is one of the great things about working at UncommonGoods. While many of these product-testing experiments become gift labs, every now and then we find a new good with so many uses we can’t fit them all in one “report.” The Woolfiller Sweater Mending Kit is an example of just such a product, AND, since associate buyer Katie and community moderator Cassie both had their eyes on this winter must-have, we decided to diverge from the traditional gift lab format and see just how many uses we could come up with for this clever kit. Four are outlined below, but Cassie and Katie agree that the fun doesn’t have to stop there!

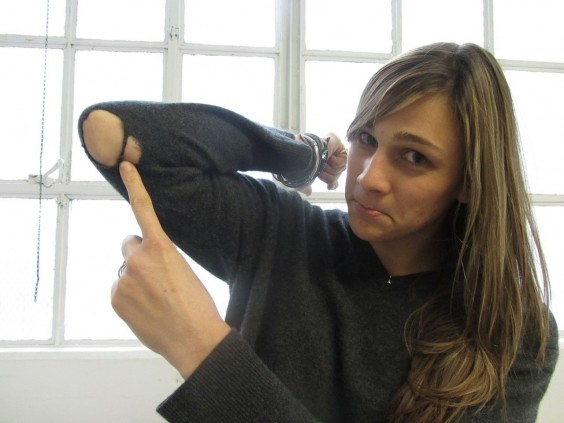
Katie: Having spotted the Woolfiller at a major New York trade show last year, I was anxious to get such a solution-oriented product into our assortment. A fun, hands-on kit to patch up an old favorite or add some flair to a basic sweater seemed like the perfect DIY project nearly anyone could adopt.To put this product to the test, I decided to tackle two specific projects, the first was to patch the embarrassingly large (and winter chill-inviting) elbow holes on one of my favorite sweaters. After completing the elbow hole patches, I wanted more – I had seen some fun images the company provided where people used the bright colored wool to add some creative patches as flair and I wanted to try this out, which lead to Project two: adding flair.

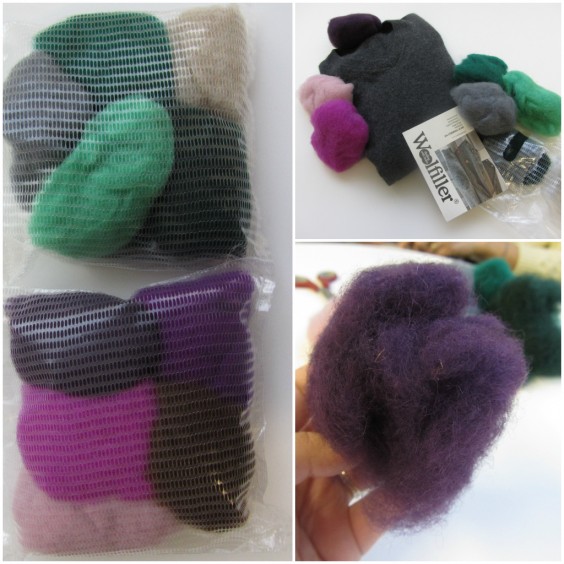
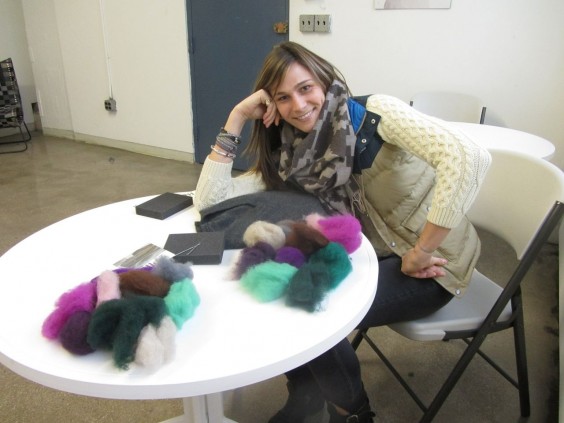
Cassie and I decided to each purchase one kit – a match made in heaven as this green-adoring girl, could partner with Cassie’s purple-loving self and combine to make a cornucopia of rich, jewel-tone wools mixed with solid staple colors (greys, blacks, beiges) which came in extra handy for my second project. But I would also say that one kit is entirely sufficient – each comes with bright color options as well as neutral, basic colors which should cover a range of sweater needs. And to that point, upon unloading our kits onto a communal table, we were both surprised by how much wool comes in each kit – we went about tearing each ball into half and divvying up our goods.

Project 1: Bold Elbow Patches

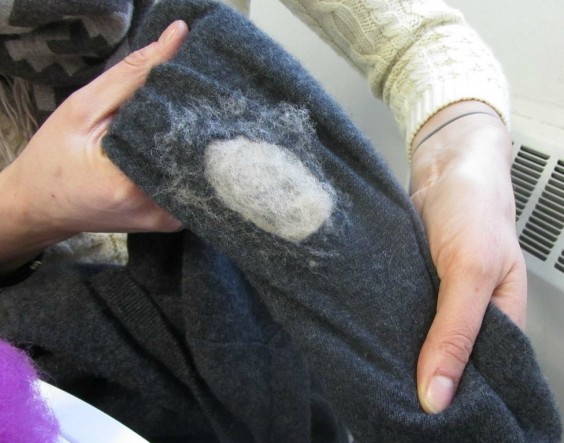
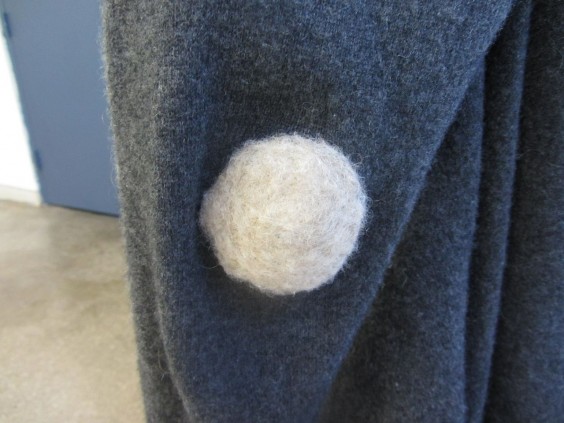
Katie: After some deliberation, I chose to patch the elbows of my dark, gray sweater with the natural beige wool – aiming for a contrast patch look – like your grandfather’s sweater.

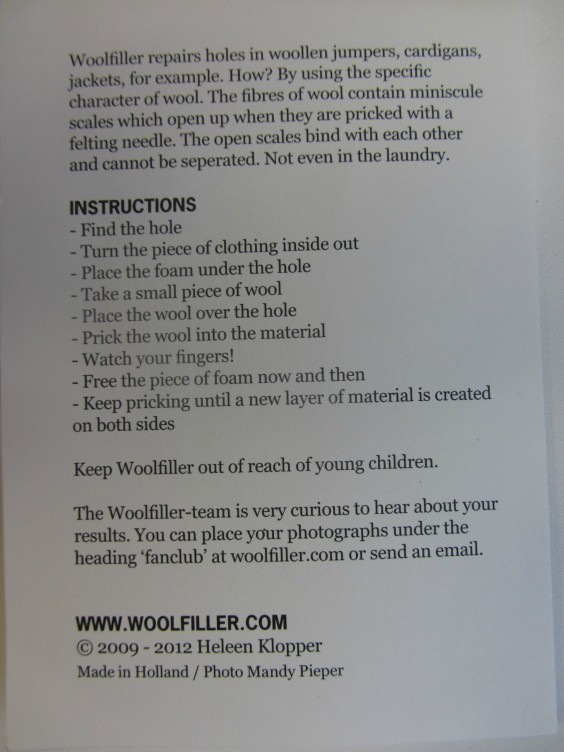
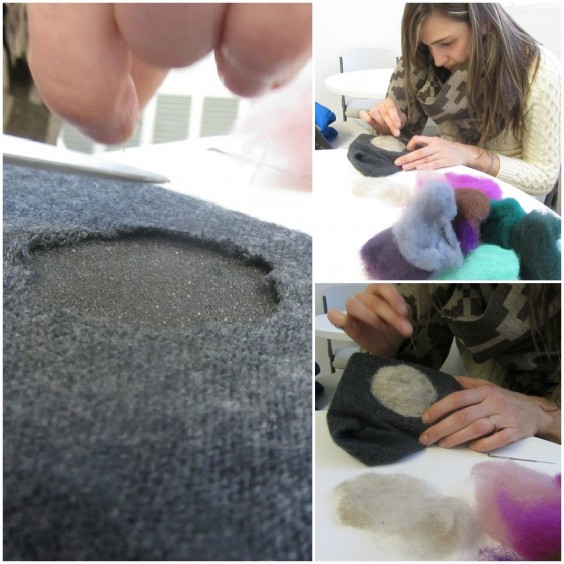
After choosing the color of wool, I reviewed the simple instructions and went to work. I used a pair of scissors to make the first of my ragged elbow holes into a smooth, even oval to ensure my patches would be as clean-looking as possible. Next, I ripped a decent amount (maybe the width of a lime) of wool off the main piece, turned my sweater inside out, put the provided foam piece in the sleeve, laid the wool over the hole, and began poking!

After completing the first of two patches, I turned my sleeve right-side out to inspect my work. Herein I learned one of the bigger lessons of the project – while the instructions suggest turning your piece inside-out to use the product, I found that by doing that I was less aware of the exact line of the hole (because the piece of wool covered it) and as a result I ended up with what can only be described as a “halo” effect around the patch – one sold patch, with a light ring of excess wool surrounding it.

On elbow #2 I decided to try another approach – again I cut away the ragged edge to make a smooth hole, but this time I left the sweater sleeve right-side out, I inserted the felt piece, and lined the wool up perfectly with the hole and started poking away. I found when I did it this way, I was able to guide the wool into a perfect oval while poking and overall felt much more in control of the overall work. When complete, the patch appeared much more perfect and solid.

After completing the elbow patches, I moved onto my next experiment…

Project 2: Adding a Little Flair

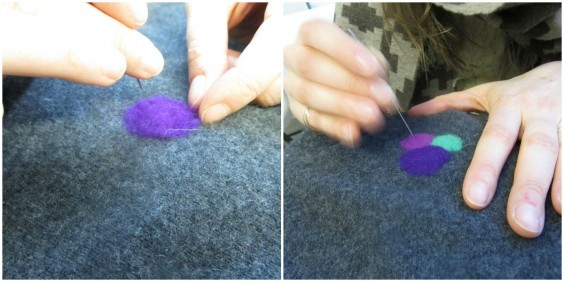
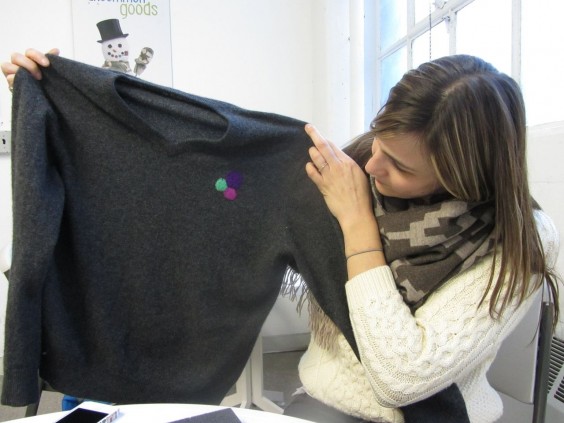
Katie: I decided to do a simple trio of mini circles with bright colors. Having learned from my elbow patches, I left my sweater right-side out, tore of tiny circles of wool (about the size of a quarter), and started poking away! I found my technique was much-improved, I used my fingers to expertly guide the wool and before I knew it I had my little flair added in.

In the interest of science, here are my key Findings:

Finding #1:
This kit comes with a lot of wool. I was surprised by how little wool it took to patch up my rather large elbow holes. I have a lot of wool leftover and am just waiting for a quiet Sunday to get to patchin’ my slew of other well-worn sweaters.

Finding #2:
The more you poke – the more “felted” the wool becomes. Good thing poking is super fun.

Finding #3:
As mentioned above, the kit recommends turning the piece inside-out and then using the wool filler, however, I found this created a slight ‘halo effect’ around the actual patch, and when I tested using the kit the opposite way – with the sweater turned right-side out, I was very pleased with the results – I could control the pokes more and create a clean oval with no halo.

Finding #4:
The Woolfiller is a really easy, creative way to patch.

Having now completed two projects on one beloved, well-worn sweater, I can vouch for the usability and honestly–the fun– this product provided.I passed the DIY-sweater-patch torch along to Cassie.

Project 3: The No-Show Repair

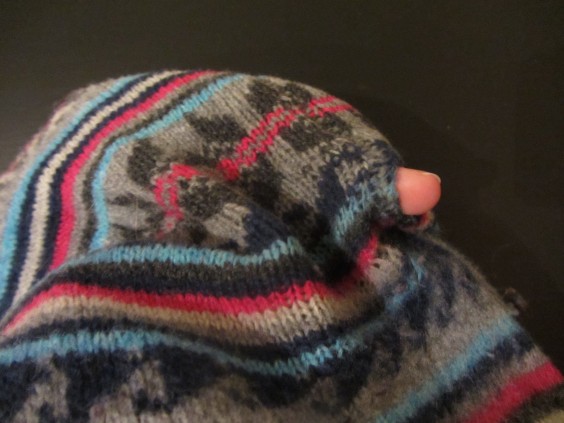
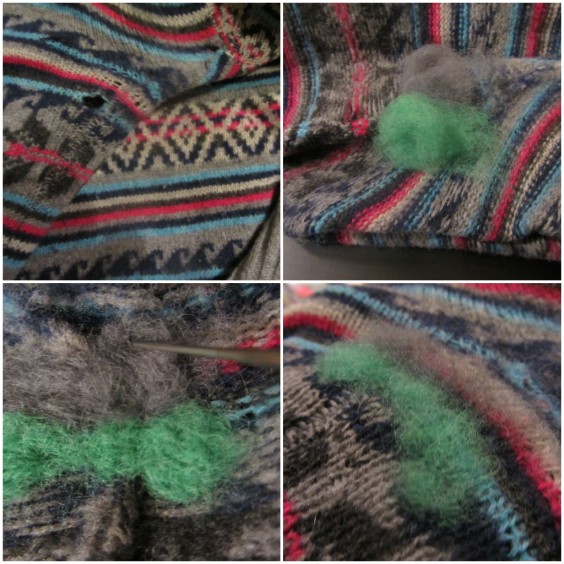
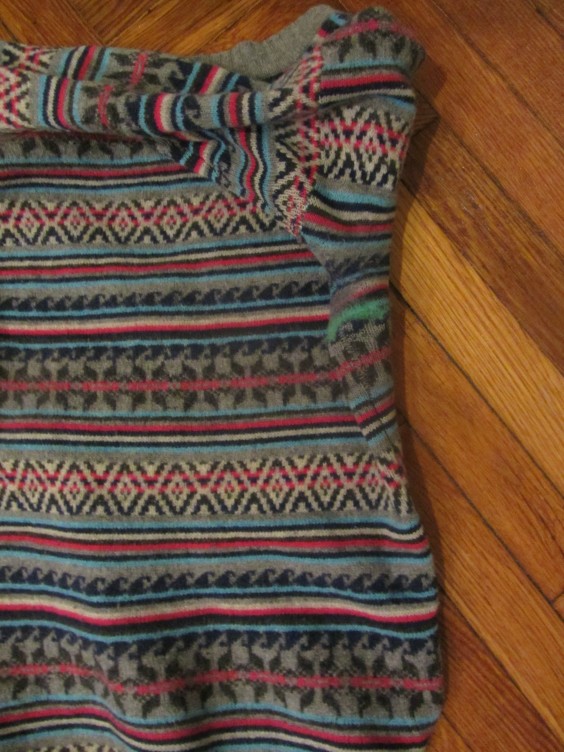
Cassie: I also had a beloved sweater with a hole in it. Unlike Katie, I didn’t want my repair job to be super noticeable. My hole was just under the arm of a multi-colored sweater, so I hoped I could blend the new wool in and make the sweater look like new. Taking her findings into consideration, I began my exercise in craftology.

I started out the same way, by finding the hole, turning the sweater inside out, and inserting the foam block. Then I picked out a couple of colors that I thought would mix nicely with my sweater’s pattern.

I placed the wool over the holes and started poking. It was really fun, and, because the sweater is 100% wool the new wool took almost instantly. I pricked at the wool with the felting needle for less than a minute before the patch was completely attached, but I kept at it for a little longer, just to make sure it was blended well.

I turned the sweater back inside in and gave it a few more pokes, just to give the wool a smoother look. The finished product looked good, and the patch feels just like the rest of the sweater.

While I agree with most of Katie’s key findings, I found that starting with the sweater inside out worked great for a small, blended patch. She preferred the look of the patch when she placed the wool directly over the hole without turning her garment inside out first. I’d recommend doing a test on your own piece, by woolfilling just a small section of the patch, before completing your own project.

Project 4: Super Star Style

Cassie: Giving my sweater a quick fix was fun and easy, but after seeing Katie’s bold patches and the little bundle of flair she added to her project, I was a little jealous. I wanted to give my own colorful creation a try, so I decided to add a little shape to an old cardigan.

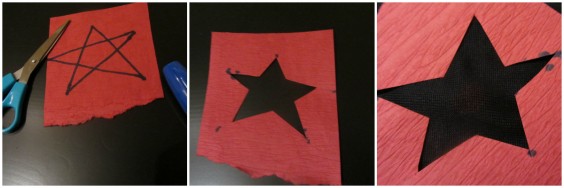
First I drew a star shape on a small piece of scratch paper. Then, I cut out the star, leaving an outline. Next, I placed the outline over the elbow of my sweater. (Remember to insert the foam block first.)

I didn’t turn the sweater inside out this time, since I wasn’t actually making a real “patch,” I was just covering up the existing material with new wool.

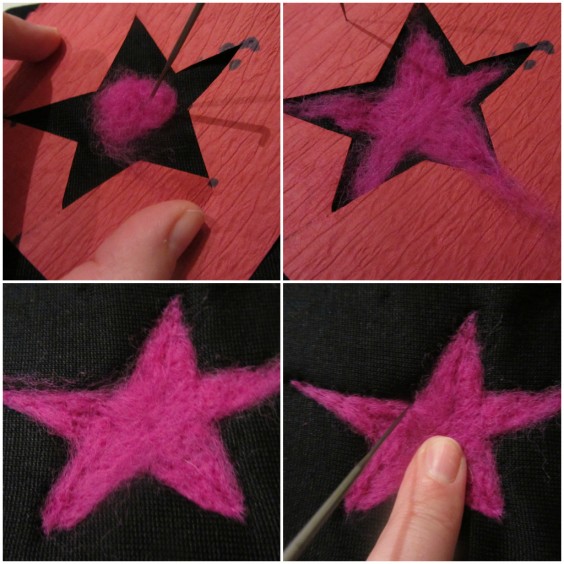
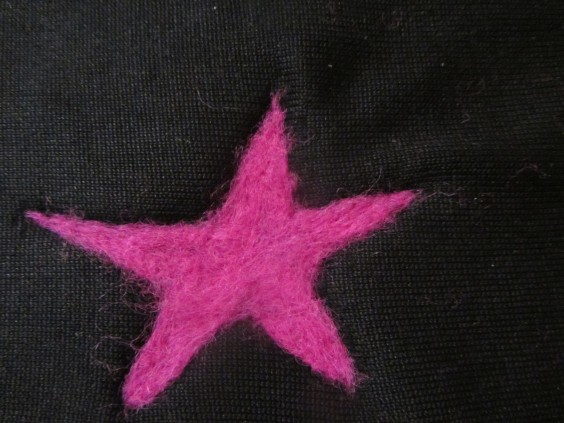
I put a little ball of bright pink wool in the center of the star shape, then started stretching it out to fill the cutout as I poked it with the felting needle. I didn’t secure the star before starting this process, which made it a little trickier than it had to be. Next time I’ll hold it in place with some fabric tape or a safety pin.

I gradually added more wool and pulled it into the shape of the star as I worked at it with the felting needle. Once I had the outline filled in I removed the paper and then poked carefully around the outside edges of the star to give it a sharper shape.

Since the cardigan isn’t entirely wool (it’s a blend also containing nylon and cotton), it took a lot longer for the woolfiller to adhere this time than it did with the 100% wool sweater I’d used it on before.

The star turned out well, but there was one problem. I was so focused on creating my shape that I forgot to move my foam block the whole time I was poking. The wool (and the sweater) got stuck to the block, so It was somewhat difficult to remove when I was done. Make sure to readjust the block several times during your project to make sure this doesn’t happen!

I’ll definitely try this again next time I want to give an old sweater a new look. Next time, I might try a heart, a triangle or square, or maybe even a letter.


Through our multiple sweater patching projects, we learned that the Woolfiller Sweater Mending Kit is a great way to repair a damaged sweater, give old wool a new look, or add a personal touch to your favorite pieces.

And, bonus, it’s not just for sweaters. It works on any pretty much anything made of wool!