Browsing Tag

Kitchen

Maker Stories

This Just In-spiration: Meet Sarah Grange

May 18, 2015

Our makers never fail to motivate us, encourage our creativity, and fill us with inspiration. So, when a new design enters our assortment, we’re always excited to learn more about the person behind the product.

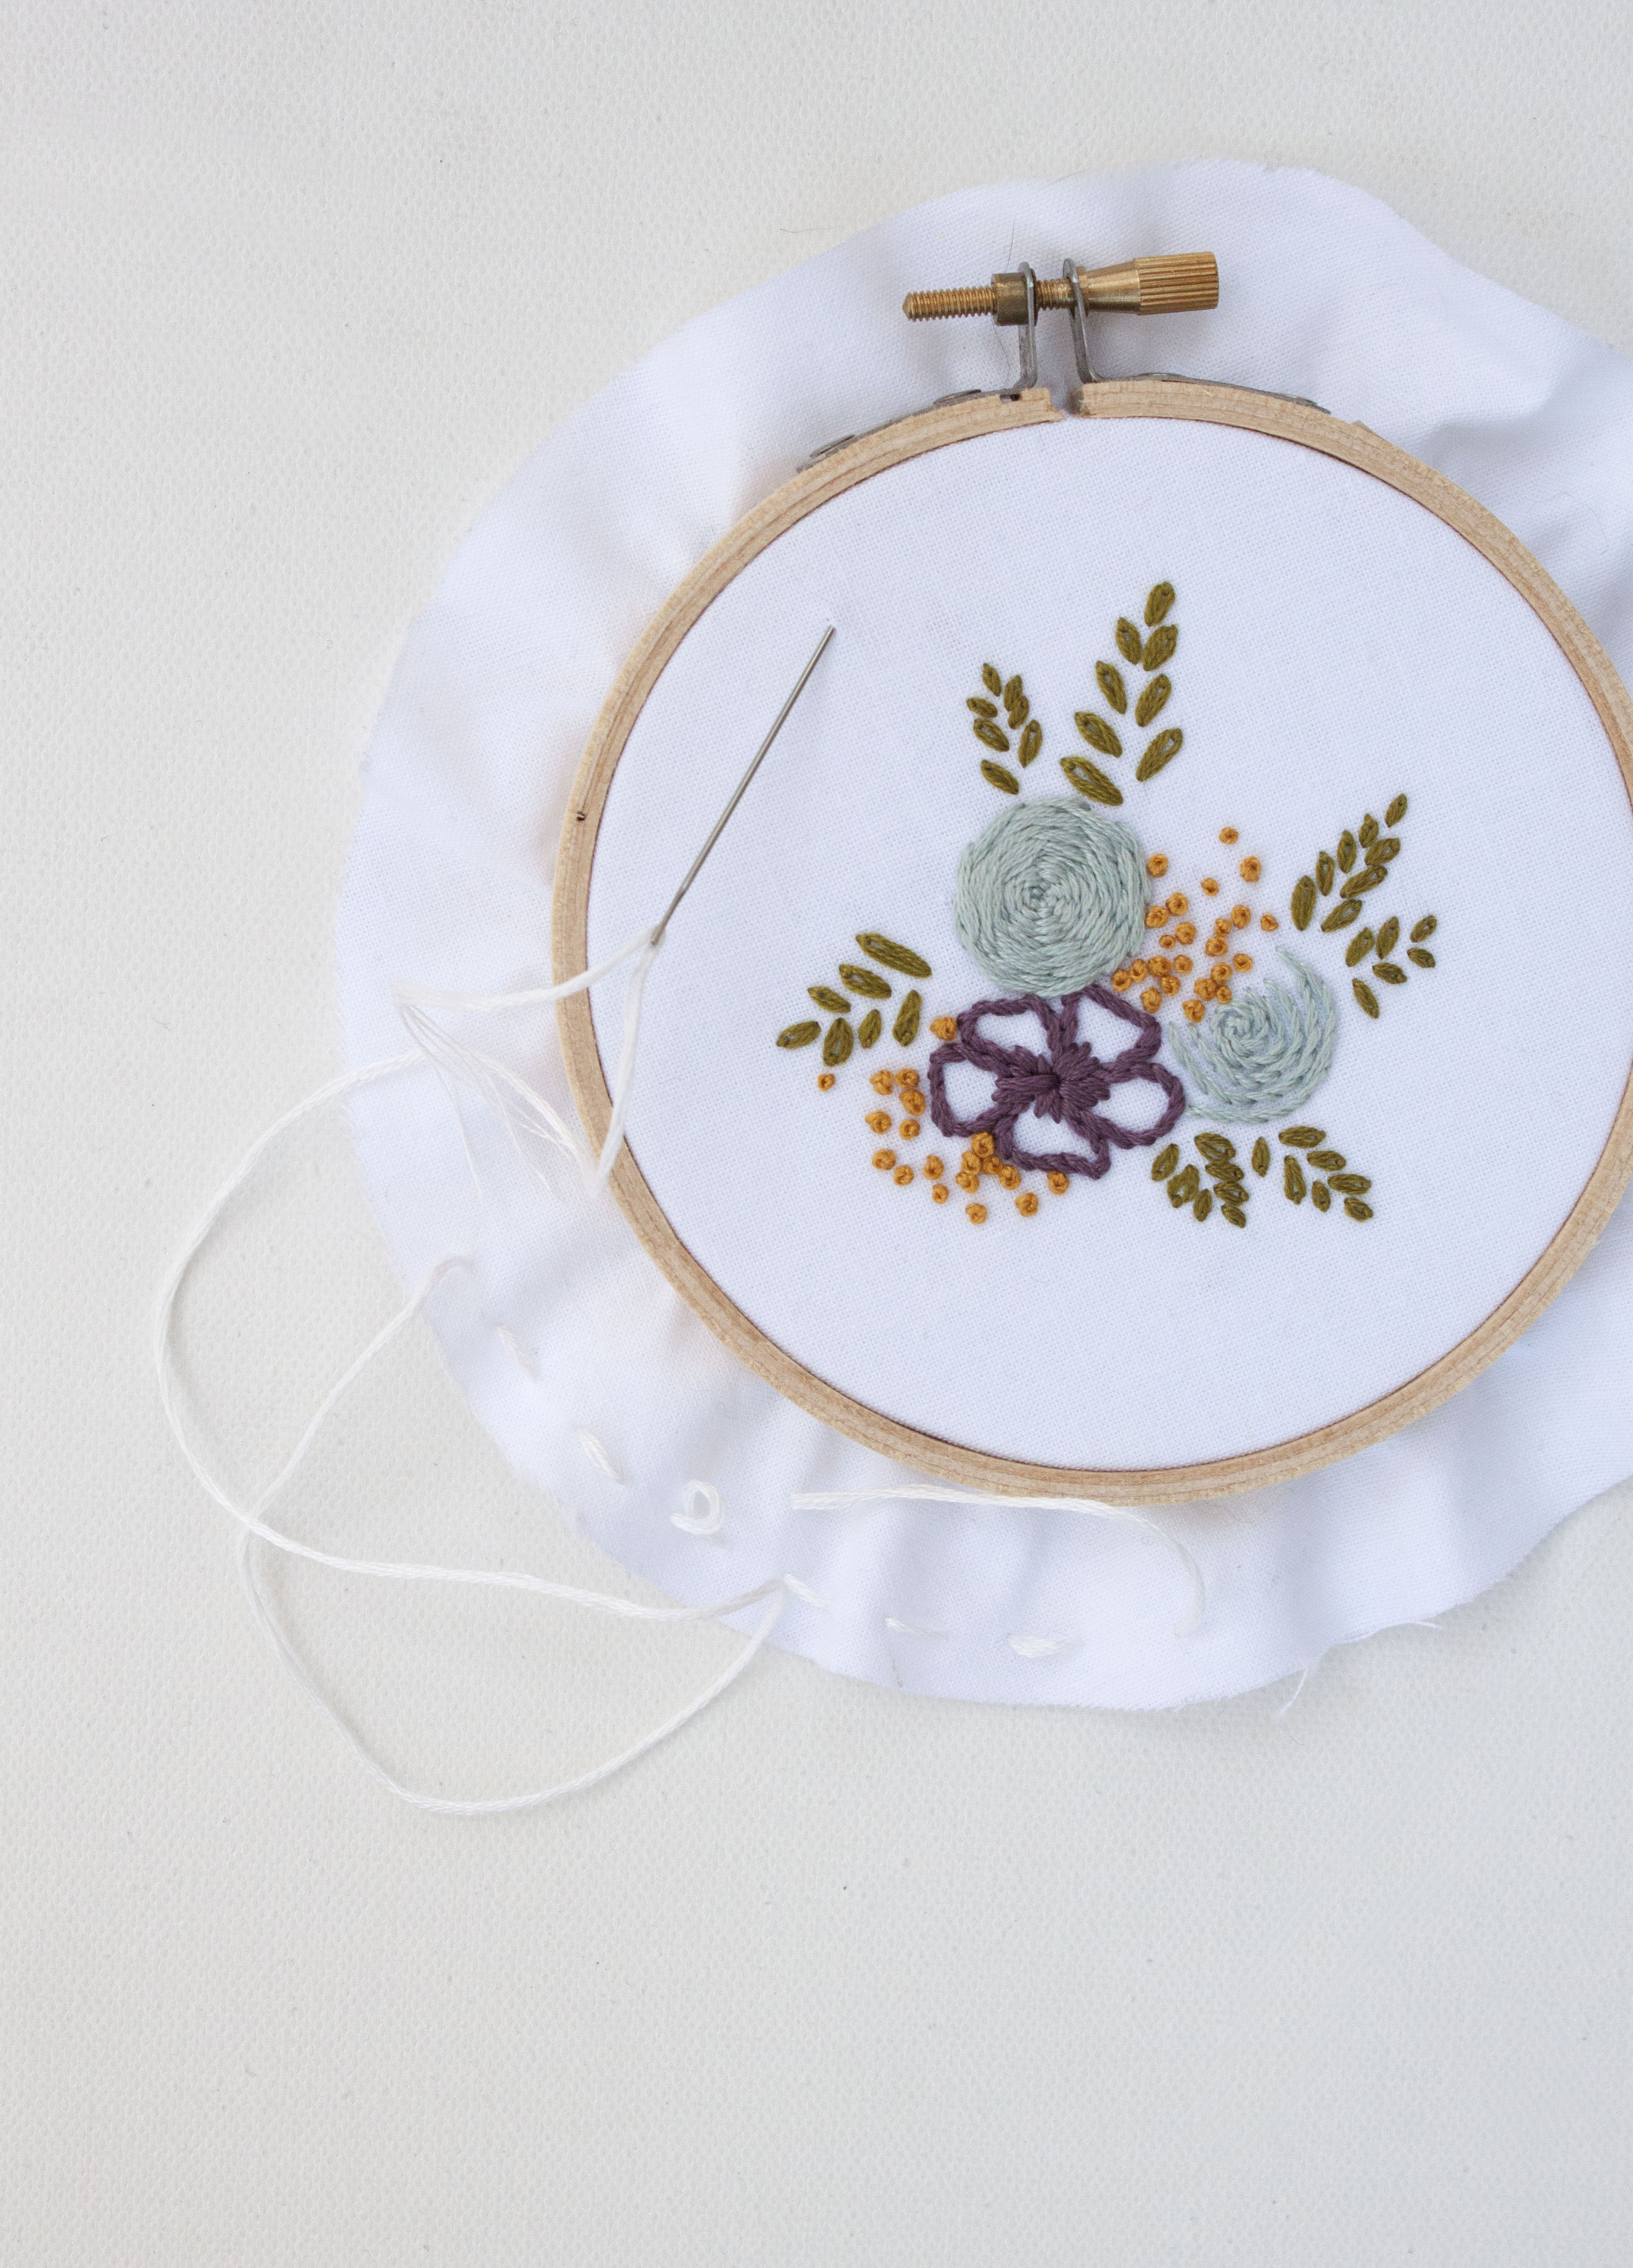
What gets an artist going and keeps them creating is certainly worth sharing, and every great connection starts with a simple introduction. Meet Sarah Grange, the artist behind our new embroidery hoop art collection.

Sarah Grange | UncommonGoods

When did you know you wanted to be an artist?
Growing up my parents always encouraged me to be creative and gave me the freedom (and the craft supplies) to do so. Around 8 years old, I decided that when I grew up my best friend and I would open an art studio/veterinary office.  While my life goals have become a little more realistic over the years (i.e. I’m probably not going to veterinary school anytime soon/ever), I’m basically that same girl.  I’m still dreaming/working towards that goal of having the perfect studio where I spend every day supporting myself by doing what I love.

What was the most exciting thing about becoming a professional artist?
Graduating college and starting my small business, Kitsch & Stitch, has been one of my greatest and most exciting accomplishments.  To look back on the past two years and see the growth that has come out of the long days and nights spent designing and embroidering is incredibly motivating.  But most of all, seeing that people appreciate my creativity and work enough that they want it in their homes is one of the most exciting and motivating aspects of what I do!  Hearing that someone loves their new embroidery hoop or that it made the perfect gift for their loved one makes my day.

Sarah Grange | UncommonGoods

What does your typical day in the studio look like?
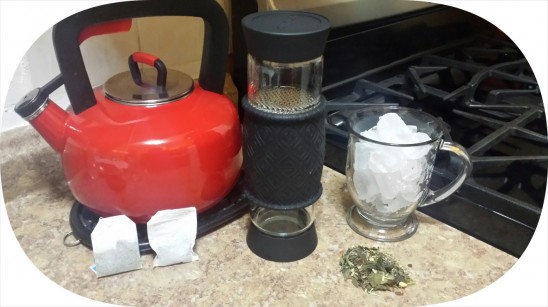
Caffeine, good music, lots of thread and fabric, and two adorable kitties (even when they’re biting at my ankles while I work).

Is there a trinket, talisman, or other inspirational object you keep near? If so, what is it and what does it mean to you?
The walls and shelves in my studio are filled with art and objects that are inspiring and important to me.  I’m a bit of a collector and I love to have all sorts of art, heirlooms, and vintage knick-knacks in my space.  My antique embroidery book that belonged to my great-grandmother is one of my most treasured items.  It’s inspiring and motivating to think that women in my family have been embroidering/sewing for centuries, and here I am continuing the craft tradition (but in a very different way).

Sarah Grange | UncommonGoods

Imagine you just showed your work to a kindergartner for the first time. What do you think he/she would say?
 “Ooo what does it do?” or “Why?”
It’s been a while since I talked to a kindergartner, but I feel like these are pretty popular questions among 3-5-year-olds.

What quote or mantra keeps you motivated?
It’s a toss up between “Fake it till you make it” and “If it’s not alright, then it’s not the end,” but both essentially serve the same purpose for me. I’ve found that at times when I’m feeling intimidated or having trouble believing in myself, the best plan of action is to push those thoughts aside and keep moving forward, even if I’m not totally sure of where I’m headed.  At times when I’m doubting myself or my work, these mantras get me going again.

Sarah Grange | UncommonGoods


Sarah Grange | UncommonGoods

Gift Guides

Gift Lab: How to Make More Creative Cocktails (Through Science!)

April 6, 2015

Erica gives the Molecular Mixology Mojito Kit a Try | UncommonGoods

Product:  Molecular Mixology Kit – Mojito Set 

Research:
I’m usually a straight whiskey or red wine drinker, mostly due to laziness and complete lack of skill with any drink that requires shaking, stirring, or straining, but I was curious to see if the Molecular Mixology Mojito Kit could help me hone my cocktail skills. My idea of mixing a drink is adding a little Diet Coke to the whiskey, so there’s a lot of room for improvement. To prepare, I watched the product’s Youtube video, which led me to believe that I, too, could create fancy drinks in just a few steps and stocked up on rum and mint leaves.

Hypothesis:
I will be the best bartender since Sam Malone and impress my friends. Besides, Molecular Mixology sounds somewhat hipster, and with my recent move to Brooklyn, maybe this kit could help me better fit in to the new neighborhood.

Experiment: 
Materials Needed:
Molecular Mixology Kit
Hand Blender
Bowls
Mint
Rum
Club Soda
Ice
Sugar
Stove
Pots
Friends

I cut the recipes in half because they make a huge amount of mojitos and it was a school night. Since my mission this evening is to be fancy, I decided to start with the mint caviar recipe. What could be fancier than caviar?

Experiment 1, Mint Caviar:

Step 1:
I first read through the instructions and gathered materials.

Step 2:

Making Caviar Mojitos | UncommonGoods
Impatience won out over the instructions I just read, so rather than bringing the sugar, mint, and water to a boil on the stove, I used an electric kettle to boil the water and poured it over the sugar and mint leaves.

Blending the Mojito Caviar | UncommonGoods
Step 3:
I then blended the mixture together, strained it, and added the Sodium Alginate packet before letting the mixture sit for 30 minutes.

Step 4:
Watch an episode of something on Netflix while the Sodium Alginate mixture sits (for best results, try Unbreakable Kimmy Schmidt).

Step 5:
Add Calcium Lactate to a separate bowl of water and stir.

Caviar Dropper | UncommonGoods


Caviar Dropper and Bowl
Step 6:
Fill the pipette with the Sodium Alginate mixture and add to the Calcium Lactate bowl in drops. This was by far my favorite part, because the mint caviar formed right away and this step felt the most like I was doing science. Having wine on hand helps the process and is good insurance in case the molecular mixology doesn’t end well.

Rinsing Mojito Caviar | UncommonGoods
Step 7:
Remove the mint caviar from the solution with a sieve and rinse with water.

Step 8:
Put the Caviar in the bottom of a glass and cover with blended ice, rum, and club soda.
Molecular Mojito | UncommonGoods
Step 9:
Stir and sip. This wasn’t the best mojito I’ve ever tasted, mostly because the mint flavor isn’t distributed throughout the drink, so depending on how much caviar you get in each sip, it tastes more or less like the cocktail should. But what it sometimes lacked in consistent flavor it made up for in cool factor, and I would eat those mint caviar drops by themselves. Next time—and they give you enough of the chemical packets for several next times—I would add food coloring to the mint solution so it is more festive and interesting to look at in the glass. I also might try making the caviar for different types of drinks and flavor combinations.

Experiment 2, Mojito Bubbles:

Mojito Bubbles | UncommonGoods
Step 1:
Put Calcium Lactate, sugar, mint, and lime wedges in a high ball glass and crush wish a muddler. Since I have neither a highball glass nor a muddler, I bashed them together with a spoon in a plastic cup. Less classy, but it got the job done.

Step 2:
Add rum and club soda. Mix until the calcium is dissolved and filter.

Mint Bubbles | UncommonGoods
Step 3:
Place mint leaves in the bubble mold and fill them with the liquid mixture. Freeze.

Step 4:
SCIENCE! Dissolve the Sodium Alginate in a bowl and blend. Unmold the iced mojitos into the bowl and stir. Because I didn’t read the directions first to see that they needed to freeze and started these late, I didn’t get to this part until the following morning.

Step 5:
Pick up the spheres with a slotted spoon and rinse them in a bowl of water.

Molecular Mixology - Mojito Bubbles | UncommonGoodsBreakfast of Champions

Step 6:
Enjoy! While slightly more involved, I much preferred these to the mint caviar mojitos. The bubble bursts in your mouth and fills it with an intense mojito flavor. Kind of like grown up Gushers.

Conclusion:
I could see using this kit to make drinks for a special dinner or event, but it was also very fun as an activity for a night in. The directions were easy to follow and provided fun science facts about the process. My friends all really enjoyed the science aspect of the kit, and there was something very satisfying about completing the full process and presenting a beautiful drink rather than just gulping it down. Next time, I might try experimenting with different drinks using the chemical compounds provided. While I won’t be leaving UncommonGoods to open my own bar any time soon, I learned something new and now have a fun activity to use again in the future.

Get the Molecular Mixology Kit!

Gift Guides

Gift Lab: DIY Brunch Ideas (& Recipes!)

November 11, 2014

Laura Frost | UncommonGoods

Product: Itty Bitty Mixer, DIY Butter Kit, Egg Separator

Research:
Brunch on the weekends in Williamsburg, Brooklyn has plenty of great options. But, there are also really long lines for omelets or pancakes or waffles. My boyfriend and I love brunch at home where we can relax in PJs and sip our coffee without food-deprived crowd of folks waiting for breakfast. Only snag is that we usually want different things. He’s not big on the pumpkin craze, and I’m a fan. He prefers waffles and I like light little pancakes. Will we have a happy brunch despite our differences?

DIY Brunch Ideas | Kitchen Tools | UncommonGoods

Experiment:
The two-different-items-brunch menu also gives me the excuse to use the Itty Bitty Mixer! I’m not a huge fan of kitchen gadgets, but this one is pretty great. I love the handcrafted ceramic design. It’s also very practical for making two different pancake flavors, omelets, and dressings. (Seriously, I could do a whole separate blog on small-batch dressings.)

PJ Brunch for Two Menu:

  • Apple Sauce Waffles for Him
  • Pumpkin Pancakes for Her
  • Coffee Required

The night before my planned PJ Brunch I made some fresh butter and roasted pumpkin. I started off with the roasted pumpkin. I cut a sugar pumpkin in half. Sprayed a foil-lined cookie sheet with oil, and roasted them for 40 minutes at 425 degrees. While the pumpkin was in the oven I opened up the DIY Butter Kit so I could have fresh cinnamon-sugar butter for my waffles and pancakes.

The butter kit is really nice to look at, but not the fastest butter to make. Even though I was starting the night before, I didn’t give myself quite enough time. The kit’s butter recipe requires 3 ingredients and 120 minutes (60 of those minutes is just running a mixer). Dilemma: fresh butter is unbelievably good. It’s especially good using it as a spread rather than baking it into something. My waffles and pancakes deserve the best!

I have to confess here, I’ve used a simpler butter kit in the past that required less than 45 minutes, heavy cream, and a jar. I took this route with the butter kit so I still got the awesome fresh butter despite my poor planning.

DIY Butter Kit | UncommonGoods

I had already bought my favorite heavy cream, poured it into the kit’s jar and shook it for about 25 minutes. It’s fun to watch the cream turn into whipped cream then morph into a happy golden blob of fresh butter. The butter then gets rinsed in cold water. That leftover milk in the jar is buttermilk. It’s great to save for pancakes or waffles. (More on that later…)

I divided up my butter so I could make the cinnamon-sugar butter and use the kit to make tomato basil butter, and still have plain butter left over.
Homemade Butter with the DIY Butter Kit

Butter’s done. Pumpkin’s done. Time for bed. Happy brunch in my PJs in the very near future!

Saturday morning- PJ Brunch part one! I want pumpkin waffles with the freshly roasted pumpkin. My guy wants apple sauce waffles with some of the apple sauce I made the previous weekend. I set up shop in the kitchen so I could easily get started. I first made a large batch of batter that I could split for the pancakes and waffles. I put about half the batch into my Itty Bitty Mixer (did I mention I love this thing?!). I then added about a quarter cup of my fresh pumpkin puree. The Itty Bitty Mixer allows the ingredients to blend together quickly and smoothly. It’s also easy to pour the batter out onto my pan.

Making pancakes with the Itty Bitty Mixer

While my pancakes were cooking I put the remaining pancake batter in the Itty Bitty Mixer along with the homemade apple sauce.

Homemade waffles with the Itty Bitty Mixer

The fresh cinnamon-butter was the perfect addition to the pumpkin pancakes and apple sauce waffle.

Homemade brunch with fresh cinnamon butter

Sunday morning-I was on my own for brunch. Not a glum morning, though. I had just enough eggs in the fridge for one omelet!

PJ Brunch for One Menu:

  • Heirloom Cherry Tomato & Basil Egg White Omelet
  • Tomato Basil Butter Crostini
  • Coffee Required

The night before, I was again making butter. This time it was just blending the fresh butter with the DIY Butter Kit’s tomato basil seasoning. I measured out a teaspoon of the seasoning mix and let it soak in ½ teaspoon of warm water as the instructions noted. Then I blended about two tablespoons of the butter using the kit’s spreader. Result: tasty and pretty butter blend.

Homemade Herb and Tomato Butter

Sunday morning and I’m ready for an omelet! I have my Itty Bitty Mixer ready to go along with the Egg Separator also made by Karen & Stephen Steininger.

Egg Separator and Itty Bitty Mixer | UncommonGoods

Ok, so again, I’m not big on the gadgets. When I typically separate egg yolks from whites I just use the egg’s shells, pouring them back and forth until I’m only left with the yolk. Honestly, I usually ruin a fair portion of the eggs when I try this trick. The Egg Separator is ideal, however. The yolk willing hung back while the white slipped right through the gap in the cup. Also, the lip on both the Egg Separator and Itty Bitty Mixer are well-designed for cracking an egg.

Separate eggs easily | Stoneware egg separator

I whipped up airy egg whites in the Itty Bitty mixer and poured them straight into my hot, non-stick skillet. I then added slices of heirloom cherry tomatoes, basil, salt and pepper. While my eggs cooked on medium low heat I toasted my French bread.

Homemade Veggie Omelet

I folded the omelet just to finish it up. Next I put the tomato butter spread on my bread, then plated it all together. Such a happy plate of goodness!

Delicious Brunch

Conclusion:
The tools I used did make for two pretty great brunches. My boyfriend and I got to share brunch, get what we each wanted, and managed to stay away from crowded brunch hot spots. Plus, I had a happy brunch for one the next day. The DIY Butter Kit could be complicated, but does help make some pretty wonderful butter and butter blends. The Itty Bitty Mixer is currently my favorite thing in my kitchen. In fact the design of the mixer and Egg Separator are so nice they’ve both earned a permanent home displayed on my counter.

Recipes:
Apple Sauce Waffles
(Serves 2)
1 ½ cups pancake mix
¾ cup skim milk
1 egg
1 teaspoon vanilla
½ cup chunky apple sauce
½ tablespoon oil (olive oil, vegetable, etc)

In a mixing bowl, whisk together the mix, skim milk, egg, vanilla and oil. Air is your friend. Whisk so mix is smooth without chunks of pancake mix. Whisk in the apple sauce. (You may want to add more milk if the apple sauce does not make the mix into a smooth-pouring batter.)

Turn on your waffle iron to the desired temperature. I crank mine all the way to the “dark” setting for a crispy-on-the-outside waffle. While the waffle iron heats up, your batter needs to rest for a couple of minutes.

Once the waffle iron is at temperature, spray your iron with non-stick spray and slowly pour in your batter. Don’t leave it unattended—the mix might expand. Just open the waffle maker for a second if need be.

Once your waffle is browned and cooked through, pop it out on a plate. Top with happy cinnamon butter and enjoy!

Pumpkin Pancakes
(Serves 2)
1 ½ cups pancake mix
¾ cup skim milk
1 egg
1 teaspoon vanilla
½ cup pumpkin puree
1 teaspoon cinnamon
½ teaspoon nutmeg
(You can most certainly use pumpkin spice instead of mixing your own spices.)

In a mixing bowl, whisk together the mix, skim milk, egg, vanilla and spices. Air is your friend. Whisk so mix is smooth without chunks of pancake mix. Whisk in the pumpkin. (You may want to add more milk if the pumpkin does not make the mix into a smooth-pouring batter.)

While your batter rests for a moment, heat a non-stick pan on medium heat. Just before you pour out your pancakes spray the pan with non-stick spray. When the pancakes begin to bubble and they’re golden brown on the bottom flip them over. Once that side is golden brown remove the pancake. As you plate them top with happy cinnamon butter and enjoy!

Egg White Omelet with Heirloom Cherry Tomatoes and Basil
(Serves 1)
3 egg whites
Olive oil or butter
Heirloom cherry tomatoes (or any tomatoes) thinly sliced
Basil chopped
Salt & Pepper

Heat a non-stick pan over medium low heat. Whisk the eggs whites—air is an omelet’s friend! Don’t let the eggs rest. Go straight from whisking to pouring the eggs into the pan. Season the eggs. As the eggs set gently drag a fork through them so the whites cook. As the omelet is setting, add the tomatoes and basil. Once the omelet has set, with the top still a bit wet, but not runny, fold your omelet. Once heated through plate and serve.

If you have good French bread, toast this up before you start your omelet and use the Butter Kit’s tomato basil butter. Enjoy!

Gift Guides

Gift Lab: How to Make Tasty Homemade Cheese

October 30, 2014

Paul Allison | UncommonGoods

Product: Italian Cheesemaking Kit

Research:
One of my responsibilities here at UncommonGoods is to answer your questions when you want to know more about an item, and what better way than to actually give this a try and hopefully a taste as well!

To prepare for this endeavor I’ve checked out Mad Millie’s YouTube channel and watched her prepare and make her Mozzarella cheese. If there’s one thing I love it would be cheese and Italian cooking. (OK, that’s two things. But two GREAT things!) In addition I’ve managed to locate some non-homogenized whole milk, there’s no question in my brief readings on Wikipedia and the instructions that starting with the right milk is key.

Hypothesis:
Surely fresh, homemade bread is better than store bought bread so I would hope that homemade cheese would be equally as satisfying.

While I am a tad nervous about the results, I feel like the instructions are clear. Although I am super glad I watched the video, so I have a sense of what my goal should look like. I’m generally good about following directions, although when I cook there are times when I can get experimental and deviate from the recipe to add a dash of this or, OOH that’s a pretty color! I’m just going to have to reign in the wild side and stick to the basics–this time around at least.

I feel like the biggest challenges are the ones I can do little about. For those of you who don’t live in New York, you may be surprised by the size of my kitchen; most surfaces are needed for storage so there’s just a limited number of spots to do your mixing and cooking. Oh, and pardon our appearance while we’re in the middle of renovations (at home)! That and I’m concerned about the size pot to use. My current plan is to use our ancient (I think this is older than me) pasta pot.

Experiment:
Well I have everything laid out, and why yes those ARE our Nesting Prep Bowls back there! The instructions say to sterilize your equipment that will handle the milk for 5 minutes. The challenge will be the colander, so let’s get a bunch of pots a boiling. It’s at this point where I wonder why I decided to do this in a heat wave and without air conditioning. My large pot isn’t making it to a boil, and alas, the lid is lost somewhere in a pile of tools. So, I give it a good 10 minutes rather than 5. Thankfully my colander in the smaller pot has reached a boil as that is my greatest concern. I prepare my ingredients, but I don’t see when I add the salt!

1 - Everything Laid Out
Cheese Supplies

The recipe calls for a full gallon of milk, but my local whole foods only sold the milk in half gallons. And here’s where I have my first tip: Shake the milk before pouring it into the pot. I left a lot of good tasty stuff in the bottle. I decided to use the same smaller pot that was already in action, so it’s already warm and we’re just heating the milk up to just under my current room temperature. (Ouch! The thermometer is reading 103, and while the pot is hot from boiling the room temperature is in the ’90s.) And here’s my next mistake. I can only fit a half gallon of milk into this pot! It’s too late to stop going now, so I’ll just have to adjust on the fly.

Making Cheese | UncommonGoods
Milk for Cheese

I squeeze in the calcium chloride. With the stopper it’s not too hard to simply measure half and then the citric acid and decide to add a tablespoon of salt. I’d already mixed in the citric acid to let it dissolve as if I was going to do a gallon batch, so I have to guestimate how much to pour in. I choose to use more than half as I feel it’s likely that it’s not completely mixed. Because of the heat the mix is at the required temperature faster than I expected and before I can really get everything prepared.

Hot Pot

I quickly turn off the heat and it’s time to add the Rennet tablet. It hasn’t really dissolved, but I hope it should in the milk. I stir it in and cover the milk and set my timer for 25 minutes. After 20 minutes of refuge in air conditioning, I’m back in the kitchen and re-reading the instructions. OH NO! You add the salt in the very last step. So needless to say, I’m very nervous at this point and a bit frustrated at myself.

Ice for Cheese

I set up the ice water and I am trying to get the temperature right for the hot water. I started with warm water, from when I was boiling (rather, trying to boil) my tools to sterilize them and I decide to heat a kettle with boiling water and try to get the temperature right. I end up with water that’s just 140 degrees rather than 158, but I go with it. I check on the cheese and it looks like it’s firmed up to me.

My knife goes in and clearly separates the curds. I slice in the cubes and am a bit nervous. Did I allow enough time for the curds to set? It really just seems like a thin skin of what will become cheese. Once I begin to reheat the mixture and gently stir, the answer soon becomes clear. No. I didn’t. I think the key is to really watch the video. I recognized it wasn’t quite the same. This is definitely a case of being close enough is not going to cut the cheese so to speak.

Cheesemaking Kit

I decide to forge on. Once the curds have reached the warmer temperature I begin to scoop the curds into the cheese cloth and colander. As the curds are loose this takes a long long time and I was not able to maintain the temperature. The recipe calls for letting the curds drain for 5 minutes but the process of just getting them out of the pot takes closer to 15 minutes.

Scooping and Straining Cheese

A little forlorn, I begin to scoop up globs of curd and rest them in hot water briefly. They quickly begin to separate, so I simply start to work them quickly and it’s readily apparent that I do not have mozzarella cheese. I still give them a dunk in the ice water, though, and they do hold up better than I expected.

Squeeze the Cheese

It's not mozzerlla but...

At the end of this experiment it appears that while I failed to make mozzarella I did end up with some REALLY tasty Ricotta cheese.

So tomorrow once the kitchen is once again clean and not quite as hot it will be time to make some lasagna!

Conclusion:
When we did make lasagna with my homemade ricotta, it was AMAZING!

I clearly did not make this easy for myself, and as much as I tried to read and prepare myself, I should have started with the goal of making the simpler recipe for the first time around.

I would emphasize that it is a lot of work to make cheese at home, but that the work has much more to do with the preparation and the clean up rather than the cheesemaking itself. I think it would help to have greater counter space and I’m curious what would of happened if I’d had the larger pot to handle the milk.

I WILL make mozzarella, although not this week. Next time I’m going to do a little more research so I can be confident in the ratio of ingredients I’m going to use. I’m also going to have to have a pot of boiling water on hand so that I can properly prepare my curds and they can be stretched into mozzarella. And now that I know the drill, I won’t add the salt until the end! I’m very hopeful that with this adjustment I will be successful.

Design

Video Kitty: Celebrating the Cats of the Internet

June 18, 2014

It has been said that the Internet is the dog park for cat owners. Sure, your kitty isn’t likely to run an obstacle course or act frisky on command. But the web makes a great place for cat lovers of all kinds to swap tips and stories. And when those cute moments do happen? Catch them on video and, boom, you’ve got an instant audience bigger than that spaniel at the dog park ever had. In honor of those compulsively-watchable cats of the Internet, we’ve helped to create the Video Kitty glassware series!

Video Kitty Tumblers | UncommonGoods

Our Product Development team spent countless hours of research, combing through the endless supply of adorable online videos, in order to determine the most charismatic, most popular and most iconic types of celebrity cats.

We then worked with artist Patricia Carlin on how to capture that star quality, with its mix of undeniable cuteness and think-out-side-the-box, sit-inside-the-box attitude.

“Refuses to be Typecast”
That’s right. You can’t pigeonhole a performer of this caliber. Unless you have an actual pigeonhole for it to climb into. Or a shoebox, cereal box, milk carton, or pretty much any container of any size. It’s been proven before that, for a cat to find a place in your heart, it merely needs to find a place in your empty packaging.
Refused to be Typecast

“A Finely Nuanced Performance”
A true cat celebrity is a master of subtlety. Extreme subtlety. Verging on laziness, even. But with the kind of artistic integrity that you’ll never find displayed by their online rivals. That’s right, sloths—we’re calling you out. Because anyone can move slowly, but it takes genius to convey such a total disdain for effort.
A Finely Nuanced Performance

“Ready for a Close-up”
A-List cats maintain a very complex relationship with their fans. They’re not going to pay attention to you just because you ask. But they will occasionally allow a devotee to massage their back, or provide them with food. And those times when a cat stares deeply into your eyes and wonders what you would taste like—that’s a kind of love, isn’t it?
Ready for a Close-up

“Catapults to Stardom”
Ultimately, the cats that reach true stardom are simply different than the rest of us. And not just because we’re different species. No, they are the beautiful ones. The risk takers. The ones with the courage and dignity to carry on, even as the paparazzi revels in their supposed failures. Also, totes LOLZ when tha fuzzy kitteh falls down. ROFL!
Catapults to Stardom

So raise a glass (or a mug) to your favorite feline celebrity, whether it’s online or in your own home.

Gift Guides

Gift Lab: Tea to Go

May 21, 2014

Tea to Go | UncommonGoods

Research:
Do you know that person who wakes up with just enough time to brush, shower, and dress and barely catch the train? Well that’s me. I’m all about getting things to go, in order to save time – typical New Yorker, I know. Hence the reason I chose the Tea to Go for my experiment, figured it would make the difficulties of staying warm on the go, a thing of the past.

Hypothesis:
I am hoping that this keeps my tea warm without burning my hand, as well as keeping it hot for at least an hour. With public transportation being as unpredictable as it is, this would be a big thing for me.

I’m going into this with no knowledge of how the glass apparatus would hold up against the traditional metal thermos that I’m used to. The plan is to use the Tea to Go all the ways that it has been advertised and to see if it meets the needs of someone who’s the definition of a person on the go.

Experiment:
First, I got everything prepared: a kettle of boiling water, 1 peppermint tea for those frigid mornings, 1 peach tea with ice for the playful days, and some loose White Riesling tea for those sleep-in mornings that you can only dream of.

Tea

The body consists of very a thick glass tube and a heavy duty rubber grip. The inner body includes a small perforated section for the tea, then a long portion where the liquid will flow through. I didn’t realize how tall it was until I put it next to my jar of Linguini noodles and, as you can see, it’s right up there.

Tea to Go | UncommonGoods

According to the instructions, I poured the hot water through the small compartment for the tea bag – that was a no go. The water took really long to fill up the tube and I wasn’t about to wait. It made sense if you had to time to allow your tea seep and brew a stronger tea, which wasn’t what I was going for. Instead, I filled up the tube from the larger side and things went smoothly. After letting it sit for 10 minutes, I gave the bottle a slight tilt to allow everything to diffuse evenly and off we go.

Making Tea | UncommonGoodsHot Tea | UncommonGoods

The rubber grip was hotter than I expected, but definitely manageable. After being out of my house for 20 minutes the tea was still extremely hot, and I had to implement the blow-and-sip method, which worked just fine. After being in public transportation for an hour, my tea kept hot (and this is with me keeping the top off so in order to drink). It didn’t really cool down at all, I still had hot tea after an hour and half – that’s a plus.

Loose Leaf Tea

I also gave it a try with loose leaf tea. From looking at the perforations you can tell that large loose tea leaves are the best choice, so that you don’t have leaf residue floating around. I didn’t take that into account until much later. Even though some of the excess tea got in the drinking tube, it was not a big deal. But it’s just something to keep in mind for those who don’t like things floating in their drinks.

The Tea to Go certainly holds up for hot tea 100%. NY Winter – here we come!

Iced Tea to Go | UncommonGoods

Next I gave the bottle a try with iced tea. I let the Peach tea bag seep in a little bit of boiling water before adding filtered water. The water was still relatively warm so I decided to add some ice cubes, which quickly melted but were able to provide me with a cold drink. Took my book, iced tea and an orange and enjoyed the break from freezing temperatures and read for a few on my stoop.

I came back in after an hour with very little tea gone (Harry is just that captivating!), and I was amazed to find out it was still very cold, like a beverage right out the fridge.

Conclusion:
Being a person who lives in New York and has experienced the wonders of Jack Frost first hand, the Tea to Go has become my accessory for those cold rushed mornings. It’s a pretty simple but effective device that will keep my hands and tea warm.

Not only is it good for those frigid mornings we’ve come to love, but it’s versatile enough to keep tea cool for those strolling days. I’m thinking it’s going to come in handy as summer approaches, since it has officially been added to my morning check list – keys, metrocard, money, and Tea to Go.

Design

An Easy Answer to Olive Pit Etiquette

May 15, 2014

Enjoying olives discreetly isn’t always easy. Where do you ditch the pit? In a crumpled napkin? On the side of your hors d’oeuvre plate for everyone to see? The usual options aren’t exactly attractive. With that in mind, we created the Olive Server.

Olive Server | UncommonGoods

This innovative dish solves the pit problem, holds your picks, and displays those tangy, salty treats in style. To design the Olive Server, our Product Development Team partnered with Paul Brothe, a ceramicist who conceptualized the piece based on his love of nature-inspired ceramics, a modern, lead-free take on traditional Majolica pottery, and the goal of keeping pits unseen.

Sketches

When Brothe first presented his prototype, we loved that it was made of sturdy earthenware painted a natural green color, and provided a way to both serve olives and hide pits. From there, we made a few adjustments to make the Olive Server even more appealing to our customers who want practical serveware with a fun twist.

Original Prototype

While the original design featured a porcine, two-holed opening for depositing pits, we decided to give the pit cavern an oval shape and one larger hole. We wanted to make the piece really pop, but we didn’t want to detract from the realistic olive form, so we chose four colors to accentuate the incorporated shapes.

Process

The fruit-shaped basin is actually two parts. The bowl holds the pits, keeping them in one place for easy cleanup, while the lid keeps them under cover. We chose to line the bowl with a pimento-inspired burnt orange and give the exterior an olive green color. We also added a shade of green to the “leaf” where the olives sit and a branch-hued brown to the pick holder. Now each individually-functional element of the server is uniquely eye-catching, enhancing the look of the all-in-one display.

Olive Server | UncommonGoods

To create the finished servers, each piece is cast from a mold, inspected and trimmed, thoroughly dried, and then fired overnight at a temperature of 2000 degrees Fahrenheit.

trimming_sqfired_sq

Two techniques are used to glaze these bisque fired pieces—dipping and brushing. The glazing is done by hand using special glazes formulated in-house at Brothe’s Jersey City, NJ studio, so the colors are truly unique. The colored servers are then fired overnight one more time, allowing the glazes to fuse together and create a smooth, glassy surface.

Glazing

The result is a high-quality dish that provides an attractive way to serve olives, keeps pesky pits out of sight, and is uncommon enough to stir conversation at any cocktail or dinner party.

Buy the Olive Dish | UncommonGoods

Gift Guides

Gift Lab: How to Make Cocktail Bitters

December 19, 2013

Morgan | Bitters

Research
I’m a devoted whisky (and occasionally whiskey) drinker and usually enjoy my Scotch like I enjoy the top shelf of my dresser: neat. But I was intrigued to see if bitters might prove an opportunity to salvage a liquor I’ve all but quit–rum. The recipe calls for a high-proof rum, so I picked up one of my favorite antiseptics, Bacardi 151. I also bought an aged rum (to test my bitters in later) that I was hoping might change my opinions of the drink. That rum, Plantation Grande Reserve (note the fancy pants name), was a vast improvement over any rum I could remember tasting (in either direction), in my younger days, so I was looking forward to a different experience, perhaps.
Bitters 1

Bacardi 151? Hello old friend.

Hypothesis
I don’t think I’ve ever tried bitters before, but I’m coming in with a semi-open mind. I like bitter things. There’s something smart-sounding about the word “bitters.” As I have a general preference for straight alcohol, I’m not sure how much this will “add” to the experience, but perhaps since I’m less predisposed towards rum, it may make that drink more enjoyable. (Spoiler alert: I cheated and came up with this last line after the experiment.)

Experiment
Preparing the mixture is actually a good bit of fun, adding the composite spices and ingredients as if your high school science teacher were a part-time bartender. (I didn’t see you and you didn’t see me, Mr. Chard.)

DIY Cocktail Bitters | UncommonGoods

Here I am masterfully peeling an apple and not cutting myself, the skins to be mixed into the jar of rum and spices. No blood! Easy enough.

The preparation requires a morning and evening shake of the mixture in its jar, which is a fun way to interact with your little blooming bundle of joy, and to appreciate the visual richness and beauty of the concoction as it does its thing. Eventually you’ll forget to shake it one morning and you’ll feel guilty for the rest of the day. Just let it go–it’ll be fine.

DAY 1 TEST
Finally, after a long and eager wait, 2 weeks are up and it’s time to open my present! Hold on there just a minute, bud–a few more steps before we’re ready for cheers. First we have to strain through cheesecloth (which doubles as gauze if you cut yourself peeling that apple earlier–try to use the clean portion).

Bitters | UncommonGoods

The liquid is separated from the solid ingredients, which are placed on the stove to simmer with water then cool. This is a good opportunity to be extremely impatient, blow on the mixture, and just dump it in hot anyway. (Again, you’re probably fine.)

Bitters in Process | UncommonGoods

After cooling, we strain the mixture once again. OK, this is your exit solids! In the trash you go! We then get started on simple syrup (a sugar and water mixture that is heated and added in equal parts to the rum mixture). Add to dropper bottle then the big payoff.

I decided on bourbon because, well, I like bourbon and it seems to feature in a good number of bitters cocktails. I could make a cocktail, but I’d rather really taste the bitters here just to see how they work with the alcohol. A bit of bitters drip drop into some Buffalo Trace bourbon.

Drinking Bourbon

Unfortunately, it wasn’t doing it for me. Nope. Had I done something wrong? I don’t think so. Was it last Friday when I neglected to shake the bitters? Were they exacting their revenge? Nah – I don’t think bitters hold grudges (although they are called bitters…). I think it was just the combination. The iconic Buffalo Trace flavor now muddled into something indecipherable and a bit all over the place. I added a bit more but that just added to the confusion. My eyes saw the Buffalo Trace and my mouth was failing to compute.

Give up? No way. We’ll try again tomorrow.

DAY 2 TEST
New shirt, new day, new opportunity to drink.

Back on the saddle and off the wagon with something a bit more compatible, perhaps – rum. Yes, my aged rum would make a late-game, surprise guest appearance in a highly unscientific evaluation.

In one glass – straight aged rum
In the other – that same rum with a few drops of bitters.

Bitters and Rum

This one makes sense. The rums obviously blend well, and this time I’m able to actually taste the spiced apple. Not overpowering, but definitely adds another dimension. Yeah – I get it.

Conclusion
I could see this enhancing a mediocre rum or allowing for a drinker to taste a decent one from a different perspective. I imagine you could mix into a number of different cocktails with different alcohols. (The instruction booklet names a few.)

The highlight for me though was the process. Enjoying a drink usually consists of nothing more than opening a bottle and pouring it. Occasionally this might involve stirring in a few extra ingredients–and sure–there are even bitters you could buy. But there was something very satisfying about the process; in the interaction with all the individual ingredients, in the ultimate unification of those flavors. There was something satisfying in the wait. Alcohol is one of those things that can take longer than anything to get right. We buy liquors that have been waiting for years, heck, decades to taste just right, then we sip them and they’re gone.

This kit represents the process, the time, the care that goes into a good drink. This probably won’t change my lineup of standby drinks or undying love of a good straight Scotch, but it was an interesting ride, I learned a bit, and I have something new to taste along with some of my old favorites. Nah, I ain’t bitter.