Browsing Tag

Crafts

Gift Guides

How to Make a Gift Bag

December 2, 2011

I tend to procrastinate when it comes to gift wrapping. I purchase the gifts I want to give and stuff them under the bed or on a shelf in the closet until right before Christmas. Then, while I’m fantasizing about radiantly glazed holiday hams and sweetly spiced rivers of eggnog, I’m also faced with making a pile of presents bright and giftable.

Those odd shaped, extra-uncommon gifts pose a particular challenge. I suppose I could skip the fancy wrap and just stick bows on things that don’t pack up pretty. Or, I could put any asymmetrical or otherwise un-rectangular products in big boxes stuffed with lots of tissue paper, then wrap them. I go with option three–a fancy gift bag.

While the bow trick works in a pinch, it’s not nearly as fun to take off a bow as it is to find a surprise inside of pretty wrapping. I know this, because my husband is a huge supporter of “just stick a bow on it.” I do have to admit, it’s a step up from his other, “just hand her the thing in a crumpled-up shopping bag” approach.

The second tactic–put that hard to wrap gift in another box–seems like a viable option, but wrapping a box just right takes time and creates a lot of waste; you spend 20 minutes getting each crease perfect, only to see your lovely artwork ripped to shreds and tossed in the trash. It’s heartbreaking, really.

So, you can see why, for me, option three takes the customary yuletide fruitcake.

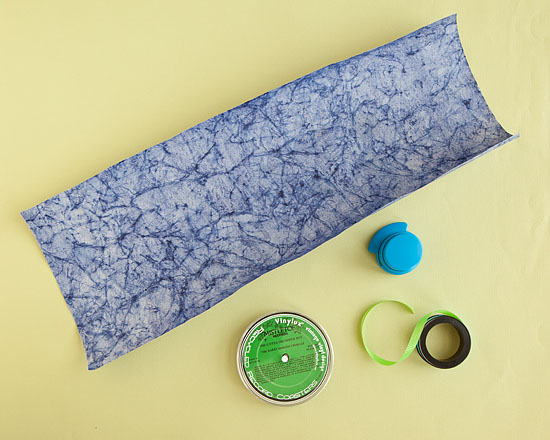
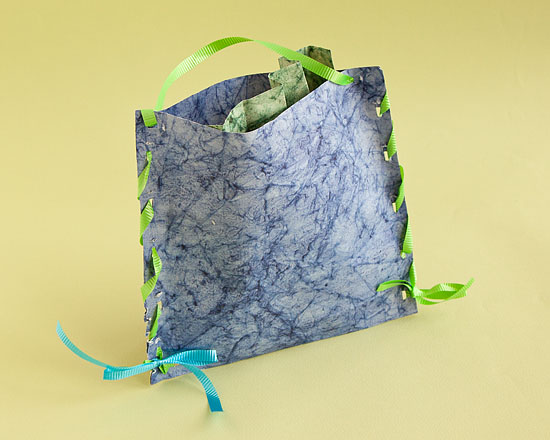
Not only are gift bags simple to use and reusable, they’re also easy to make. All you need is some heavy wrapping, construction, or scrapbooking paper and ribbon to create a sturdy, eco-friendly alternative to traditional wrapping. I picked pretty blue craft paper from the paper mezzanine at Pearl Paint here in New York. (Yes, that’s really what their paper department is called; it’s an entire sublevel–mezzanine, if you will– full of gorgeous papers for wrapping, crafting, and scrapbooking.) I wanted my bag to be festive, but not too Christmasy, so it could still be reused after the holidays. To fasten the paper, I used a Staple-less Stapler, but you could easily use a hole punch and stapler to create a similar effect.

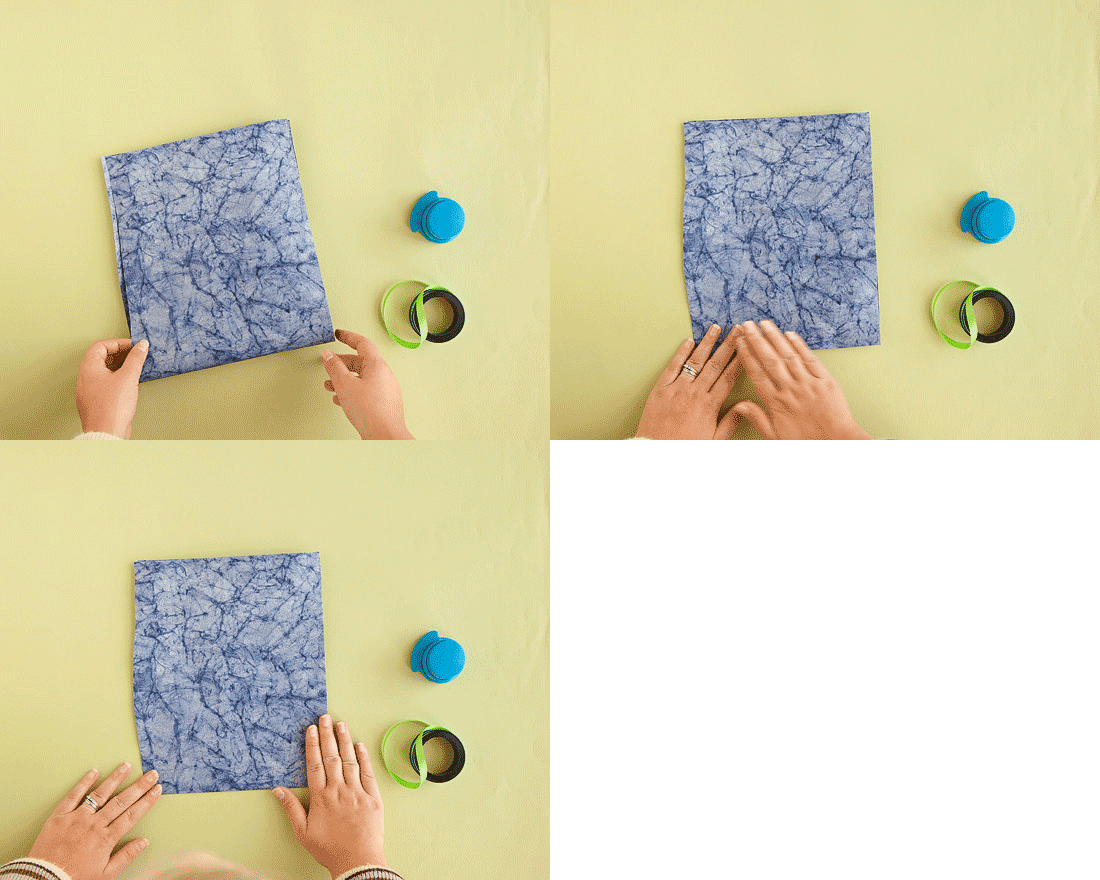
First, make sure you have enough paper to cover the item you’d like to wrap. To wrap the Holiday Record Coasters, I placed the product in the middle of the top half of the paper, then folded the bottom up to completely cover the gift. It’s okay to make the bag a little bit bigger than you need it, just make sure the gift doesn’t stick out of the top.

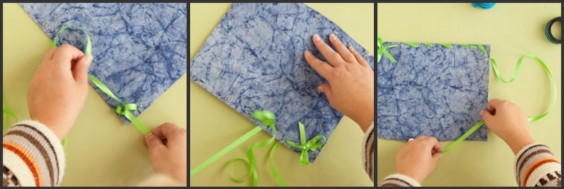
Next, “staple” along the edges on both sides. The staple-less stapler will create interlocking flaps for a secure hold, but it also leaves a small hole where you punch. You’ll also want to punch once in the bottom left-hand and once on the bottom right-hand, just above the seam.

Threading the ribbon through the holes not only adds decoration, it also increase the bag’s sturdiness and create a handle. However, before threading the ribbon, make sure you have enough by measuring it against the length of the bag four times (once for each side, once for the handle, and once for extra ribbon to work with).
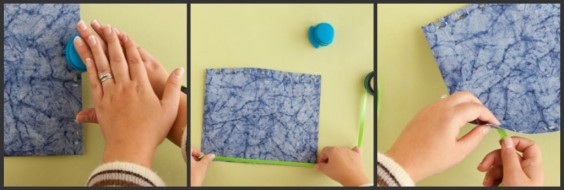
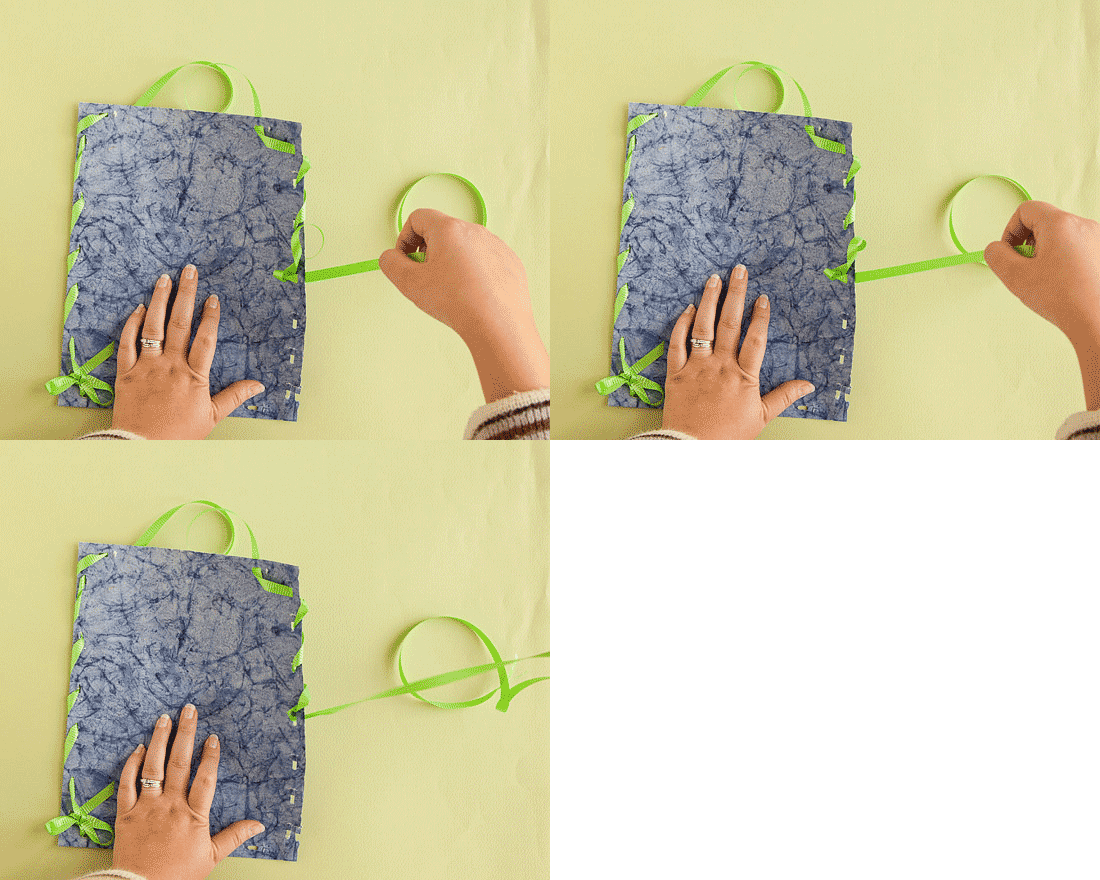
Start threading by inserting the ribbon in one of the bottom corners, just above the seam. Leave a few inches of ribbon, then pull the remaining ribbon up through the next hole in the side of the bag. Tie the two ends into a knot, and create a bow with the remaining ribbon from the short end. Using the long end, continue to thread up the side of the bag, looping around the outside edge of the paper.

When you come to the end of one side, leave enough ribbon to create a handle before continuing to thread down the opposite side.

Once you reach the end of the second side, pull the remaining ribbon up through the hole on the corner above the seam. Pull the leftover ribbon back though the final loop on that side, and tie it into a secure knot. This side won’t be as pretty as the bow on the opposite side, but the problem can be easily remedied by cutting off any excess ribbon and tying a new bow to cover up the knot.
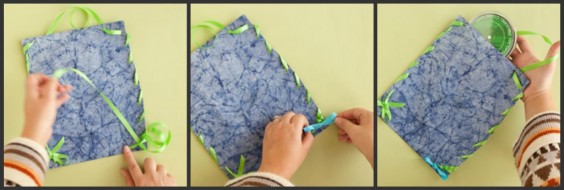
The finished product uses no tape, glue, or staples (if you go the staple-less stapler route), can be used over and over again, and costs less than buying a pre-made gift bag. For an added touch, stuff the bag with leftover wrapping paper, folded into fans (or other origami shapes, if you’re feeling extra crafty), instead of using a new sheet of tissue paper.

Gift Guides

Gift Lab: Alphapets

October 11, 2011

I’ve always thought that origami was pretty neat. I’ve seen people fold paper into those prophetic fortune telling contraptions, make beautiful swans out of napkins, construct geometric fish in just a few creases, and create those highly fashionable newspaper hats. However, to be perfectly honest, aside from the occasional paper airplane, I had never made an origami figure of my own.

Of course, when I was offered the opportunity to test the Alphapets Origami Book, I had to give it a try.


Continue Reading…

Design

Color Ball Kit

July 21, 2011

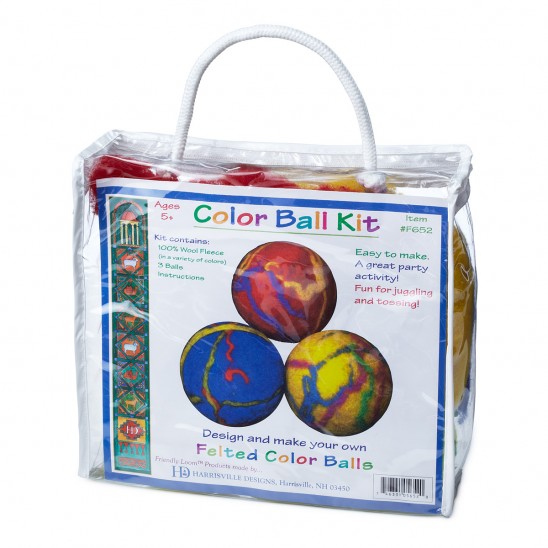
Color Ball Kit

Jessica said: “This is a wonderful idea and craft project. I know, as a mother of two, kids will enjoy this and have fun telling their friends that they handmade their own tennis ball. The price is very reasonable and teaches a good skill set. I would purchase this product!”

We’re having a ball choosing products for our community voting app, and we hope you’re enjoying sharing your feedback! Up for voting this week, the Color Ball Kit is a fun and easy way to get started felting. Add warm water and soap to the provided wool, then start squishing and watch the fleece turn into colorful felt as it covers the included tennis balls. Would these bouncy balls make a great craft project for your kids? A fun gift for an aspiring juggler? Cute toys for your favorite pooch? Visit our voting app and let us know how you’d use this creative kit.

Gift Guides

Gift Lab: iMitt DIY Mitten Kit

December 10, 2010

Product Name: iMitt DIY Mitten Kit

Background Research:

I can knit in stockinette all day long, but can I actually knit a fitted mitten? I’m not just testing out this knit kit, but also testing my skills. The real challenge will be, can I finish these mittens in time for cold weather?

Hypothesis:

Using the iMitt DIY mitten kit, with everything I need included, I can teach myself to knit mittens before winter really kicks into gear.

Experiment:

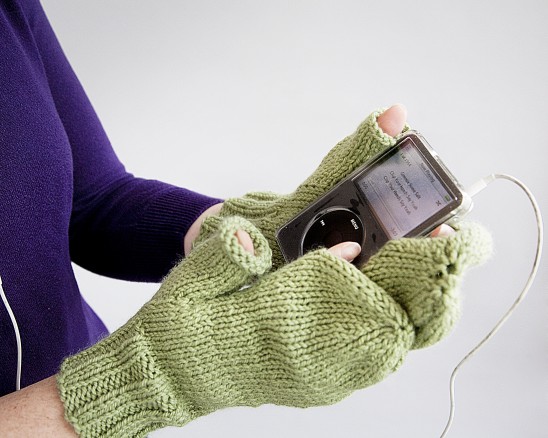
I was a bit nervous when I laid out all the materials in front of me. Two balls of sage green yarn, a pair of circular needles, stitch markers, a yarn cutter and a daunting set of instructions. And these weren’t normal mittens; they had openings for my fingers so I could operate a smart phone in the cold. What had I gotten myself into? I’d just tweeted that I’d be finishing these mittens soon, so I had no choice but to get started.

Check out some of the work in progress photos.

Well it took a few tries, and the help of some friendly YouTube vloggers, but I did it!

Results:

The mittens were knit! And the weather reports are calling for snow. I finished just in time.

This kit did have about everything I needed. I grabbed a ruler to check my measurements and kept my laptop on so I could get a second opinion on some of the instructions. The pattern was pretty daunting for a self-taught knitter like myself. I consulted YouTube and about.com frequently, restarted a few times, but it all came together. And the challenge was definitely worth it.

One thing I learned was that the woman’s small still ran too big for my tiny hands. I adjusted the pattern to start with 36 stitches and that worked much better. If you’re knitting for a child, or like me, you have ridiculously small hands, be sure to adjust the pattern before you get started.

Conclusion:

When I first saw the shape of a mitten emerging from my needles, I knew I’d done it. And there is nothing like that feeling of accomplishment. I couldn’t recommend the iMitt DIY mitten kit enough to all your crafty friends.

The mittens are super cute, warm, and have a perfect sized opening for my thumb and pointer. Now I just need to get an iPhone!

Gift Guides

Ten Gifts for the Green-Hearted

November 18, 2010

We asked you what kinds of gifts you were shopping for and we heard green, fair trade, & sustainable. So our gift to you: a guide of the best gifts to give with a conscious this holiday season:

Black Floral Belt: Like a casual treasure discovered in an open market far, far away, this textured statement piece is a brilliant way to add color and craftsmanship to my uniform of jeans and tees. But the best part? It’s hand-embroidered with curly wool thread by Fair Trade artisans in Peru. Plus: Julia Roberts wears one on in Eat, Pray, Love. (Just saying.)

Continue Reading…

Design

Meet Us at World Maker Faire

September 21, 2010

If you’ve ever wondered where you can shop UncommonGoods in person, wonder no more. This weekend, we’re putting together an uncommon living room at World Maker Faire, a gathering of makers, crafters and DIY folk at the NY Hall of Science.

We’ll be showcasing all our past YouGoods winners along with a great assortment of our newest and best in handmade, eco-friendly, DIY-friendly, and modern design.

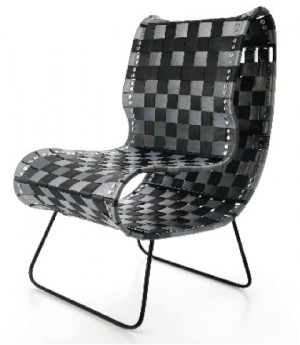
So come sit down in a seatbelt chair. Scribble a note on a chalkboard pillow. Make faces at our Tengu USB-Powered character. Bring your kids– we’ll have plenty of toys.

Seatbelt chair

And tell our CEO David Bolotsky about your product ideas. We’re looking for innovative and new product designs, and we want to hear from you, Makers! Stop by to share your ideas, and we just might help you bring your product to market.

UncommonGoods at World Maker Faire
NY Hall of Science, Queens, NY
Saturday, September 25: 10 – 7
Sunday, September 26: 10 – 6
*Product Pitch Hour: Sunday, 2-3 pm*

And once you’ve shared your ideas at World Maker Faire, come down to Times Square on Sunday at 6:00 P.M.  for Love In Times Square, with our friends at IndieFlix. They’re showing a sneak peak of the new movie game– Film Festival in a Box– and they’re inviting you to play. Four award-winning short films will be screening on the Jumbotron at 47th St. Don’t miss it!

Maker Stories

Friday Giveaway: Hand-Forged Kitchen Tools

September 10, 2010

ETA 10:26 AM, Sept. 13: Hope everyone had a great weekend!  Congratulations to Jennifer, our latest Friday giveaway winner. Her favorite pizza topping is the garlic dipping sauce– which is a great answer for almost every slice.

Stay tuned for future giveaways by subscribing to The Goods via RSS.


This week’s giveaway comes with a really awesome story.

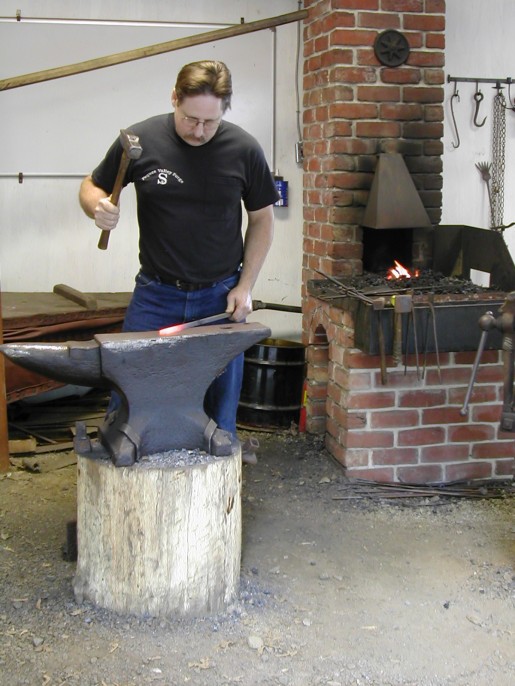
After 20 years of working in a high-production industry, Al Stephens decided to become a blacksmith. He visited Lincoln’s New Salem State Historic Site in Illinois, and soon became a volunteer in the 19th century blacksmith shop where they had bellows, a coal forge, anvil, and vise. For the next few years, Al developed his skills by working with other blacksmiths who taught him the trade.

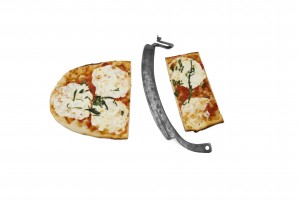
And by 2000, he and his wife Sylvia had started their own blacksmith shop. Today Al makes items like the pizza cutter and cheese slicer by hand, in his shop in rural northern Alabama.

Impressed? We certainly are!

This week we’re giving away two hand-forged kitchen tools available on our site– a cheese slicer and a pizza cutter— to one lucky reader.

Want to win? You know what to do! Leave a comment below telling us about your favorite pizza topping or type of cheese. Then leave a comment on our Facebook wall, and tweet @uncommongoods on Twitter to triple your chances.  We’ll announce the random winner on Monday.

Want to learn more about the art of forging metal? Al Stephens suggests you go out there and try it! The Artist Blacksmith’s Association of North America has local affiliates all over the country. Find a group near you and attend the regular meetings. Al says, “One-on-one teaching is an excellent way to learn, hands-on style.”

And it certainly paid off for him!  Happy Friday, everybody!

The Uncommon Life

Gift Lab #9: An Inspired Ukulele

July 8, 2010

Build Your Own Ukulele

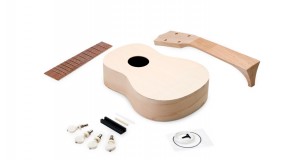
1) Product Name: Make your own Ukulele Kit

Make Your Own Ukulele

2) Background Research: This is a joint project that my partner, Leo, and I will endeavor upon as a team.  I have a continuing fascination with building models. In college I built a full-sized circular saw with a rotating blade entirely out of cork. I also am a working painter. My partner can play the accordion, trumpet, piano and guitar.

3) Hypothesis: The do-it-yourself nature of the project will enable both of us to bring our talents together to create a functional instrument that will have continued playability.

4) Experiment: I will paint the body of the ukulele and Leo will demonstrate the sound.

make your own ukulele

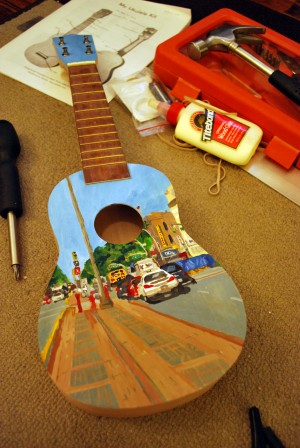
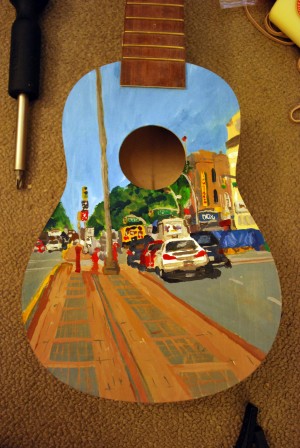
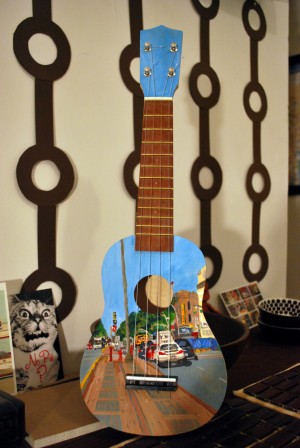
5) Results: Music has the capacity to transport one to specific moments in our lives so I wanted the ukulele to speak to the present in my own life.  I’m about to celebrate one year living in Brooklyn, New York, so I decided that a view of my daily commute home from work would be the prefect landscape. I’m fortunate enough to live within walking distance from the UncommonGoods warehouse so I enjoy the sights of Brooklyn’s Fourth Ave each day. Additionally, from a compositional standpoint, I hoped that the median would echo the fingerboard of the ukulele.

make your own ukulele kit

The wood grain behaved differently than the stretched canvas that I am more familiar with. The gouache soaked into the wood and bled slightly (I decided against applying gesso). I enjoyed the effect in the large color planes, like in the sky, because it added a softness that would have been difficult to achieve with the brush alone.
After I completed the body, it was time to assemble the instrument. The directions kept declaring “This is a point” whenever something important was about to be written, but due to my lack of general guitar anatomy and the somewhat confusing translation miscues, I admit I found myself perplexed on what the “point” was.  Nevertheless, my partner and I trudged along, despite some complications with gluing plastic to wood (be sure to use clamps). We found a metric ruler and assembled the hardware.

After the ukulele was fully assembled, my partner researched how to string and tune a ukulele on Youtube as a supplement to the written instructions. As a guitar player, the process was not difficult for him, but he noted that the tuning of the ukulele was much different than that of the guitar. Because of the nylon strings, as opposed to the metal strings often found on acoustic and electric guitars, the ukulele may be more forgiving on the fingers of a beginner string instrument player.

6) Conclusion: Whether displayed on the wall or sitting on the player’s lap, the ukulele was a success to both one’s ears and one’s eyes. The time we committed to the ukulele-building project was rewarding and justified.

Click here to see Mary Catherine and Leo play the Ukulele!

make your own ukulele