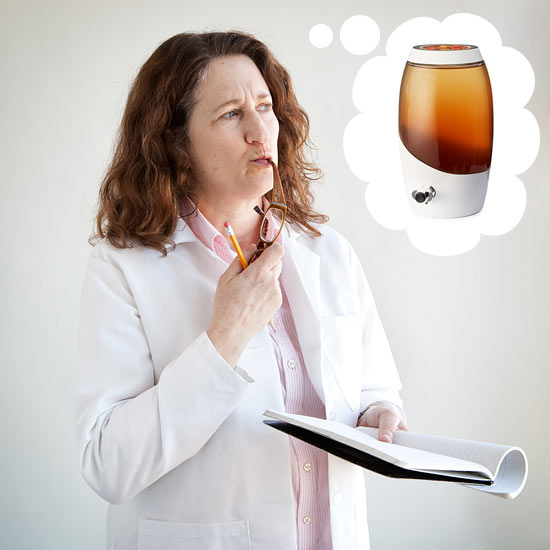
Product
Research
Like everyone else, I’ve been aware that kombucha is a Thing. I vaguely knew it was fermented tea, and that much like kefir, which I’ve made, it’s fermented by a SCOBY: a live, Symbiotic Colony Of Bacteria and Yeast. “Symbiotic” because they rely on each other: the yeast eats the sugar and puts out carbon dioxide and ethyl alcohol; then the bacteria eats the alcohol and puts out amino acids and trace vitamins and minerals.
Because of all those beneficial bacteria, it’s probiotic. I wanted to try making it, and as it happens, UncommonGoods sells this handy kit, which includes everything you need to make kombucha except for tea, sugar, and water.
Kefir’s SCOBY has different B’s and Y’s than kombucha does, but the principle is the same. So I thought I understood it. But after I did some preparatory reading, I realized I didn’t. Different sources say different things about exactly what kinds of ingredients to use and exactly how to proceed. What kind of sweetener? What kind of tea? That made me little nervous. Kombucha SCOBY also seemed more fussy than kefir grains (and yogurt culture, which I’ve also used), and I was afraid of killing it.
So I read some more, until I felt confident enough to start. I’m an over-thinker, so sue me! Turns out, as with kimchi and sauerkraut fermentation, it’s really easy, once you get going. “Getting going” is actually the only work you have to do. The rest is nothing. Literally. All you have to do is wait.

I have a wonderful book called Wild Fermentation: The Flavor, Nutrition, and Craft of Live-Culture Foods, by Sandor Ellix Katz. (A fully revised new edition just came out last fall.) In December, I used his recipe to make fruit kimchi with our DIY Fermentation Crock.
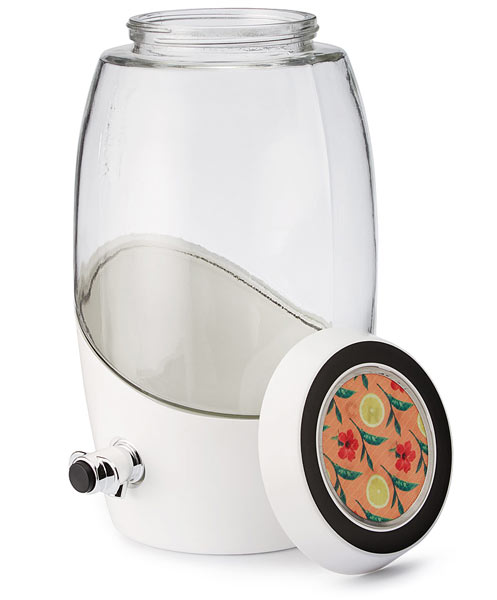
I read the instructions that came with our Kombucha Jar and Brew Kit, but mostly followed the recipe in Wild Fermentation, because the author is a fermentation god and I trust him. (Handy fact, if you want to try other recipes: This jar holds 5 liters, aka 1.3 gallons.)
Experiment
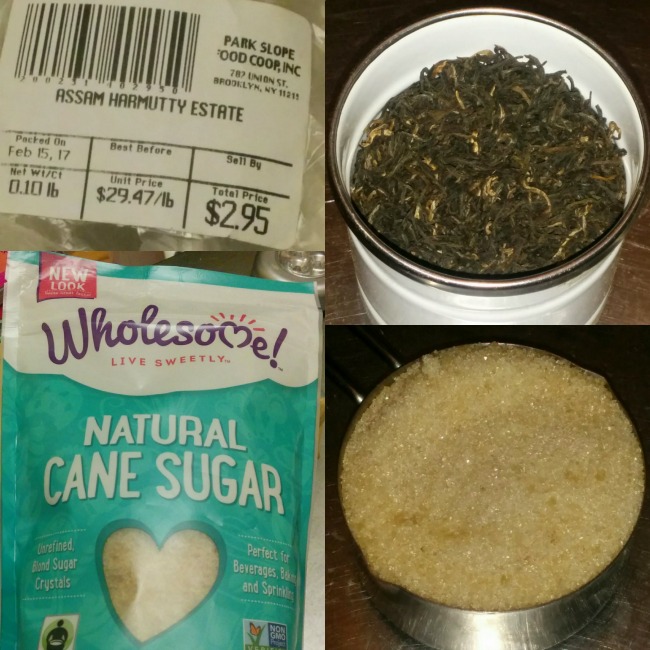
Most of the sources I read said to use loose organic black tea, so I bought some at my beloved food coop. (Wow, good tea is expensive by the pound. But you use so little at a time that it doesn’t end up costing much at all.) I bought organic, evaporated cane juice. Nothing but the best for my little microorganisms! (Lipton bagged tea and white sugar are perfectly fine, however. But read up before you try anything other than these two types of sugar. It’s complicated.)
If you’ve made yogurt, you know you have to bring the milk to a certain temperature range so that you neither kill the microorganisms nor cool them into sleepy dormancy. It’s the same with the sweetened tea.
Most recipes, including the one in the instructions that come with this kit, call for you to make the tea and then wait until it cools down to room temperature. Katz, however, has an ingenious, time-saving suggestion for how to do this: make the tea twice as strong as you need, add the sugar when it’s hot so it will dissolve easily, then add cool water to bring the tea to the concentration and temperature it should be.
(The tricky part is that, because you’re transferring tea from one container to another, you need to have a sterile container that’s good for pouring (see the end of this post). When you make kombucha with the instructions that come with our jar, you make the whole thing in the jar, so you don’t have to worry about that.)
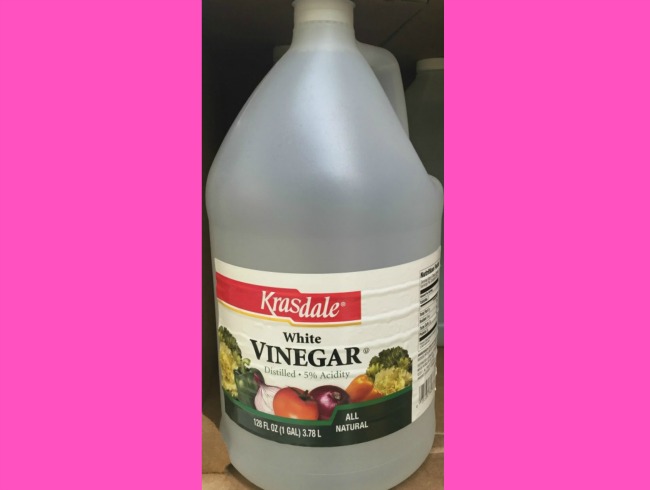
First, I measured out all the ingredients. No, wait. FIRST, I sterilized my tools. You can’t put very hot water in the jar, because it’s not tempered glass, and may break. I washed it with soap, rinsed very thoroughly a bunch of times (because soap kills microorganisms), and then sloshed cheap white vinegar around inside (the SCOBY needs an acidic environment).
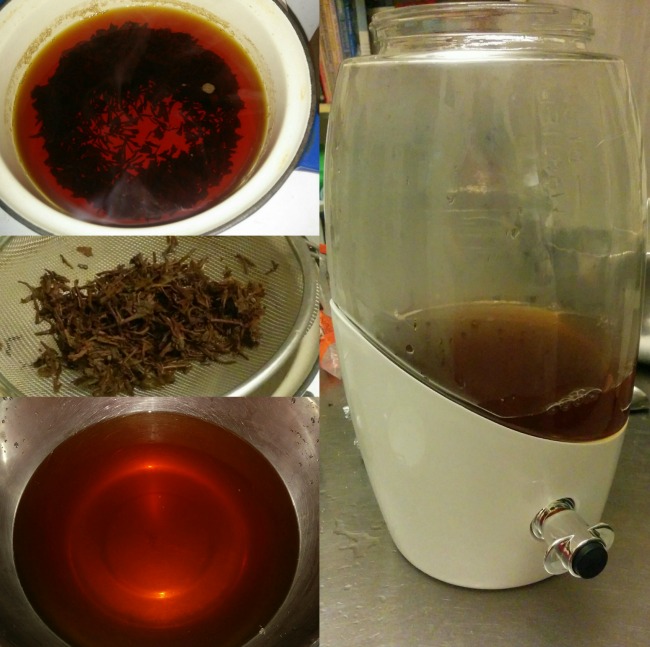
Next, as per Katz’s instructions, I boiled a quart of water in a saucepan, added the tea, steeped it for 5 minutes, and strained out the tea leaves. Then I added the sugar and stirred a lot to dissolve it. I poured it into the kombucha jar, and then added a quart of cool water to the tea. I’d read that you should use filtered water, because municipal water often contains chlorine, the purpose of which is to kill… bacteria! But I forgot. So I Googled “forgot to use filtered water for my kombucha” and found a comment by someone saying they had no problem using unfiltered water. Thank you, commenter person who relieved my anxiety. (Spoiler: it wasn’t a problem for me, but I recommend filtering anyway if you can, because it’s better to be safe than sorry.)

Then I cut open the packet containing the SCOBY. It comes floating in a cup of mature kombucha (which, since it’s already fermented, is acidic), which keeps them healthy (but only for a certain period of time, which is why these kits are made to order, because they can’t sit around in our warehouse).
I poured the juice into the jar and then carefully, oh so carefully, let the SCOBY slide from the packet onto the top of the tea/sugar/mature kombucha mixture. (I didn’t want to touch it, for fear of contaminating it.)
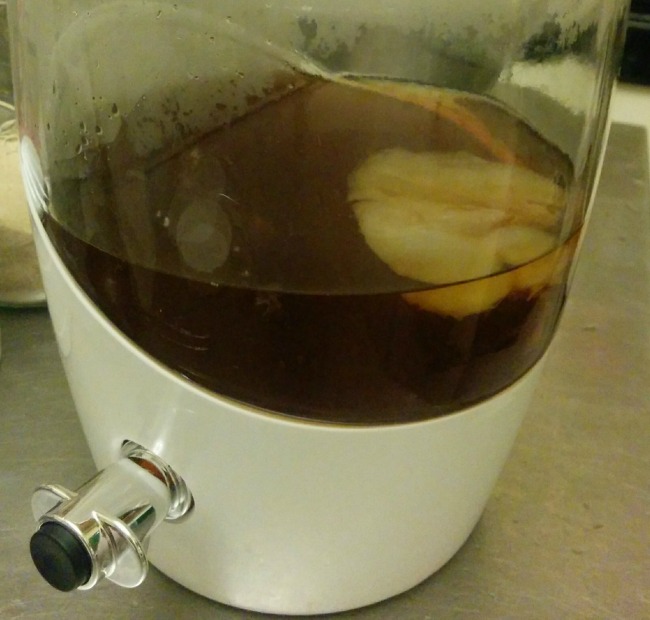
My SCOBY looked weird! I mean, they all look weird, like legless jellyfish in rusty brown-colored sea water. But mine was a darkish blob that in no way resembled the smooth, pale SCOBY disks I’d seen in photos. It did not look promising. So I searched Google Images to see the range of what healthy SCOBYs look like. My blob was apparently normal.
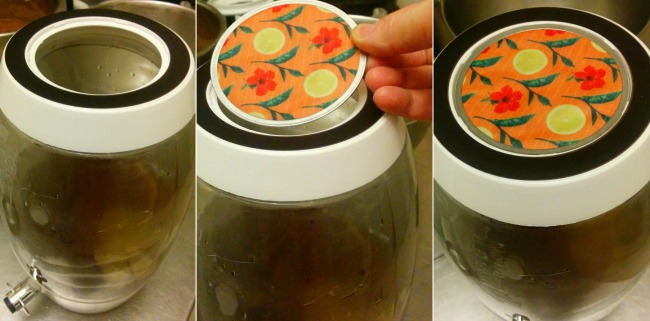
I screwed on the plastic lid, which has a big hole in the middle for the snap-in mesh screen to go. A lid is needed to keep out dust, but it must be a porous one because kombucha needs to breathe while it’s fermenting. If the weave is too loose it will allow in bacteria or yeast from your kitchen. This screen is perfect for that–easy, effective, even cute.
I scrawled the date on the black part of the lid with the white waxed pencil included in the kit.
I was doing it!
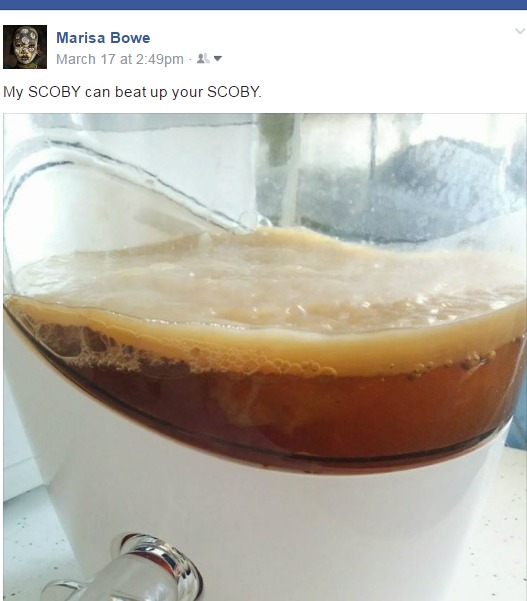
The next day, I went off to work. When I came back home, I went to look at my kombucha setup, even though I knew not much would have changed. But oh, it had. My SCOBY had disappeared. It was supposed to be floating on the top, but it wasn’t. I tilted the jar this way and that, even though I’d read that disturbing the SCOBY can prevent the SCOBY baby from forming properly. But I just had see where it was.

Well, I found it. It had sunk. “My SCOBY sank!” I posted on Facebook. Kombucha aficionado friends came to the rescue, assuring me that that was fine. I’d read that if it stayed at the bottom for days, that generally meant it was dead. But mine never came to the surface. However… after 5 or 6 days, I noticed a little bit of petri dish-like culture growing on the surface of the tea. Was this bad? Was it good? I had no idea. I needed to taste my kombucha to learn what was up.
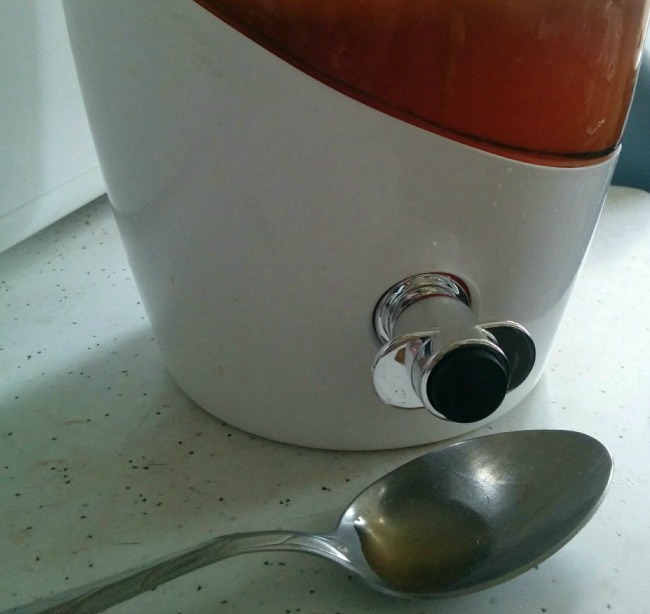
The spigot on our jar makes it possible to taste the kombucha without having to open the top and disturb the SCOBY to get a sample. I just put a big spoon under it and pressed the button for a split second.
It was totally sweet. Fermented foods are supposed to be sour. Had I damaged my SCOBY? Was it defective?
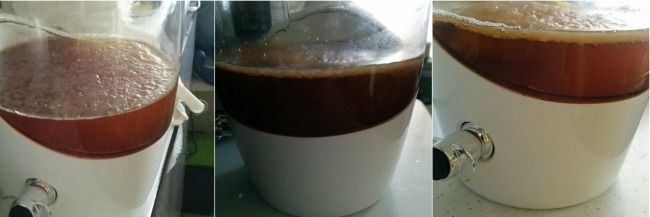
A few days later, there was a little more growth on the surface. My SCOBY “mother” was producing a SCOBY “baby,” exactly as it was supposed to! I tasted again, and it wasn’t so sweet. There was tangyness. It was fermenting. Every day, it fermented more, and the baby SCOBY grew more robust. I wasn’t a failure. I was making kombucha like a boss!
From then on, it was smooth sailing. My SCOBY got thicker and thicker.
My kombucha got more and more tangy, and then became sour. I should have poured it off on the day I felt it had the perfect tangy taste, but I was too busy. Also I didn’t know how to do it. How much tea should I leave in the jar? Can I touch the SCOBY? Where should I put it once I take it out? Etc. Again, I had to read up.
I had intended to do a secondary fermentation. This is how the fizzy, flavored kombucha in stores is made. Once the kombucha is fermented, it’s poured into bottles with a little more sugar and some natural flavoring, and left to sit for a few more days. I’d read that flip-top bottles are the easiest type to use. I didn’t have any, but didn’t want to buy them; I’m pretty obsessive about sustainability, and I hate to buy new things when it’s not necessary. Walking home from the subway one night, I saw a 4-pack carton of empty Grolsch beer bottles a block from my house. Score! Clearly a sign from the kombucha gods. All I had to do was wash them.
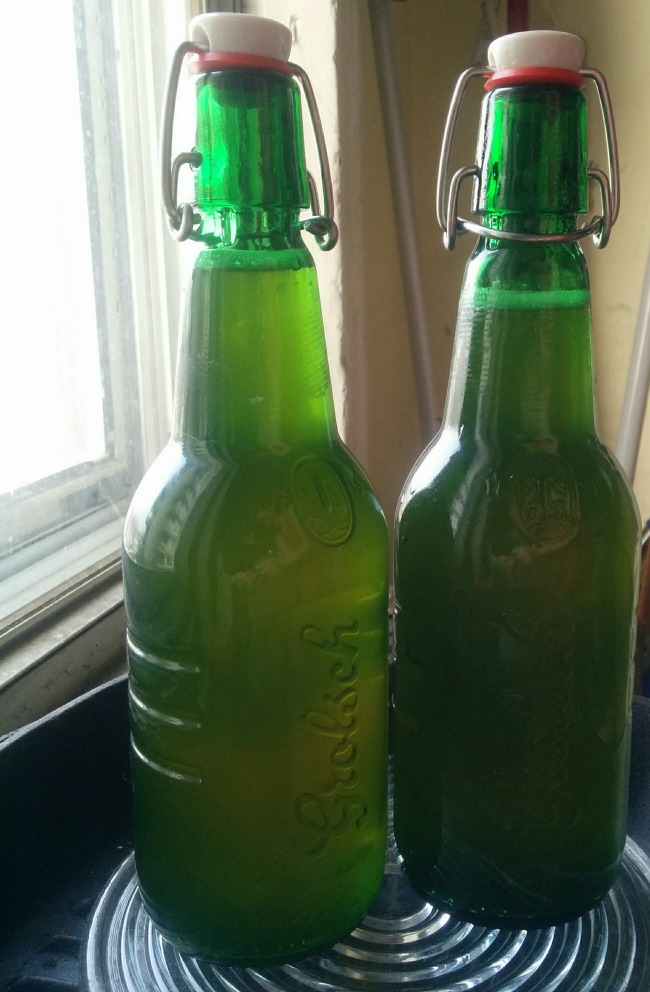
However, I ended up up not doing the secondary fermentation this time around, because my Gift Lab was due! The taste of the first fermentation was plenty fascinating and good to me as it was, anyway. I poured it into my cool green bottles and have been drinking it over the last week, blending it with seltzer water.
Conclusion
I thought I was making kombucha for my health, but three batches later, I’m making it because it’s so delicious and easy. It’s tangy, complex, and refreshing, and, unlike soda or other over-sweetened beverages, tastes adult–not like liquid candy. You can make it as sweet or sour as you like by fermenting it for a longer or shorter time. And once you have the basic process down, you can experiment with different teas, sweeteners, and for the secondary fermentation, flavorings.
This jar is designed to make it possible for “continuous brew,” meaning that you don’t have to empty it out before starting a new batch. You can just leave the SCOBY and about a cup of mature kombucha in the jar and add more sweetened tea (at room temperature) from the top.
Random-ish Tips & Thoughts
Some advice if you use Katz’s recipe: Have the right kinds of containers around. I didn’t, and spilled tea. Don’t use a bowl, like I did; use something that pours well. Get a non-plastic pitcher. Keep everything sterile.
I read that you should pull new starter liquid from the top of the previous brew, not the bottom. I think that because this jar has a spigot, that’s exactly what you’re doing when you use the last cup or so of kombucha as your starter liquid, since the kombucha at the bottom of the jar is what comes out of the spigot, so the top part stays in the jar.

IMPORTANT – Safety notes:
Clean the kitchen and your hands, an keep every container and utensil you use clean and sterile. Some websites said not to use soap, but I suspect it’s OK if you rinse it off completely and follow with vinegar, including your hands. (Remember pH, in basic chemistry?) Throw away any SCOBY and kombucha that gets even the tiniest bit of mold on it. Do not try to salvage it. You don’t know what’s growing in that mold, and it can be something very dangerous.
Do not give kombucha to pregnant women, small children, or people with compromised immune systems.
Finally, do not put very hot water in the jar, because it’s not tempered glass, and may break.
1 Comment
This was such an enjoyable post to read! I’m thinking about buying the brew kit on uncommon goods and your post was cracking me up because I would have also stopped and googled every little thing that happened during the first batch. Thanks for such a real life post and for linking it on the product page so it was easy to find. It has convinced me to pull the trigger and buy the brew kit. 🙂