Browsing Tag

Garden

Maker Stories

Ricky Giacco’s Eco-Conscious Concrete Creations

April 4, 2014

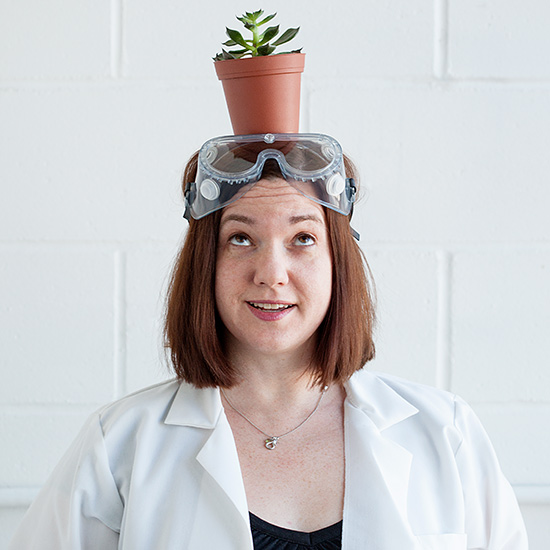
An avid container gardener and all-around horticulture-lover, Ricky Giacco founded NativeCast in 2010 to create and sell his handcrafted concrete “functional sculpture” while following environmentally responsible business practices. His “green concrete” is amazingly light, yet strong, and made mostly of recycled materials.

Ricky Giacco | UncommonGoods

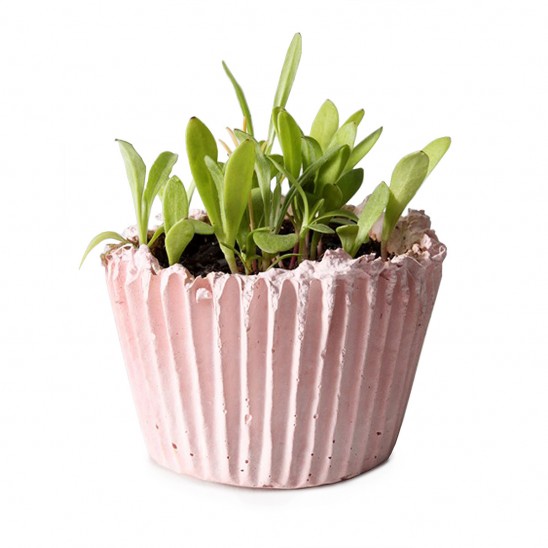
Giacco’s uniquely creative planters come from an illustrious family tree. The Roman Colosseum, the Hoover Dam, the Panama Canal, and this adorable Cupcake Planter are all made of concrete, the most widely-used building material in the world.

DIY Cupcake Planter

The production of concrete uses much less energy than other building materials, such as steel, aluminum, glass and wood. But it’s not carbon-neutral, and we Earthlings use 19 billion tons of it a year. That adds up. In fact, about 7 percent of human carbon emissions comes from concrete manufacture. So at UncommonGoods, we’re big fans of Ricky’s innovative, ecologically sound concrete, which he makes from scratch in Chadds Ford, PA.

The Mix | UncommonGoods
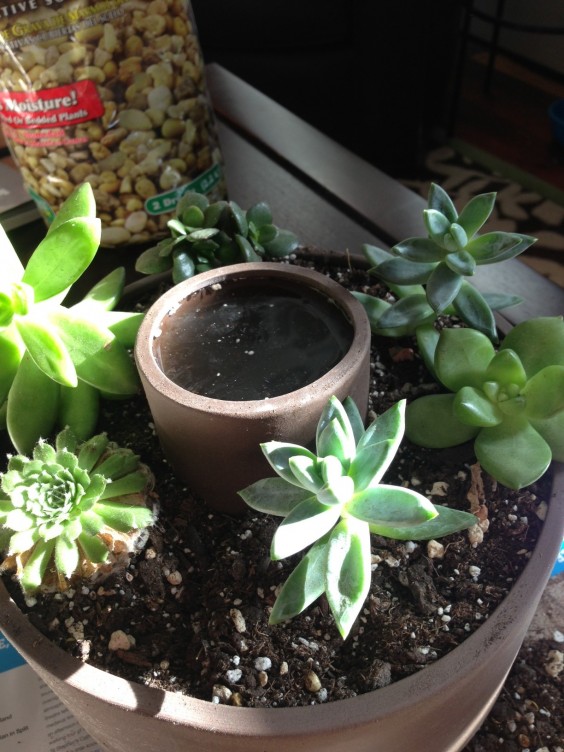
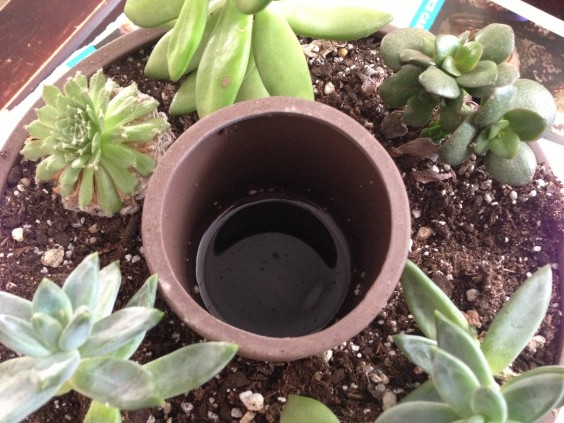
You could call Giacco a concrete mixologist. He concocts new recipes using ingredients native to his region. But unless you enjoy the taste of seashells, pine cones, and crushed, reclaimed roadway rock, you won’t want to drink these cocktails. Your plants will love drinking from them, though; concrete makes a great planting environment. Because it’s porous, it allows air and moisture to move into plants’ root structure; and it maintains a more stable soil temperature throughout the year, compared to plastic or metals.

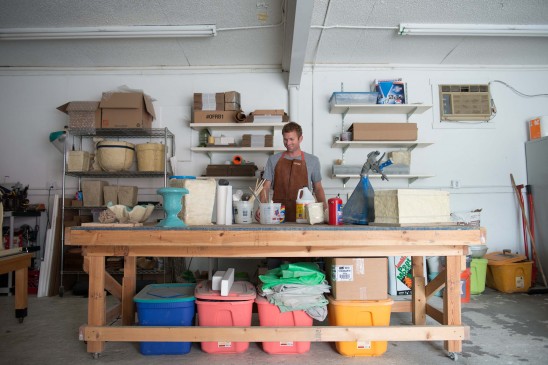
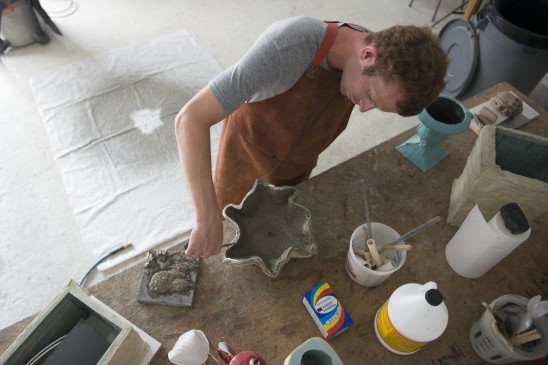
NativeCast is a family affair: Giacco is its creative head, his father handles most of the business end, his wife works on trade shows, his mother works in the production studio once a week, and Giacco says each member of his “rather large” family “helps out in one way or another.”

We wanted to know more about every aspect of his business, and he graciously allowed us to indulge our curiosity.

Ricky's Studio

You “design” not only your objects, but the material they’re made of. Does that give you a special satisfaction?
Designing the material I work with is very cool, and I am happy with the results I am getting. There is satisfaction in knowing that my customers also enjoy what I’m doing. I do know the material’s limitations, so as I look to design new pieces and expand the business, I am exploring some new material ideas.

The most important breakthroughs have been in the mixing process. We have successfully replaced the typical heavy aggregates with lighter and more eco-friendly options while maintaining a good strength. This process is much easier said than done.

Ricky's workbench

Gun

Tell us a bit about the process of making your concrete.
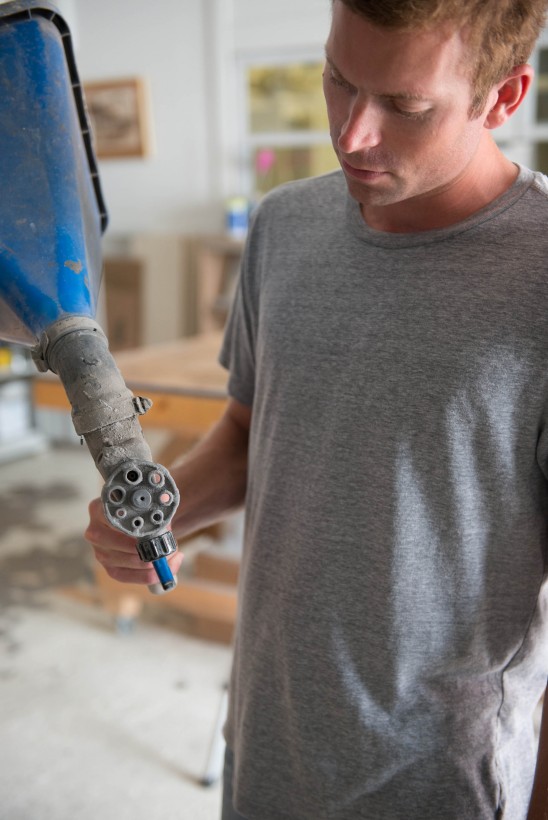
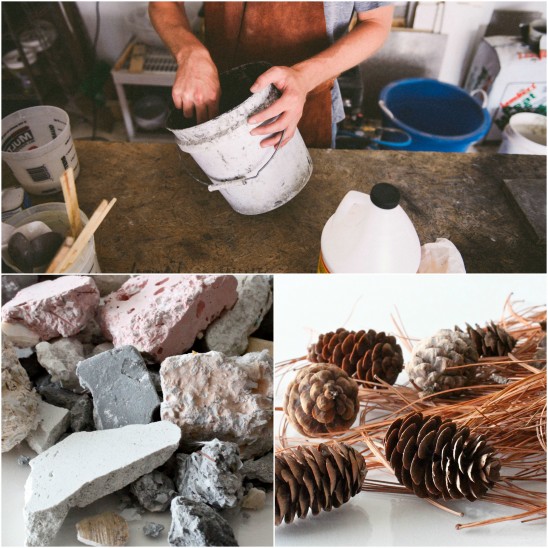
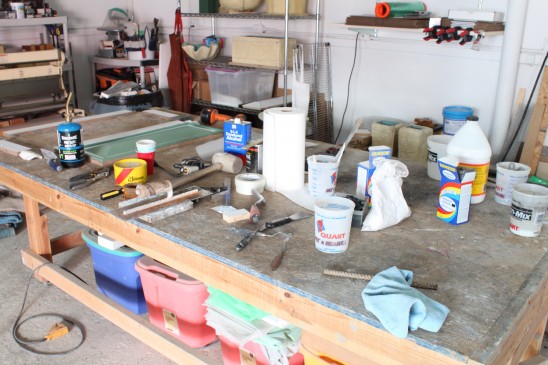
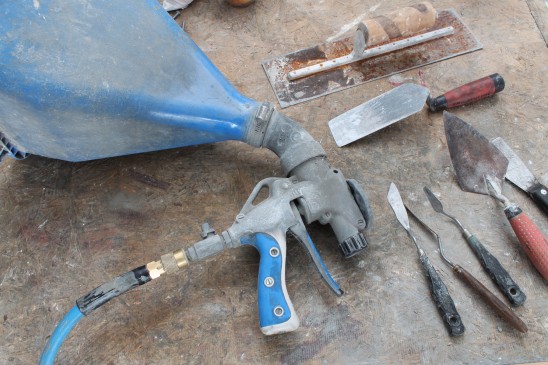
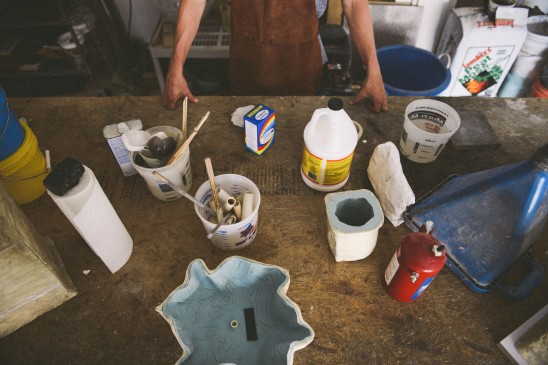
Our green concrete is made by hand and is a fairly complicated process to mix. It is made of Portland cement, sand, lime, recycled concrete, post consumer plastic, shells and pine mulch. The ingredients are always the same, but the ratios tend to vary. This is due to a number of different factors; the biggest ones are air temperature and the technique being used to craft the pieces. We use different application processes depending on the individual product. This forces us to hand mix many small batches of concrete.

Is it a form of hypertufa?
It is not exactly hypertufa, but the concept of modifying the concrete mix for planters is the same.

Where and how do you get the recycled material you use? Is it pre-crushed? Do you treat it? Does it affect the color of the stone?
Our recycled content is all locally sourced. The reclaimed concrete is cleaned and crushed into very small pieces so we can properly incorporate into our mix. We do not treat the recycled content any further. The recycled content does not affect the color of the stone. It acts as filler so it is really contained within the concrete walls.

What factors come into play when making these decisions about materials and their suitability for a given piece?
The things I am trying to do with any given piece are fairly straightforward. The first is to make the container as strong as possible while using the smallest amount of concrete material. Then I look for the most efficient way to apply the concrete. And the last part is mostly using the best concrete mix to achieve the surface texture for the container. This process does take a bit of experimentation to get production rolling.

Ricky Giacco

MaterialsDo you actually hand cast every piece yourself? How do you do it quickly enough to fill the demand?
I do cast every piece myself and it is time consuming. I have the experience which allows me to move fast, but efficiency really comes down to making good molds and have a quick system to fill each one.

Your family helps a lot; that sounds lovely… depending! Do they all have a lot of these planters and other items in their homes?
Yes my family helps quite a bit and yes they all have planters in their homes. This is how we test out the product and improve others. I think working with family is a very special thing, if you can find a way to be productive. I’m sure it is not for most people. However, I am constantly surprised how much I like it.

Your materials are sustainably smart. Do you think construction or other types of companies, governments, etc. could use this kind of material on a large scale?
I certainly think it’s a good concept for an eco-friendly building material. However there is a lot of science involved in engineering concrete. What we make is intended for a craft application. I know there are plenty of scientist, engineers and universities working on the construction grade eco-concrete.

Concrete is alkaline, and very porous. Are your planters best used for alkaline-loving plants that don’t need a lot of water?
Yes, concrete is made from limestone, which is an alkaline rock, and therefore alkaline plants will do best in our containers. If you wish to put an acid loving plant in concrete, a liner is recommended. And it is porous, and is better for plants that don’t need a lot of water. In my opinion, porous is good all around; potted plants die because of over-watering.

How should one take care of these pots?
The concrete containers are fairly easy to care for. What I tell most people is to avoid standing water. It can stain over time and in freezing temperatures can crack concrete. Other than that, they are pretty easy to use.

Apple Bark Planter

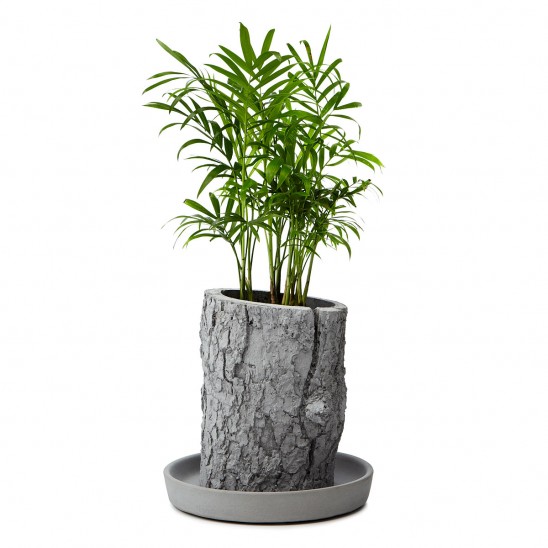
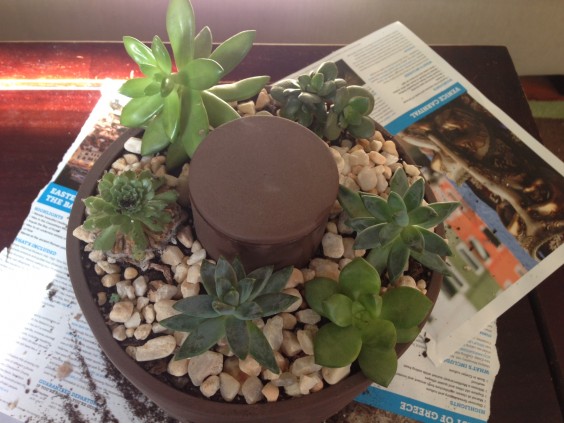
Your Apple Bark Planter was cast from a crab apple tree that got sick and had to be removed. It sounds like you’re very sentimental about plants! What are your favorite things to grow?
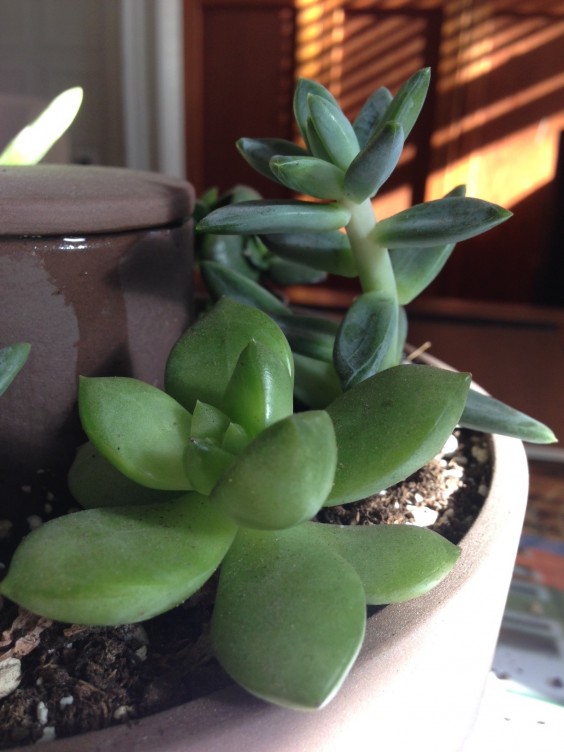
I did know this tree for many years and was disappointed to see it go. I had this idea to make the planter, and I think it turned out pretty well. My favorite plants are cactus and succulents. They seem so exotic to me. I love how rugged and nearly indestructible they are. I wish I lived in a warmer climate to grow them beyond my containers.

Gift Guides

Gift Lab: How to Keep Plants Healthy While You’re Away with the Self Watering Planter

October 23, 2013

Jen | UncommonGoods

Research
I travel a lot and my plants tend to suffer because of it. Turns out it’s easier to find someone to take care of cats than plants – probably because the plants don’t complain as loudly as the cats do. Over the years I’ve tried a bunch of gizmos to get the right amount of water to the plants, but they were all either ineffective, the wrong size for my plant, or just plain old ugly.

Hypothesis
Let me be the first to say that I was skeptical about this planter. It was a good size and attractive, but it seemed too good to be true. The last of my non-succulent plants just died (thanks, cat-sitter), which meant that this was going to be a long experiment. Armed only with slow-drinking succulents, I took a chance on this planter.

Experiment
May 2013: I got my materials together: some succulent planting mix, some decorative rocks, and some new succulents from my favorite store. I took the lid off of the water compartment to check it out, but neglected to put it back on when I started filling the planter with planting mix. Lesson learned: put the lid on because that planting mix goes everywhere and it’s really hard to remove from the water reservoir.

Self Watering Planter With Succulents | UncommonGoods

June 2013: I hadn’t checked the water in a month but the plants looked happy and healthy. The water level had definitely decreased, though it was hard to tell whether this was from the planter soaking up the water and it evaporating, or if the planter was delivering water to the succulents. I filled the reservoir and went on vacation for 3 weeks without leaving watering instructions for the cat-sitter.

Succulents | UncommonGoods

July 2013: I came home to find that (a) the cats were fine and (b) so were the succulents. They were larger than they were when I left and the water was about half gone. I was starting to become a believer.

Growing Succulents | UncommonGoods

August 2013: Baby succulents began popping up – this was the clearest sign that the planter was delivering water as promised. Another sign that the planter was working: the succulents that I hand-watered were all near-dead from over-watering.

Beautiful Baby Succulents | UncommonGoods

Conclusion
1. This planter actually works.
2. The planter has got to be much more impressive with something that needs more water. I’m going to get another one and try to grow some herbs.
3. Put some little plastic feet at the bottom of the planter to raise the planter a bit above the windowsill or table it’s sitting on. I found that the water in the reservoir affected the paint on my windowsill.

Maker Stories

Self-taught Metal Artist Chris Crooks on the Danger & Pleasure of His Work

June 28, 2013

You could say that Chris Crooks’ art makes a lot of sparks! It’s true factually as well as metaphorically, as you can see in this photo of him at work on one of his 16-gauge steel creations. Chris loves working in metal because, as he says, “The possibilities are endless. If you can dream it, you can do it.”

He took a somewhat winding road to get to where is now, running his own successful metal art company. After graduating from the Art Institute of Philadelphia in 1984, he worked in advertising, then ran a printing business with his wife, while painting during his free time. Wanting a change of scene, the couple moved to Tucson, Arizona in 1990. There, Chris started a company making solid cast statuary. It was while collaborating with a metal art manufacturer that Chris met his true love, materially speaking: Metal, he realized, was so much more dynamic than plaster. It was in 2001 that he began designing and making his first line of metal sculpture, inspired from the southwest and the Sonoran desert. We were curious to know more about his path to creative fulfillment and success — so we asked him about it!

What’s your studio like? Do you do all the work yourself, or do you have assistants to help with certain tasks?
I rent a space in an industrial park. I started out from my garage, as the business grew, and my wife’s and neighbors’ patience stretched, it was time to move to an industrial space in downtown Tucson. There I can bang and grind at all hours of the night and stretch out a bit. It’s a 1000 square feet of pure metalworking nirvana.

Do you display your work in your own lawn or garden? If so, what kind of reaction have you gotten from it?
I really don’t display much of my garden art, but my friends and neighbors make up for it. I generally don’t give people my art as gifts unless they actually ask, since you are never really sure they like it as much as they are telling you, kind people as they are. With their response to the garden art though, I am never at a loss for a present.

How did you end up working in metal?
It seemed like a natural progression from sculpting in clay to working in metal. My first pieces combined the two, using the metal to augment the plaster, then the plaster to decorate the the metal, and then no plaster at all. Metal is just so fun and versatile, I feel like I’m just getting started.

Do you work regular hours, or do you work when you feel like it?
Well, when you work for yourself – you’re always motivated. OK, maybe not always. Generally, I work something like 60 hours a week. I really don’t have much say in the matter, especially when UncommonGoods comes calling! As a small business owner it really doesn’t feel like work.

What are the biggest challenges to doing this work?
Beyond the logistics of getting all the orders out the door, the biggest challenge is coming up with new designs. New designs and product is the lifeblood of an art company. Fortunately, coming up with new designs is also the funnest thing to do.

Is it dangerous sometimes? What do you do to keep it safe?
Yep, it certainly can be dangerous. I’ve learned my lesson more than once not to disregard safety precautions. Never the same precaution and never more than once. Whenever I’m training somebody, it reminds me how dangerous it can be.

How much metal do you go through in a year?
I use about 400 sheets of 4 x 8 foot metal a year of varying thickness.

How do you get it all to your studio?
It is both picked up and delivered.

You studied Fine Art in college – did you expect to be an artist, or did you think you’d always have a “day job”?
I always wanted to be an artist. I didn’t know if I could pull it off…didn’t really have a clear vision of what being an artist would mean for me. I got a day job at an ad agency out of college, that was fun for a while. Painting was not as rewarding as sculpting, and metal sculpting is completely enjoyable and engaging. It seems to be working so far.

What were your paintings like, back when you were in advertising — were they in any way related to the themes of your metal art? And do you still paint?
Here’s one of my Bar Fly paintings, and recent painting on metal.

How did you learn the skills of your metal art?
I am completely self-taught.

What do you like about living the artist’s life?
I always wanted to make a living doing something genuinely enjoyable. To get up in the morning raring to go, and never having enough time to do everything you want to do. I remember watching the Crocodile Man Steve Irwin cavorting about wrestling crocs and generally living life large. He was just so happy. What a way to live life. Crikey, now I got some of that.

Do you miss anything about having a regular job/working for somebody else?
Not really. Routine is nice, as long it’s not every day. Coworkers, company paid health care and a 401K are definitely positives.

What do you do for inspiration?
I get back to nature as often as possible to recharge. Honestly, whenever I find the time to be creative there’s generally tons of ideas ready to go.

See Chris' Collection | Uncommongoods

Gift Guides

Gift Lab: From Wine Bottle to Watering Globe

May 28, 2013

RESEARCH
Ok, so I don’t have the greenest green thumb, but I love having fresh herbs and veggies on hand. When I’ve planted in the past my poor plants’ main downfall has been lack of water. If my sprouts are not directly in sight every day I tend to forget them. The backyard for my apartment building is accessible, but it isn’t exactly easy to get to each day, so I need a watering system that will babysit my sprouts a few days a week. I’m hoping the Plant Nanny is up for the job!

HYPOTHESIS
The Plant Nanny will keep my herbs and tomato plants well-hydrated without daily watering sessions on my part.

EXPERIMENT
I got my seedlings home and potted in a sunny spot. I also brought home the Plant Nanny wine bottle set. Because my herbs went into pots on the small side I decided to try empty beer bottles for their Nannies. The tomato plants went into a larger pot, so they got a wine bottle. The necks of the beer bottles fit just about perfectly into the wine bottle Plant Nannies. But I wasn’t certain that the water would hold out in them over the next few days.

The directions recommended that the end of the Plant Nanny should be pushed down by the roots. This was easily accomplished without over-packing the soil too tight or crowding out my seedlings.

It was also really simple to get the full bottle into the Plant Nanny. The directions noted to put a finger or two over the top of the bottle before tipping it into the Plant Nanny. The water filled the base of the nanny and balanced out without losing hardly a drop.

Ok, so I have to admit I thought the upside-down bottles might not be that great looking. (Course, neither do the re-used pots I got from a neighbor that was going to chuck them.) It turns out that they look pretty cool, and I can already tell that they’ll blend in a bit better once my plants start to fill out.

CONCLUSION
So, I did my planting on a Sunday afternoon. By Wednesday morning there was only a bit of water left in the both the beer bottles and the wine bottle Nannies. The small-bottle-to-small-pot and large-bottle-to-large-pot idea worked out well with the wine bottle Plant Nannies! The soil in all three pots was moist without being overly flooded.

Looks like I’ll be able to let the Plant Nannies “babysit” for about 2-3 days at a time. If we hit a dry spell I plan on checking my plants every 1-2 days to be on the safe side.

Maker Stories

Meet Beau Lyday, Garden Design Challenge Winner

March 4, 2013

Our busy year of design challenges started off with a call for garden decor in January. With entries from across the country of sculptures, planters and birdhouses, our judges Katie and Chris had the difficult task of picking a winner. They decided on a design they considered to be a triple threat- with beautiful craftsmanship; a creative, unique design; and functional. What they didn’t realize during their deliberation, that they were inviting Beau Lyday of North Carolina into the UncommonGoods artist family. Meet Beau, a carpenter whose skills were passed from generations and a philosopher whose view on art and life is sure to inspire.

What was the inspiration behind the Garden Tool Box Tote?
My wife loves Pinterest and she pinned a garden box on her “Projects for Beau” board. Using the rake for a handle was a really neat idea. I made her a gothic style garden box for a present. That got me thinking about my grandfather Pennington. He was a carpenter. He passed before I was born, but I remember playing with his tool box in the shed. Wooden tool boxes used to be a commonplace item, but are rare now. Using the handle idea and my memories of my granddads tool box, I came up with a strong serviceable garden tool box tote.

Who or what are some of your design influences?
My Father helped me make a stool when I was six. He was a teacher at school and at home. We worked side by side, repairing and refinishing antiques through high school and then whenever we could get together. He taught me how to work with my hands and to be safe with machinery. Most of all he instilled in me a pride in workmanship and if it was not right it was wrong.

After college, I studied the works of Palladio and Christopher Wren, learning the classical relationship of balance and proportion. Their rules have become my basic design building blocks and help me discern why something looks right or wrong and how to fix it.

My wife, Brenda, is a wonderful artist with a keen eye. We make a wonderful team. When she makes a critique she is seldom wrong and she does it with love. I am my own worst critic. She is my greatest influence.

How does designing fit into your lifestyle?
Designing/creating is how I uncover my authentic self and act on it. The quote “By the work one knows the workman” says it best. Whether a person appreciates what I do or they don’t is not as important as the act of bringing an idea, a feeling to life. Working with the creation process, understanding the challenges and overcoming them, creating something useful and pleasing is where my true vocation and occupation come together. So, my work is my full time job.

What are some of your other designs?
Brenda and I try to have breakfast and watch Sunday Morning each week. I love the sun art work. This inspired me to create a series of sun mirrors.

This week I have continued taking down an old barn. I made a checker board with a Celtic ribbon border out of some of the wood I repurposed from that barn. There were also several pieces of wonderfully aged red painted boards that I used to make Brenda a primitive one door 3 shelf wall cabinet. She showed me a strange table in a magazine that we figured out was kite shaped. It took me two tries to make one but it is a very unique small side table and it’s only Wednesday evening. My web site has over 70 items I have made this year.

I am always looking for new inspirations, experimenting, refining until I have it right.

Describe your workspace.
We live in an 1840’s post and beam farm house I restored. Behind the house Brenda and I have side by side studios with wood floors and good windows. My grandmother’s Warm Morning pot belly stove keeps my shop comfortable in the winter time. I am going to have to take a week off and fix up my studio. It’s functional but not too pretty. I have a blacksmith shop in a shed by my studio. Brenda’s description of my work space is sawdust, sawdust, sawdust.

What is most uncommon about you?
I am a unique individual. My uncommonness stems from spending most of my life observing. How do the lines come together and work with each other. Which colors are present and how do they blend. What are the effects of textures and light. Can I identify the functions and understand how it works. I question how these observations relate to each other. I debate with myself why objects are pleasing or unsettling to me. These conclusions have become my memory library that I draw from to see things, to create and to interact.

I made a whirligig base on a child’s antique rocking horse and carriage and showed my dad. The horse’s head rocked up and down, the carriage following along. My dad said he remembered riding in a carriage like that when he was three (he was 80 at the time). I asked him what he thought of the whirligig and he said, “Son there is a fine line between crazy and genius. He did not tell me which side of the line I was on, but he had a smile on his face.

Gift Guides

Uncommon Gifts for the Earth Mama

November 21, 2012

The Earth Mama is a special lady. She’s in touch with her surroundings. She’s down with nature–whether it’s the wind, grass, and trees encapsulating her country hideaway, or the energy of the bustling city streets and other people, all sharing the planet and working with one another. She’s been called a hippie, a new ager, a granola girl, and a bohemian. But she doesn’t mind, because she dances to the beat of her own music and knows that her tune is just one song on the universe’s eternal playlist. So what do you gift someone with such deep love for the sublunary world? One of the organic, handmade, responsibly-created goods on this list could be the perfect uncommon gift for an unconventional gal.


Zen Elephant Garden Sculpture / Inspirational Totem Necklace / Embroidered Belt / Roaring Fork Valley–Renee Leone / Hand of Buddha Jewelry Stand / Agate Coasters / Stone Finish Organic Bowls / Garden Pens / Wool Landscape Scarf / Beer Soap 6 Pack

The Uncommon Life

Gift Lab: Fresh Air Compost Collector

July 5, 2012

Background Research

The Fresh Air Compost Collector, designed by Heather Tomasetti and Tal Chitayat, is a smart-looking, new-fangled container for storing your compostable food scraps.

Image: Royal Caledonian Horticultural Society

First, for those of you who don’t already participate in the wonderful world of composting: what is it, and why should you do it? In a nutshell (ha-ha, see what I did there?), composting is piling up a lot of waste plant matter–fruit and vegetable peelings, moldy bread, browned avocadoes, raked leaves–in a specific way that makes them decompose in the same manner, but at a faster rate, than they naturally would on their own.

Compost Heap, a 39 Day Time-lapse

Not only does this divert them from the general waste stream and thus the landfill, but “finished” (thoroughly broken-down) compost works magic on plants, not only in an eco-positive way, but also in terms of complex plant science. I tried it, and my plants shot up like they were on steroids.

You’ve probably heard of people keeping worms in bins in their homes in order to compost. But you don’t have to do that. You can just save your scraps and bring them to a compost site run by your community, or a neighbor. However, there’s no getting around the fact that saving compost scraps means keeping them at room temperature for at least a few days if not longer, which can have its unpleasant aspects. The purpose of the Fresh Air Compost Collector is to make them less so.

Time-lapse Fruit and Vegetable Decomposition

See? It’s not necessarily gross. It’s natural, and fascinating to your inner biology nerd.

Most indoor compost collectors either have a lid to prevent odors from escaping, or, like the one I used to have, above, use charcoal filters or other devices to absorb them. (Admittedly, the ventilation-promoting, filter-holding, cut-out flowers on the lid are nicely done.)

The Fresh Air Compost Collector, on the other hand, is designed to allow air to circulate around the scraps in order to slow down the rot rate. (The inventors refer to “air flumes,” and there are no such things, but calling them that is kind of adorable on their part.) Oxygen can get in and heat and moisture can get out, so your moist, vegetably, fruity leftovers evaporate a bit, preventing “anaerobic” (oxygen-free) breakdown. That’s what causes quick bacteria and mold growth, evil-smelling slime, and the fruit flies it attracts.

Hypothesis

The Fresh Air Compost Collector will allow me to enjoy composting, relatively undefiled by disgusting smells and unwelcome fruit flies.

Experiment

I got my Fresh Air Compost Collector in January and have been using it ever since. To be honest, I didn’t expect it to work all that well, because I usually believe in the tried, true, and un-chic, and this is pretty stylin’ for a waste receptacle.

I was game to try, though, because it was a pain to deal with my old compost pail. With that one, I was never sure if I was supposed to put a bag inside it to collect the scraps, or drop them directly into the naked pail.

If I just put them in the pail, it would soon absorb their collective noxious stink. But plastic bags would never stay upright enough to catch the scraps when I dumped them in (which almost invariably happened when I was cooking and unwilling to stop, open the pail, and hold up the stinky, slimy bag to get the scraps in while somehow keeping it upright so as to not spill its contents). Paper bags disintegrated when wet. And when I pulled the bags out to bring it to the compost pile, they always dripped putrid, decomposing produce juice on me, either then, or on the way there, or when I dumped their contents into the community container.

So, on to the new one: First of all, the design of this container is deceptively simple. You can’t really perceive this until you use it, but it’s very well thought-out in every detail.

The sides and bottom of the container have ribs that stick out and keep the bag from lying flat against them. Any liquid that might drip evaporates instead of pooling and festering.


Image: Picker's Treasures

The spring-loaded lid, which is full of tiny holes that allow air to circulate but keep out the flies (just like the tin panels of an old-fashioned pie safe), pops open when you press the button, and stays open without having to be held.

A detachable metal frame keeps the bag upright, so you can toss your scraps into it without getting glop all over yourself. The frame is strong, but light and very easy to lift off and click back into place when you put in a new bag.

One ergonomically crucial factor for me is that, because of where it needs to be stowed in my kitchen, it has to fit under my all-the-way-open dishwasher door, and at 9” tall (and 11.4″ long by 8.5″ wide), it does.

Whether its 1.3-gallon capacity is a good size for you or not depends on how often you eat fresh fruit and vegetables, and how often you’re able to drop off your saved scraps at a compost pile. The one I go to, the North Brooklyn Compost Project, is only open Saturday mornings, so I have to keep my scraps for up to a week (or longer, if I miss the day–see below).

There have been weeks when it was too small for me (I joined a food coop, got overly ambitious, bought too many vegetables, then got busy with other things and most of them went bad in my fridge).

There have been other times when it was too big (my cat died suddenly, I wasn’t up to cooking for a long time, didn’t bother to grocery shop, and put only coffee grounds and the occasional squozed-out lemon in there).

Aaaaand there have been weeks when I missed the compost drop-off day. By “weeks,” I mean “three weeks in a row.” (In my defense, this happened in the middle of winter.) Then it started to smell, though it never got as bad as my old one did.

But those aren’t fair testing conditions; no composter could deliver fume-free service under such circumstances. In general, the Fresh Air Compost Collector performed as promised: it emitted way fewer smells than my old composting pail, and the only time fruit flies were appeared were that one time when I pushed the limits of biology way too far. Even then, I saw only the beginnings of mold.


You’re meant to use compostable liner bags with the Fresh Air Compost Collector, because unlike plastic ones, they “breathe.” Since the bags start biodegrading as soon as you put moist food in them, I was sure they’d break in the container, or on the way to the compost pile. As a precaution–because I don’t like coffee grounds mixed with fermented mango skin and slimy rotten cucumber bits dripping down my legs–I put the bag into a plastic shopping bag for the walk to the compost pile. But it was never actually necessary, even after three weeks. None of the bags has broken yet. Still, I recommend holding the bottom of the bag in such a way that it won’t tear when you pick it up. The speed with which they (and everything in them) break down increases as the temperature gets warmer.

The container can easily be taken apart and put in the dishwasher, though the one time I needed to wash mine (following the three-week-no-compost-pile era), I did it by hand.

Tip: Don’t buy the wrong type/size of bags like I did once, duh. Doggie bags! Rusty Marmalade (RIP) was so disappointed in me.

Conclusion

I’m impressed with this doohickey. The Compost-Scrap-Saving Experience no longer means mess, stink and flies. As all three of those are greatly disliked by humans, no wonder the Fresh Air Compost Collector won a 2012 Green House Design Award. Six months in, I’m still happy with it, and am looking forward to filling it with the remains of this summer’s delicious fruits and vegetables.

The Uncommon Life

How To Repot Succulents

June 8, 2012

In the world of trends, Succulent plants seem to be taking home the crown in the fauna and flora category. And why shouldn’t they? Succulents are hardy, unique, and perfect for the dry summer heat. They don’t ask for much, but a good environment No green thumb needed — follow this quick DIY tutorial to repot your succulents and ready for your front porch or city window.

As Charlotte (you know, the one with the web) would say, Salutations! I’m Blair – the bloggin’ gal from the lifestyle and fashion blog, Wild and Precious and now that I’ve introduced myself lets chat about a way to spruce up that patio of yours!

Mix Your Potting Soil

Potting soil recipe:

  • Potting Soil
  • Coffee Grinds
  • Sand

Did you make mudpies growing up? If so, this might be your favorite part — make your own dirt mixture! When picking out potting soil just get the very most basic stuff. You don’t want anything too rich in additives — Succulents just don’t like that stuff. The goal of your dirt mixture is to get water/food/light/nutrients to and away from the roots in a time appropriate fashion. Mix coffee grinds and a little sand into your dirt before filling your pots. The sand will keep your soil from getting too over saturated with moisture (remember, these type of plants are desert dwellers – they aren’t use to a whole lot of the wet stuff) and the coffee grinds will help fertilize as well as keep away slugs and bugs that would otherwise love to nibble your Succulents down to nothingness.


Prepare Your Pot

As far as picking out pots the world is your oyster. You don’t need anything too big and can even choose to put more than one succulent together in a pot. With your pot(s) picked out fill 1/3 of each pot with sand. Do not try to cut costs (sand is cheap anyway) by bringing home sand from your beach vacation — that stuff is full of salt and your succulents will no longer be… well, succulent. Sand is important in helping move around and drain water. Once you’ve got the sand in, fill with your dirt mixture leaving a small lip of space up top.

Prepare Your Succulent

Before introducing your plants to their new home give the bottom of the existing dirts/roots a bit of a scrunch. Flare the root structure out a bit. This will help it transition better into its new/bigger/better environment. This is something good to remember when planting anything anywhere. If you don’t break up the bundle they are used to having in their temporary store shells, they might be a little too shy to branch out (pun intended) into their new world.

Pot Your Succulent

Now — where to put them? These guys are not fans of the midday sun. They prefer indirect/filtered sunlight and enjoy a nice airflow (I chose to put mine on my front porch which is roofed). As for watering — unlike planting in your garden, you do not want to water these right away after repotting. Give them some time to adjust and then give a good watering about once a week during the warmer months. Don’t ever leave standing water in your pots — it makes them angry.

Wham bam thank you ma’am we have ourselves some repotted Succulents! Call your self hip cause you’ve got the trendiest little plants on the block. Mischief managed!

Thanks for hanging out with me — pop over any time to say hi Wild & Precious. ta ta friends.

Ready to get started? Shop planters at UncommonGoods >>

The 10 Best Indoor Succulents | Indoor Plant Tips | UncommonGoods

Check out this INFOGRAPHIC to discover the perfect succulent for you. (No green thumb needed.)