Research
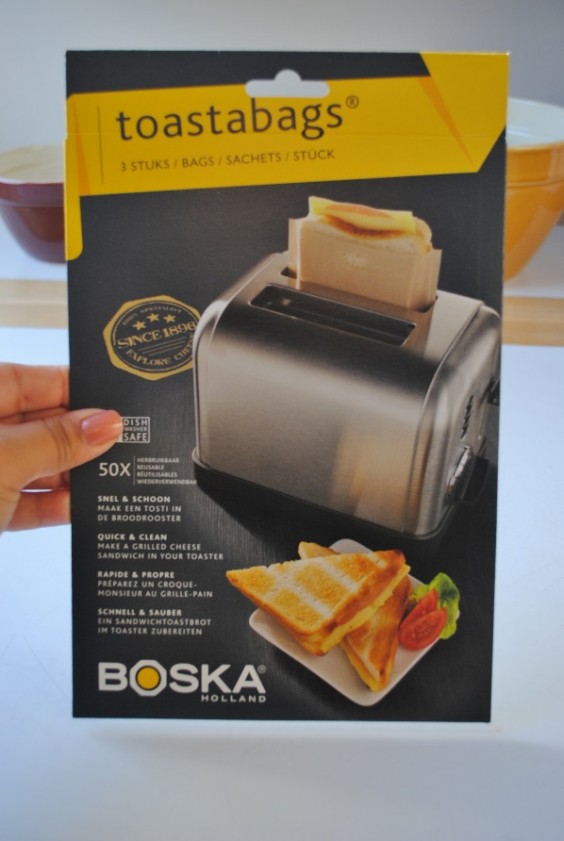
I love a good grilled cheese. The gooey goodness inside reminds me of childhood meals, always paired with a tomato soup, of course. I first saw the Toaster Grilled Cheese Bags and thought it would be a fun, and super easy, way to make that delicious, buttery comfort food. I’d never heard of such a product before. How simple – just put it in a toaster! I’m, however, familiar with the iron-grilled cheese approach…enough said. In comparison, that ironing approach is quite barbaric.
Hypothesis
Given my experience with toast and grilled cheese, I suspect that the sandwiches will be nice and melt-y. However, the warm buttery flavor (that is signature to anything cooked with butter on a frying pan) will be missing.
Experiment
Step 1: Checking out the goods
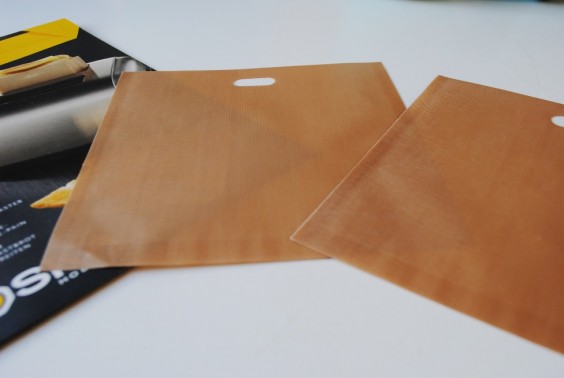
The Toaster Grilled Cheese Bags are very different than I expected. They’re a silky-papery material. Very tough and pliable. So far, I’m impressed. Three bags are included in the package (wish it was four for those 4 slotted toasters). The grilled cheese in the picture looks really delicious – nice and golden.
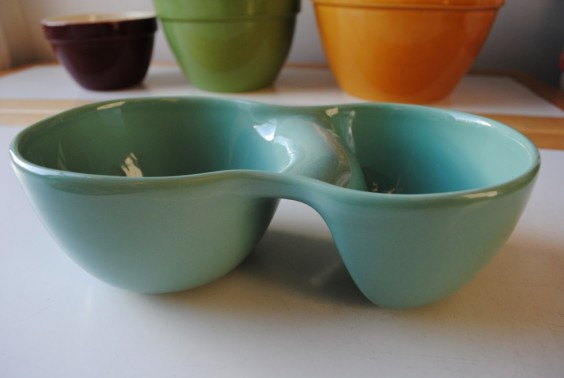
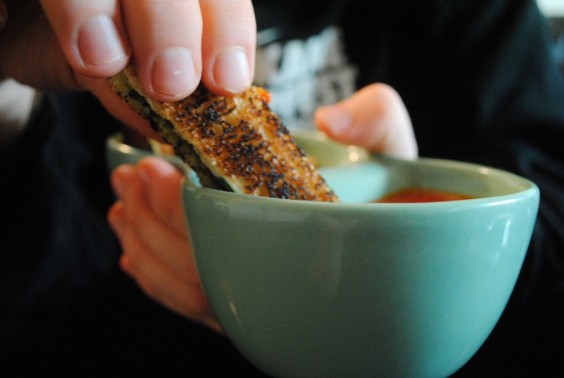
The Ooma Bowl
I love the clean and colorful look. It’s meant to easily fit into the hand for holding. Overall, the style gets two thumbs up from me. The bowl may also serve as a nice pet food dish? Food on the left, water on the right.
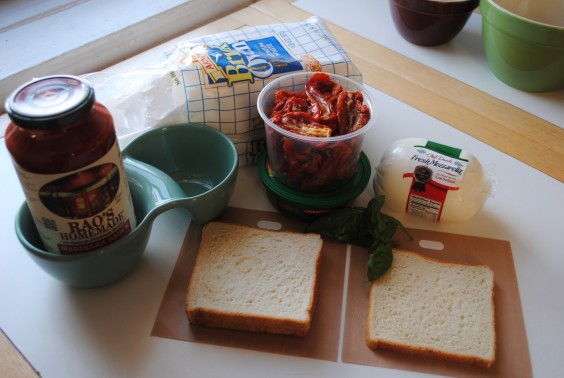
Step 2: Assemble the ingredients
For my experiment I’m making 2 recipes.
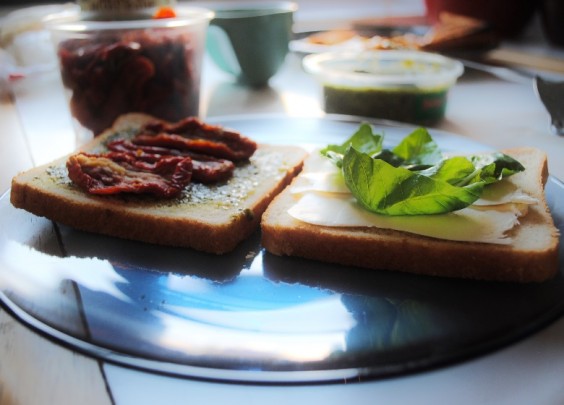
First: The Classic. Simple and to the point; white bread, sharp cheddar.

Second: Italian Craving–Featuring the Ooma Bowl. Yummy take on the classic done Italian style. My plan is to cut the finished sandwiches into sticks and use to use the Ooma Bowl for easy dipping. Using mozzarella, pesto spread, fresh basil, and sundried tomatoes. For the dipping sauce I’m using my favorite marinara Rao’s Homemade (it’s the best; I highly recommend trying it).
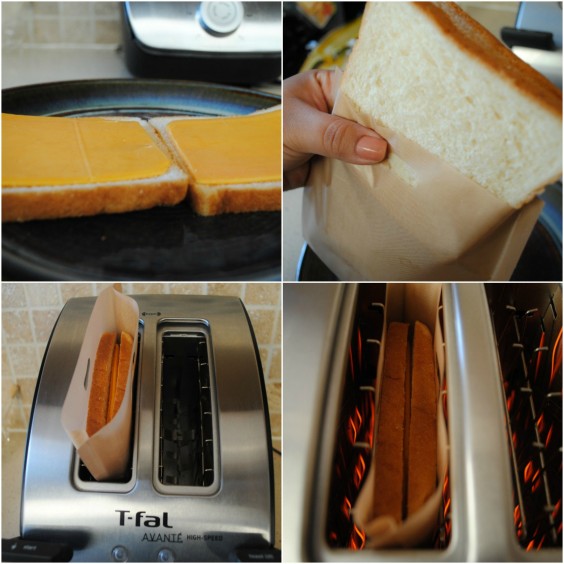
Step 3: Get’m grilled
Attempt Number One:
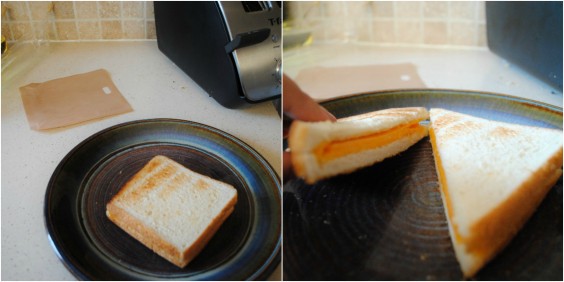
The Classic. It was pretty simple to get them into the bags. It needed a little maneuvering, but nothing difficult. I have a nice toaster that accommodates bagels. After getting them bagged I put them in, I set the toaster to level 4 and set it into motion.
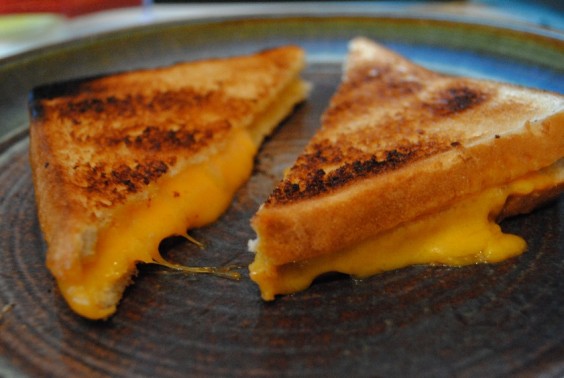
The end result was not what I was hoping for. Setting 4 didn’t cut it. The cheese didn’t melt, and the bread was not toasted enough. Compared to the picture on the packaging, my sandwich was a total fail. Try again…
Attempt Number Two:
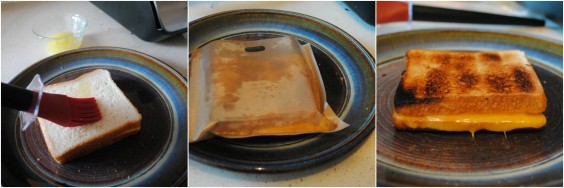
OK, the setting was too low; I overcompensated by upping the game to a level six setting. Also, I was thinking I would try to add some butter to the bread in hopes of obtaining that nice golden buttery glow. I melted 2 tablespoons and brushed the outsides of the bread with a pastry brush. Drum roll please…
I got the taste spot on and beautiful melted cheese. However, I ended up with burnt bread. It didn’t taste bad, but charred is no good either. Also, the butter made the bags all greasy.
Attempt Number Three:
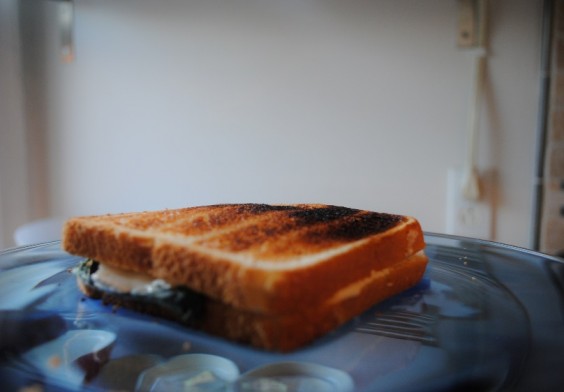
I completed my attempts with the Classic recipe and moved onto the Italian Craving. First things first, I washed the bags. They got greasy from the butter and the melted cheese. Washing was incredibly easy. I used a simple sponge with handle and hot water. I hand dried, but noticed that the bags held moisture. I didn’t have time to let them air dry, so I continued on with the sandwich making.
I made a total of 4 sandwiches; all of which came out a little darker than I expected. I’m not sure what’s to blame. My toaster setting, the moist bags, the butter; I really am not sure. What I do know is that the sandwiches were tasty. (The chef has to taste their food before it leaves the kitchen).
Step 4: Plate and Taste
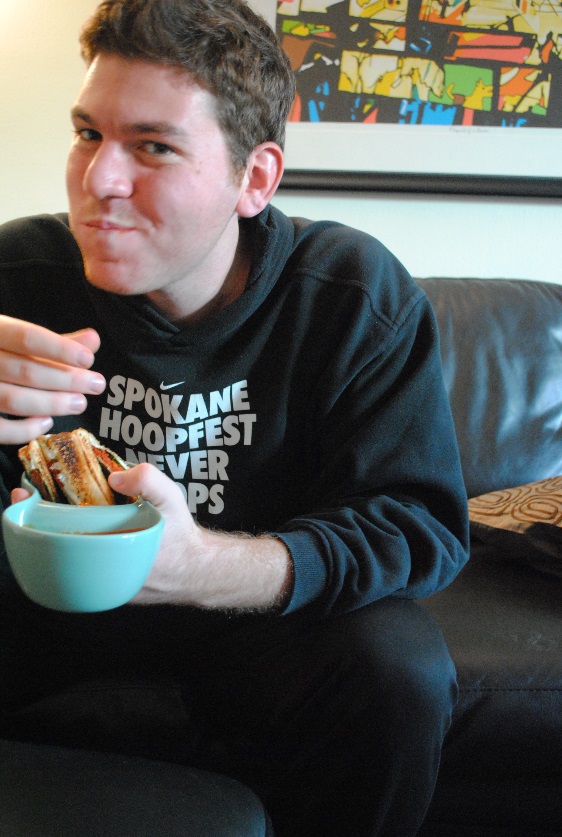
Time to eat, drink, and be merry. As planned, I cut the grilled cheese into long strips and placed them into the Ooma Bowl. I heated the sauce and added that to the smaller section. Et voila! A culinary masterpiece. (At least for moi, a simple cook.)
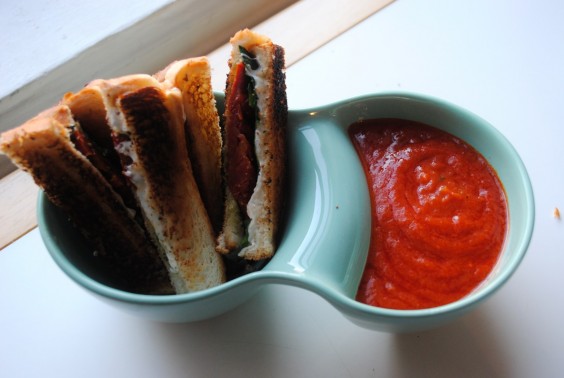
The bowl was easy to hold. Modeled by my fiancé (thank you for your help). Recommended for couch activities such as Sunday sports and Netflix. A delicious end to a full day of ingredient shopping and toaster cooking.
Conclusion
Did these match up to the classic grilled cheese? Not completely; however, they were 1. Easy to make and 2. Melt-y and tasty.
Lessons Learned:
1. Don’t apply butter before toasting! It may be good to apply after? Question for thought.
2. The bags need to thoroughly dry before the next use. I later washed, hand dried, and placed on the handle of a frying pan to dry.
3. Toaster settings are key; you need to find the right one. (I have yet to find the right one for my toaster.)
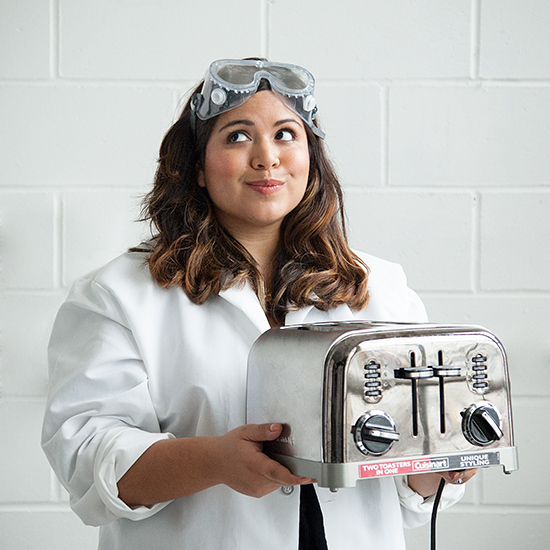
Photo Credit: Moi! Anna Moreno
Model: My fiancé Noah Perkins
