Research
Some say it tastes like Christmas, but I say it’s more like pure class in a glass. Scientists think liking it might mean you have a dark personality (I also drink my coffee black – uh oh), but I think you’re crazy if you hate it. It’s the gin & tonic, people, and I’m a fan. And so, when I saw the Gin & Tonic Making Kit in our assortment, I knew I had to try it out for my next gift lab.
Hypothesis
When I saw the kit online, it looked like a fairly simple process. Plus, it involved mason jars, and who doesn’t love those? So based on those early assumptions, my initial hypothesis was that making my own gin and tonic syrup would be pretty easy, and that the results would be delicious. I was a little curious about how exactly I’d be making the gin – would I be doing this Prohibition-era style? Would it involve a bathtub? I looked at the instructions and noticed that you make the gin using vodka. My hypothesis then slightly changed, thinking that I couldn’t possibly make vodka magically taste like gin, but I was ready to put it all to the test.
Experiment
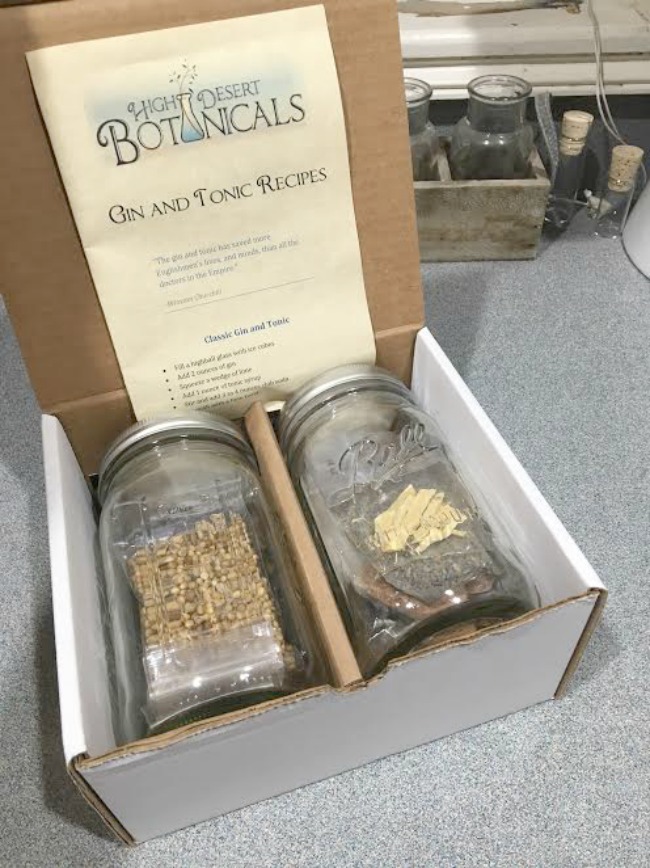
Yes, back to those instructions. Once I opened them up (after chuckling a bit at the Winston Churchill quote on the front: “The gin and tonic has saved more Englishmen’s lives, and minds, than all the doctors in the Empire,”) I was slightly alarmed at how in-depth they were. This looked to be much more work than I’d anticipated.
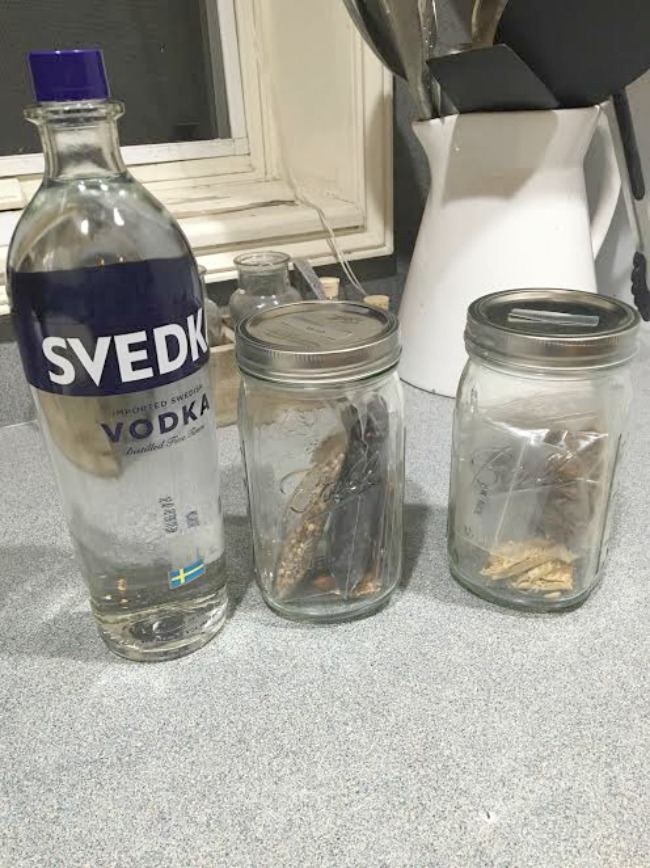
Basically, you use vodka as the base of your gin, and add a bunch of excellent-smelling spices and let the mixture sit for a few days, shaking the jar every so often. The instructions recommend using 100-proof or stronger vodka. I went to start this whole experiment the day after the Presidential election, didn’t immediately find 100-proof or stronger vodka on the liquor store shelf, and kind of didn’t want to ask because I thought the cashier might think I was trying to drink myself into a stupor due to the election results. Therefore, I picked up a cheap bottle of 80-proof Svedka. According to the instructions, it’s okay to choose 80-proof – you should just let the spices steep longer than you would if you used 100-proof. Also, make sure you use totally neutral vodka–none of that flavored stuff–so that you don’t mess up the taste.

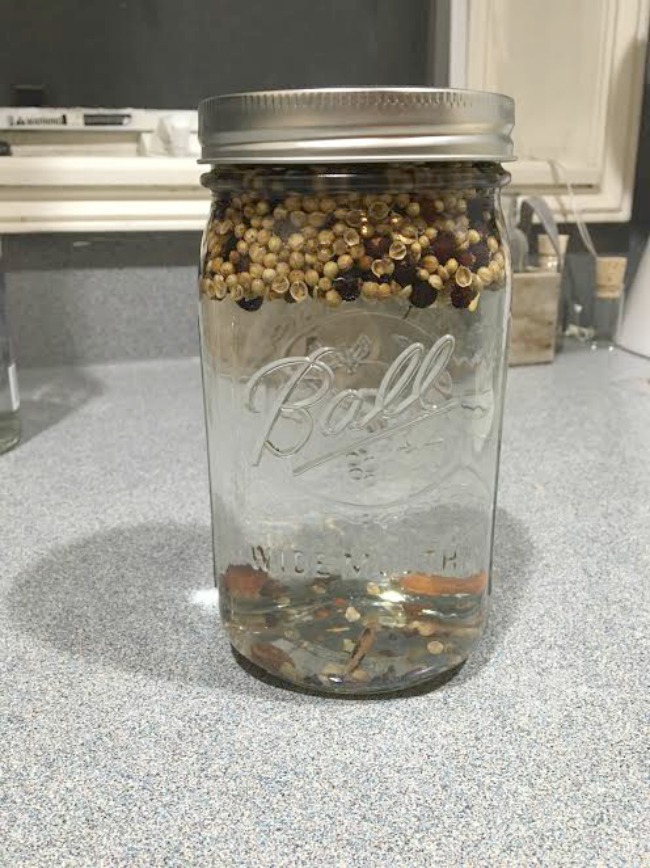
So I combined the vodka with juniper, coriander, apricot kernel, calamus root, cardamom seeds, angelica root, orris root, cassia bark, and grains of paradise (all included, though I wish I was cool enough to have these things in my kitchen always) and sealed up the jar.
I continued to let the gin steep and started the tonic the next day. You’ll need to get 3 limes, 3 lemons, and 1 grapefruit and zest them (using a zester is always fun, so, worth it). You’ll also need to have simple syrup, sugar, and kosher salt on hand. The first step is to combine all your zests with some sugar, cover and refrigerate it overnight.

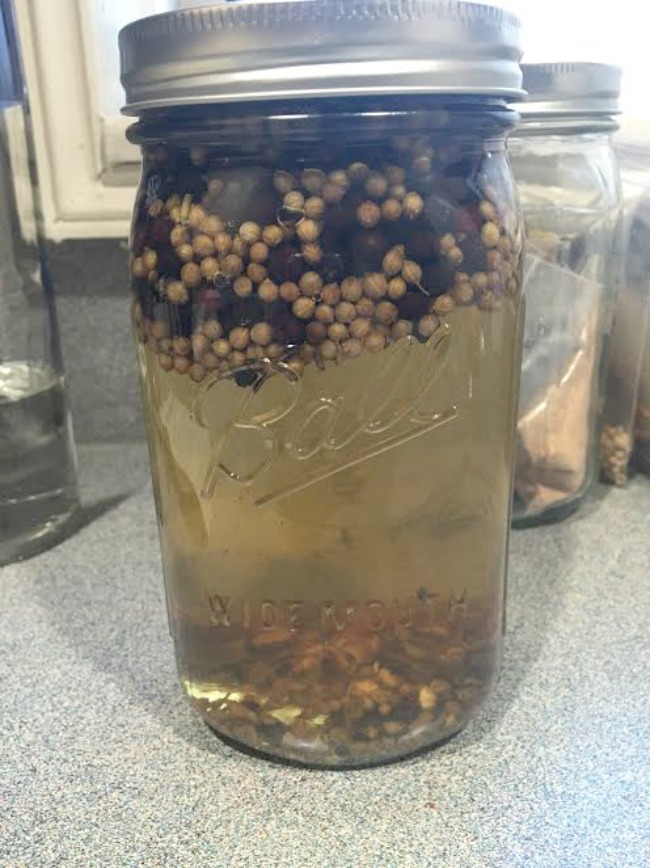
The next day, my gin was still steeping and was really brown (the instructions told me this was normal), and so I continued onto the next step with my tonic.
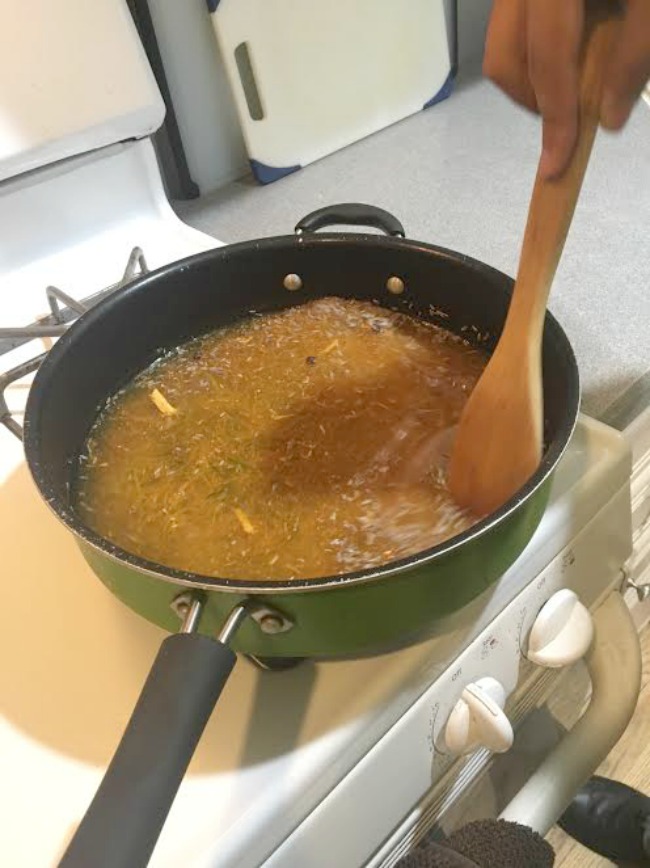
The instructions say: “In a saucepan, bring all ingredients except the simple syrup to a boil and reduce heat immediately; simmer on low for 30 minutes, then remove from heat, add to zest mixture and allow to cool fully, then refrigerate overnight.” Due to continued election fatigue, I took “bring all ingredients except the simple syrup” to mean that I should include my zest mixture in the saucepan, totally neglecting to read the rest of the sentence. So I included the zest mixture (whoops), 3 cups of water, cinchona bark, gentian root, citric acid, kosher salt, and some of the optional spices, like juniper berries, lavender, and star anise, all in the saucepan to simmer.
My boyfriend got into the alchemy of it all and took over for a bit
The instructions also said to include lemongrass, but that wasn’t included and I didn’t happen to have any, so I just omitted it and hoped for the best. Hoping I didn’t totally ruin the whole thing by simmering the zest, I let the mixture cool and refrigerated overnight.
It smelled much better than it looked.
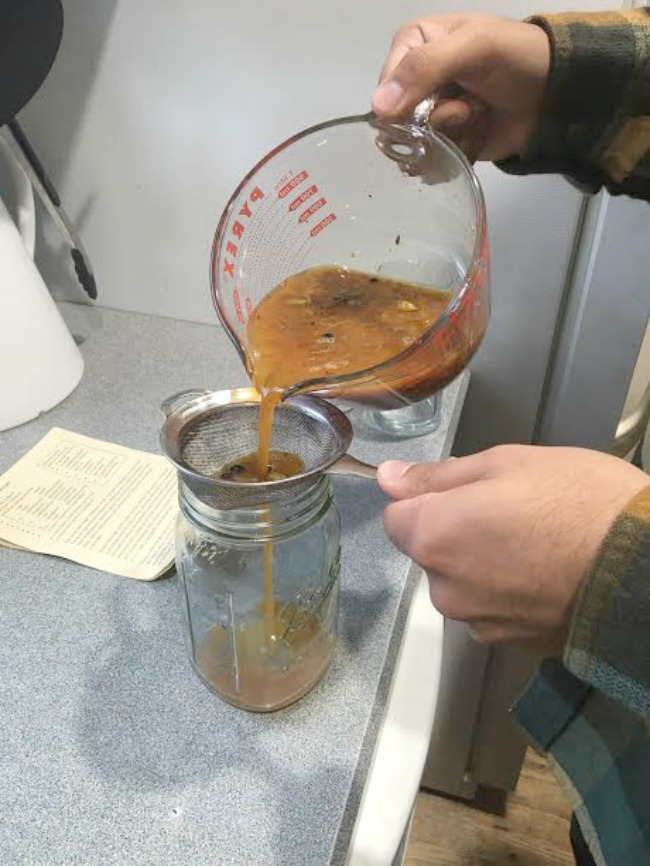
The next day, feeling a little weary by the whole process, we continued to work on the tonic, and the gin continued to sit, brown and seedy, on my kitchen counter. The next step for the tonic is to strain the mixture through a mesh strainer, return the liquid to a clean jar, and refrigerate again, letting any sediment settle on the bottom of the jar.
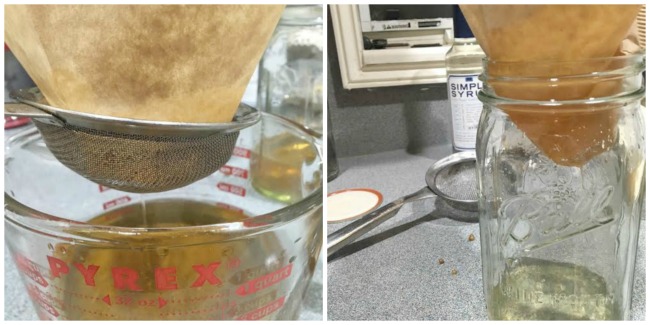
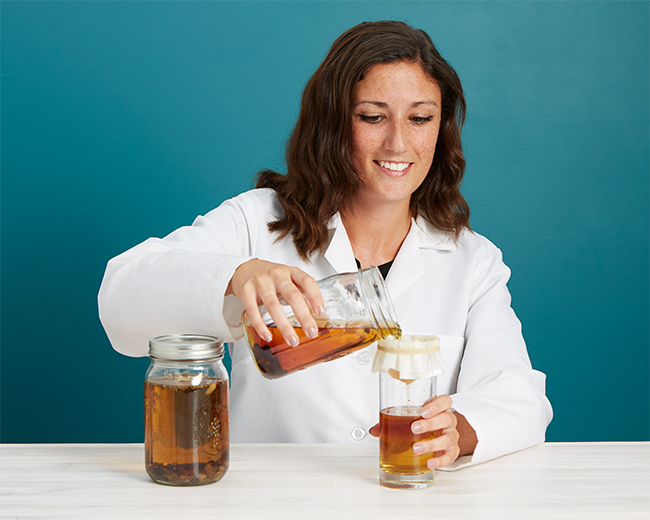
Finally, on Sunday night, I was ready to complete the final steps and mix my drink! After such a long process, I was really ready for one. To get the gin ready, you can use either paper coffee filters or a water filtering pitcher, like a Brita. I went with the coffee filters. I filtered the liquid through a mesh strainer lined with coffee filters a few times, but was concerned to find it still brown and sediment-y. The instructions then assured me that “the gin will still be brown in color but should be quite clear.” It certainly looked clear while I was filtering, but the sum total was still brown, so I figured it was OK. I filtered one more time through just the coffee filters to get rid of any extra sediment. The instructions say you can also dilute it a bit with water, but since I used 80-proof instead of 100, I decided not to dilute.
As for the tonic, the last step is to pour the mixture into a clean jar without disturbing the sediment at the bottom, and then discard the sediment. Then you add simple syrup and it’s good to go!
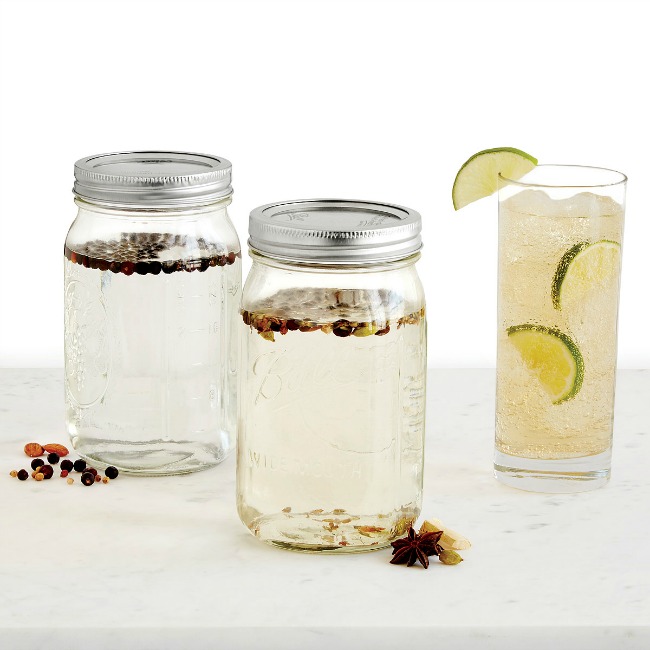
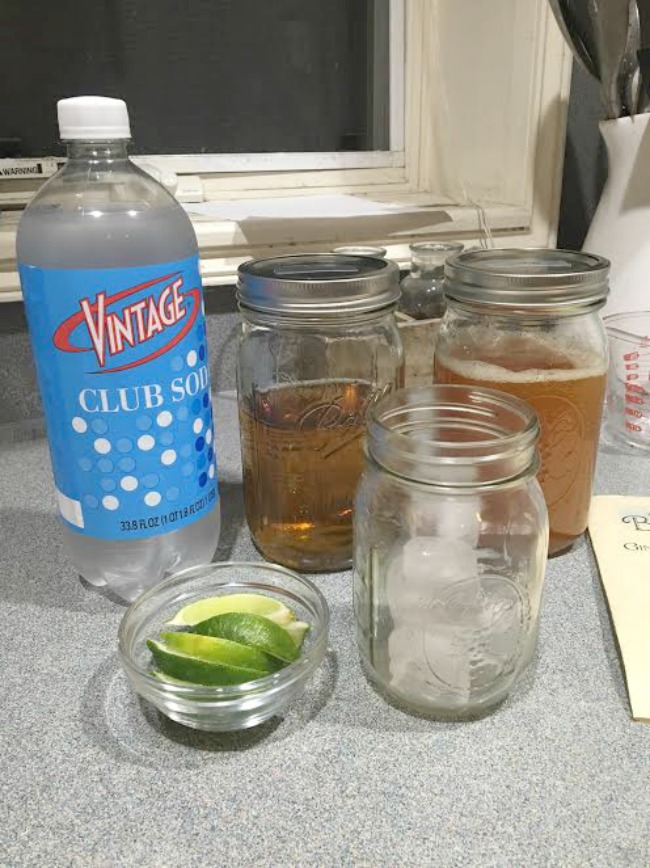
I sliced up some limes and started mixing. You just need the gin, tonic syrup, some club soda, and limes. I followed the directions to a tee and took a sip.
Conclusion

It was delicious! All of those cool, witchy spices added a really interesting (good interesting, not I don’t know what to say interesting), aromatic flavor to it. However, it didn’t really taste like a classic gin and tonic, to me at least. I’d think of it more like a take on a gin and tonic. Many of the flavors of a gin and tonic are there, but with a little something different. Maybe it’s ‘cause I simmered my zest, or maybe it’s because I only used 80-proof vodka. Regardless, I loved it, and I’m reluctant to share it since it’s such a limited batch! The kit does give you enough supplies to make 3 batches, FYI. Though the process was a little long, I feel that made me extra proud of how the drink turned out. Definitely give yourself about a week to have the whole thing ready if you’re going to embark on your own G&T experiment. Also, all the spices will make your kitchen smell amazing, so there’s that, too. Cheers!

No Comments